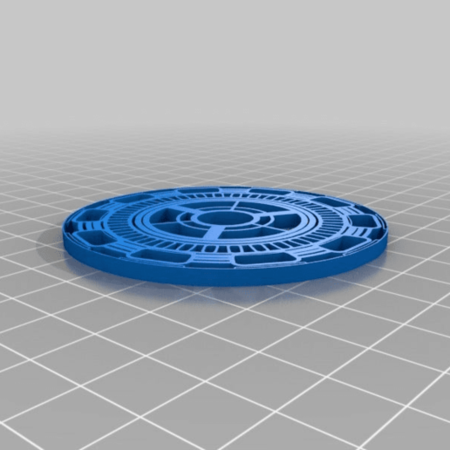
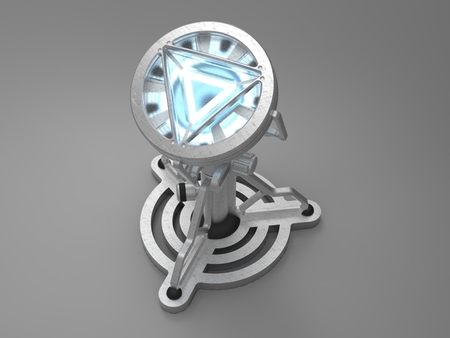
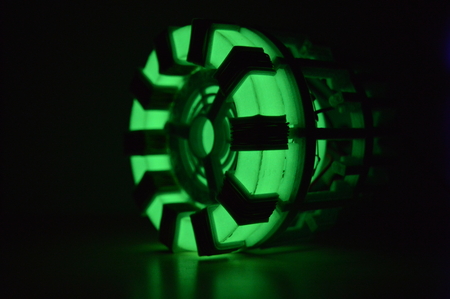
Arc reactor sized for neopixel ring 3D for print
3520 Views 1 Likes 0 Downloads Download the piece here from 3dforprint
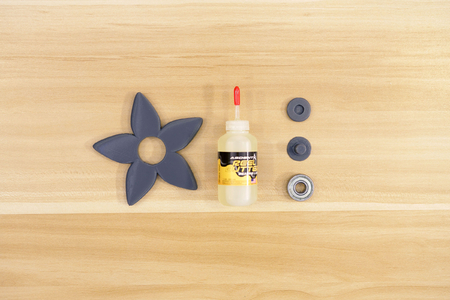
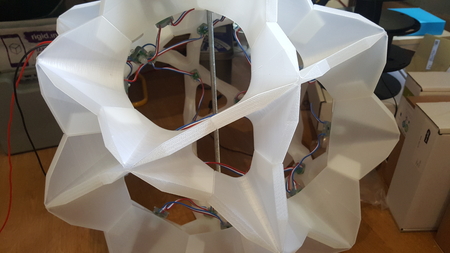
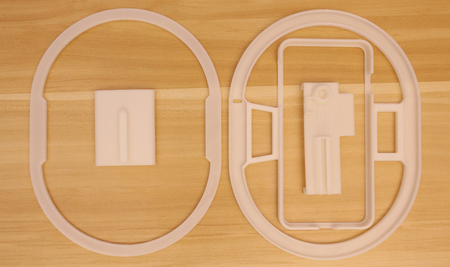
Printing this should be fairly straightforward. As mentioned in the description, the only thing that needs supports is the battery cover. The rest should have no surprises. Use whatever fill you want, whatever material you want (just make sure to use white or clear for the lens), however many shells/perimeters you want, etc. I experimented with printing a solid clear plastic lens and this produced the nicest result, but it was super hard to control warping. If you can conquer warping, then print it solid. You'll like the result. The pictures all had a lens printed with Archimedean Chords fill pattern at, I believe, 20%.
Assembly:
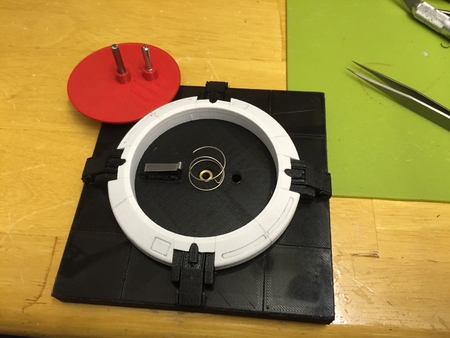
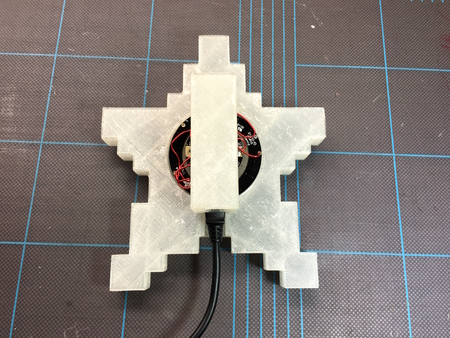
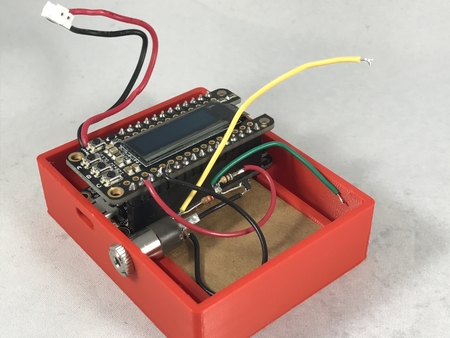
1. You can either follow the soldering instructions in the original Adafruit project or you can use my pictures as a guide. I soldered mine such that the single neopixel is the last in the chain rather than the first, and I included the capacitor and resistor because my neopixel rings will not work well without them (the singlets do, though, provided I'm not using 16 of them). Even if you follow Adafruit's more detailed soldering instructions, you'll still need to add the capacitor and resistor in, which they left out. The plastics are sized to be able to hide that awful capacitor so don't worry. Just make sure to get the polarity right. Also, make sure you've soldered to the Vout pad on the Gemma and NOT the 3Vo pad for power. (well, you can, but the colours will always be off. If you don't mind that, then you can use the 3Vo pad as it's regulated and hopefully safer)
2. Test your neopixel assembly before proceeding.
3. If using a switch, solder it up as in the pictures. If using alternative JSTs, then take the opportunity at this point to test and make sure everything turns on.
4. If using the button, solder it up and connect to the board. Again, you can see how I did mine in the pictures.
For ease of assembly, use solid core wire for the attachment of the neopixels and stranded wire for everything else.
Or, you know...do what you want. :p
Not gonna lie...the electronics will take up probably a day or more, depending on your skill level. The plastics will only take a few minutes to print. The soldering is a bit tricky. None of it is surface mount (unless you make a mistake, which I've done), but you are soldering to an already-populated board and working in a confined space. You may be faced with a lot of wire splicing. NOTE: If using heat shrink to fix mistakes, do not heat the plastic! It might warp.
The battery can be expected to last about 1 - 1.5 hours, depending on how bright you make the lights. You'll know when the battery is dying as the colours will start to get warmer and eventually they'll flash strangely. I do not plan to make a version that fits a bigger battery unless I also make a version that fits a bigger neopixel ring. If you really want a big battery, then I suggest running a wire to your pocket and stuffing a really big battery in there so the weight isn't on your neck.
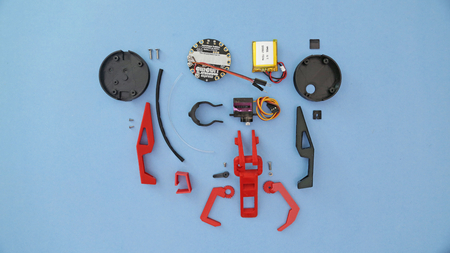
- One Gemma.
- One single Neopixel mounted on a round board
- One Neopixel rin...g (16 neopixels).
- One 1000 uF capacitor or larger (larger is actually better, due to tolerances. Smaller will cause strange flickering as colours change. If you don't ever change the colours, then you can probably omit the capacitor altogether.)
- One 300-500 ohm resistor (anywhere in that range).
- One switch. I'm uploading multiple STLs for different switches, and a plain one you can cut/drill yourself.
- A push button for the flashlight. Sorry, no part number. It came in a kit and is pretty common. I’ve seen them for sale in automotive sections in brick and mortar stores.
- 150 mAh lipo battery with charger (Adafruit). Project is sized for this battery.
- optionally, some better JST connectors. I used Digikey part numbers 455-1648-ND, 455-1133-1-ND, and 455-1183-ND
- yarn for the necklace part, if desired
Designer
Graymalk3d model description
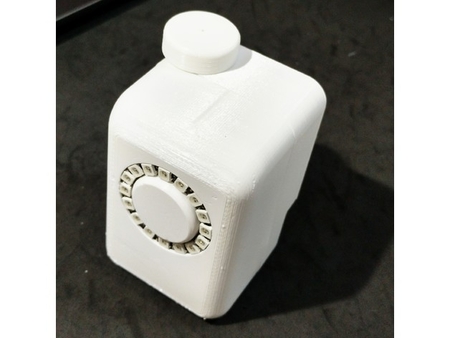
Costume prop, or just something to play with. Has a flash light option. Inspired by https://learn.adafruit.com/superhero-power-plant/ but is totally 3...D printable.Printing this should be fairly straightforward. As mentioned in the description, the only thing that needs supports is the battery cover. The rest should have no surprises. Use whatever fill you want, whatever material you want (just make sure to use white or clear for the lens), however many shells/perimeters you want, etc. I experimented with printing a solid clear plastic lens and this produced the nicest result, but it was super hard to control warping. If you can conquer warping, then print it solid. You'll like the result. The pictures all had a lens printed with Archimedean Chords fill pattern at, I believe, 20%.
Assembly:
1. You can either follow the soldering instructions in the original Adafruit project or you can use my pictures as a guide. I soldered mine such that the single neopixel is the last in the chain rather than the first, and I included the capacitor and resistor because my neopixel rings will not work well without them (the singlets do, though, provided I'm not using 16 of them). Even if you follow Adafruit's more detailed soldering instructions, you'll still need to add the capacitor and resistor in, which they left out. The plastics are sized to be able to hide that awful capacitor so don't worry. Just make sure to get the polarity right. Also, make sure you've soldered to the Vout pad on the Gemma and NOT the 3Vo pad for power. (well, you can, but the colours will always be off. If you don't mind that, then you can use the 3Vo pad as it's regulated and hopefully safer)
2. Test your neopixel assembly before proceeding.
3. If using a switch, solder it up as in the pictures. If using alternative JSTs, then take the opportunity at this point to test and make sure everything turns on.
4. If using the button, solder it up and connect to the board. Again, you can see how I did mine in the pictures.
For ease of assembly, use solid core wire for the attachment of the neopixels and stranded wire for everything else.
Or, you know...do what you want. :p
Not gonna lie...the electronics will take up probably a day or more, depending on your skill level. The plastics will only take a few minutes to print. The soldering is a bit tricky. None of it is surface mount (unless you make a mistake, which I've done), but you are soldering to an already-populated board and working in a confined space. You may be faced with a lot of wire splicing. NOTE: If using heat shrink to fix mistakes, do not heat the plastic! It might warp.
The battery can be expected to last about 1 - 1.5 hours, depending on how bright you make the lights. You'll know when the battery is dying as the colours will start to get warmer and eventually they'll flash strangely. I do not plan to make a version that fits a bigger battery unless I also make a version that fits a bigger neopixel ring. If you really want a big battery, then I suggest running a wire to your pocket and stuffing a really big battery in there so the weight isn't on your neck.
3d model print parameters
- Some wire (both solid core and stranded) and heat shrink to match.- One Gemma.
- One single Neopixel mounted on a round board
- One Neopixel rin...g (16 neopixels).
- One 1000 uF capacitor or larger (larger is actually better, due to tolerances. Smaller will cause strange flickering as colours change. If you don't ever change the colours, then you can probably omit the capacitor altogether.)
- One 300-500 ohm resistor (anywhere in that range).
- One switch. I'm uploading multiple STLs for different switches, and a plain one you can cut/drill yourself.
- A push button for the flashlight. Sorry, no part number. It came in a kit and is pretty common. I’ve seen them for sale in automotive sections in brick and mortar stores.
- 150 mAh lipo battery with charger (Adafruit). Project is sized for this battery.
- optionally, some better JST connectors. I used Digikey part numbers 455-1648-ND, 455-1133-1-ND, and 455-1183-ND
- yarn for the necklace part, if desired