Nía - wireless winter ornament 3D for print


1201 Views 0 Likes 0 Downloads Download
Designed for the Make – “Design and 3D Print an Ornament” Contest (http://bit.ly/1YgqubI)
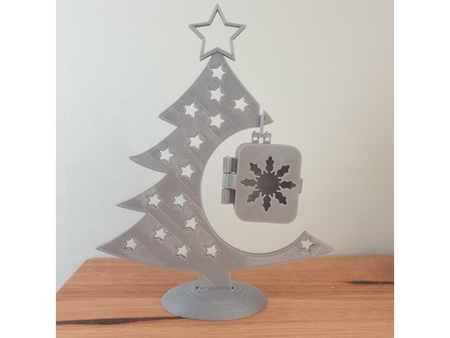
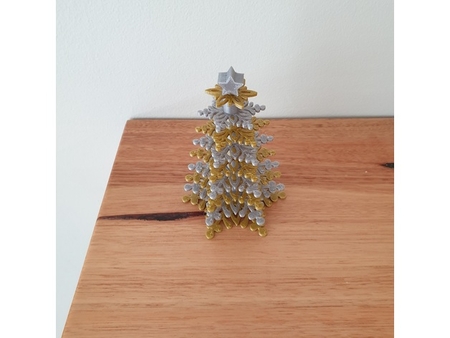
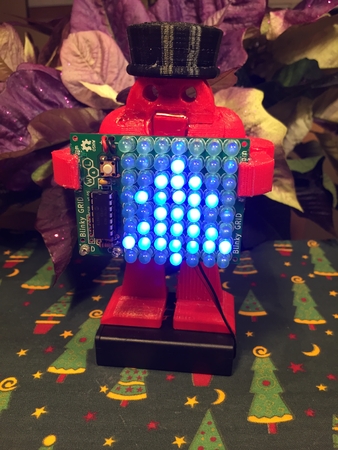
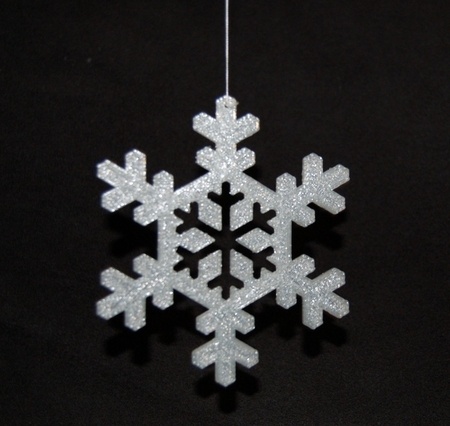
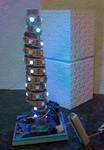
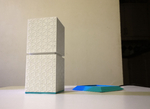
Nía is a beautiful winter themed ornament fitting for every household. Pairs charmingly with furniture hiding wireless QI charging like IKEA's wireless furniture range (http://bit.ly/1mkuvjO). No charger? Print the complementary base unit to integrate one of the many available kits. Nía is sure to become a talking piece over the holiday season and is perfect for setting the winter mood. Nía combines an Arduino compatible Digispark with digital LED’s and wireless power to be the ornament you want to keep with you around the home. What’s that snowflake pattern you see? That pattern happens to be a subtle reminder that this ornament was built not mass produced, and features Make’s very own Makey throughout.
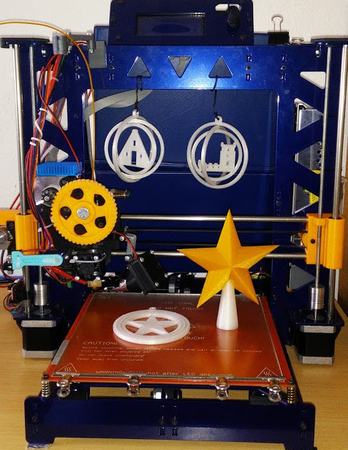
Printing Instructions
Base - 0.2mm Layer Height
Shaft - 0.3mm Layer Height
Shade – 0.1/0.2mm Layer Height, Supports required on overhang half way up.
Charger – 0.2mm Layer Height, Support Touching Bed
Assembly Instructions:
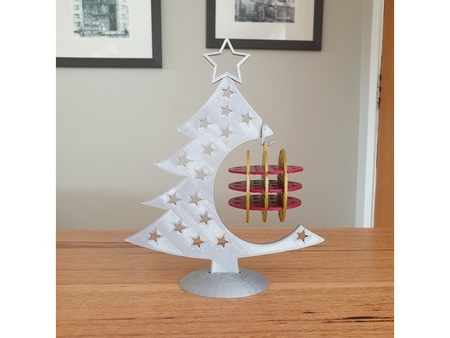
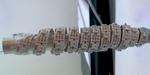
1. LED Shaft Instructions
Wrap LED strip around the shaft (Aluminium or Printed). Leave 6mm on each end for fitting to base and shaft. Use tape or a glue gun to secure in place.
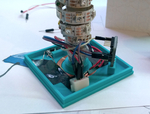
2. Base Instructions
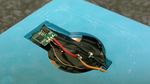
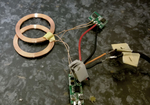
Fit induction coil in place along with module and secure with tape if necessary.
Insert the shaft into the base.
Connect 5V and Ground wires together using solder or a solderless breadboard segment. (Can be cut to size) Connect the data wire to Pin 4 of the Digispark and connect power to the board using jumpers. Secure the Digispark into the base using the slot provided.
Any small form factor Arduino can be used, In this case the DigiSpark works great because of its small size.
TIP: Wrap any excess wiring around the shaft before connecting to the terminals of the Digispark to keep things tidy.
OPTIONAL: Connecting both a Lithium battery and charging module into the circuit allows Nía to be used away from the base for periods of time.
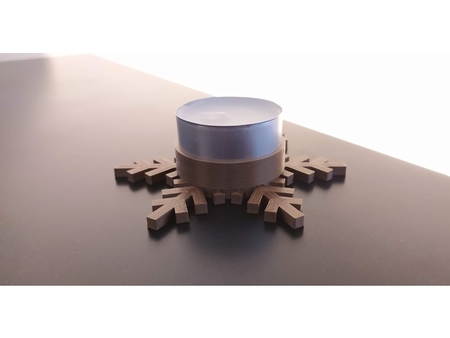
3. Charger Instructions
Fit induction coil in place along with module and secure with tape if necessary. Cut the end off of a 5V power supply and thread the wires though the hole in the side. Strip back the wires and solder them to the corresponding positive and negative wires on the wireless charging board. If you’re not sure which wires are which use a multimeter to check the voltage.
4. Coding Instructions
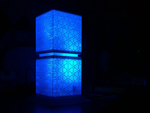
Let me start by saying coding is not a talent of mine. My code is messy and in many cases excessive. That being said it’s functional and with some trial and error I was able to get the lighting effect I was going for. The LED’s are set to a winter blue and flicker between varying intensities of brightness creating a modern candle like effect.
For those trying to understand or change my code, I made use of the FastLED library, there are 5 LED’s which are copied to the next in the strip. These 5 LEDs change their brightness at the same rate but out of sync with each other. This out of sync brightness change creates the effect.
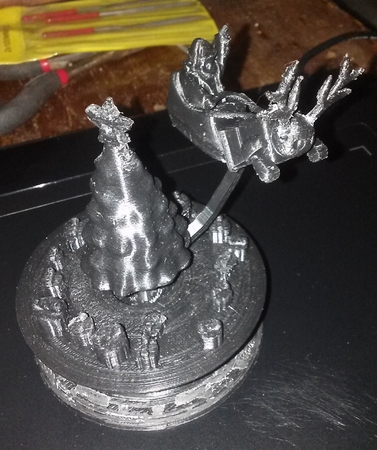
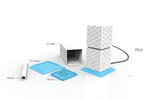
1. Charger Unit
2. Base
3. Shade
4. Rod (Optionally use aluminium)
Electronics
1. DigiSpark
2. 5V LED's - WS2812B Strip (1 Mete...r)
3. QI Wireless Charging Kit (http://bit.ly/1O1pDWM)
Add Battery Operation
1. Lithium Battery > 400mAh
2. Lithium Battery Charging Module
Designer
Geoffrey Duffy3d model description
Nía is a beautiful winter themed ornament fit for every household. Wireless power and Arduino controlled digital LED’s, just a few of the things th...at make Nía special.Designed for the Make – “Design and 3D Print an Ornament” Contest (http://bit.ly/1YgqubI)
Nía is a beautiful winter themed ornament fitting for every household. Pairs charmingly with furniture hiding wireless QI charging like IKEA's wireless furniture range (http://bit.ly/1mkuvjO). No charger? Print the complementary base unit to integrate one of the many available kits. Nía is sure to become a talking piece over the holiday season and is perfect for setting the winter mood. Nía combines an Arduino compatible Digispark with digital LED’s and wireless power to be the ornament you want to keep with you around the home. What’s that snowflake pattern you see? That pattern happens to be a subtle reminder that this ornament was built not mass produced, and features Make’s very own Makey throughout.
Printing Instructions
Base - 0.2mm Layer Height
Shaft - 0.3mm Layer Height
Shade – 0.1/0.2mm Layer Height, Supports required on overhang half way up.
Charger – 0.2mm Layer Height, Support Touching Bed
Assembly Instructions:
1. LED Shaft Instructions
Wrap LED strip around the shaft (Aluminium or Printed). Leave 6mm on each end for fitting to base and shaft. Use tape or a glue gun to secure in place.
2. Base Instructions
Fit induction coil in place along with module and secure with tape if necessary.
Insert the shaft into the base.
Connect 5V and Ground wires together using solder or a solderless breadboard segment. (Can be cut to size) Connect the data wire to Pin 4 of the Digispark and connect power to the board using jumpers. Secure the Digispark into the base using the slot provided.
Any small form factor Arduino can be used, In this case the DigiSpark works great because of its small size.
TIP: Wrap any excess wiring around the shaft before connecting to the terminals of the Digispark to keep things tidy.
OPTIONAL: Connecting both a Lithium battery and charging module into the circuit allows Nía to be used away from the base for periods of time.
3. Charger Instructions
Fit induction coil in place along with module and secure with tape if necessary. Cut the end off of a 5V power supply and thread the wires though the hole in the side. Strip back the wires and solder them to the corresponding positive and negative wires on the wireless charging board. If you’re not sure which wires are which use a multimeter to check the voltage.
4. Coding Instructions
Let me start by saying coding is not a talent of mine. My code is messy and in many cases excessive. That being said it’s functional and with some trial and error I was able to get the lighting effect I was going for. The LED’s are set to a winter blue and flicker between varying intensities of brightness creating a modern candle like effect.
For those trying to understand or change my code, I made use of the FastLED library, there are 5 LED’s which are copied to the next in the strip. These 5 LEDs change their brightness at the same rate but out of sync with each other. This out of sync brightness change creates the effect.
3d model print parameters
Printed Parts1. Charger Unit
2. Base
3. Shade
4. Rod (Optionally use aluminium)
Electronics
1. DigiSpark
2. 5V LED's - WS2812B Strip (1 Mete...r)
3. QI Wireless Charging Kit (http://bit.ly/1O1pDWM)
Add Battery Operation
1. Lithium Battery > 400mAh
2. Lithium Battery Charging Module