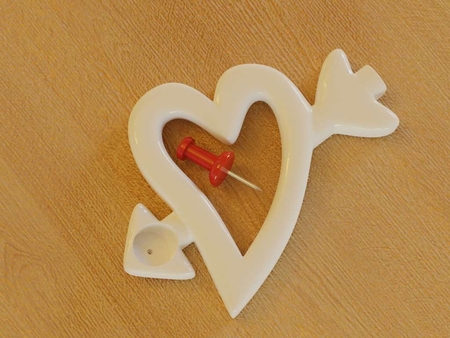
Arco y flecha, disparar una flecha / el día de san valentín corazón de flecha hasta 5 metros! en 3D para imprimir
6384 Visualizaciones 2 Me gusta 0 Descargas realizadas Descarga aqui la pieza desde 3dforprint
Sólo tiene que utilizar un pequeño regular hogar de banda de caucho (probado con una banda de goma aprox. 37mm ronda x 2.0 mm x 1.0 mm de espesor) y instalar como se muestra en las imágenes.
ADVERTENCIA: Dependiendo de la banda de goma instalado este pequeño arco se puede disparar la flecha de 5 metros o más. Que se diviertan con ella, pero tenga cuidado al disparar alrededor de la gente. No apunte hacia la cara de nadie.
Por favor, consulte las instrucciones para el correcto montaje, etc. .
Si te gusta este tómese el tiempo para revisar mis otros diseños!
Utilizar un hogar estándar de goma de la banda de aprox. 37mm de diámetro x 2.0 mm de ancho x 1.0 mm de espesor.
Instale la banda de goma por parte de la celebración de la banda de goma para hacer un lazo. Empujando el bucle parte de la banda de goma a través del agujero en un extremo de la proa. Gancho el lazo sobre la retención de lug en la proa.
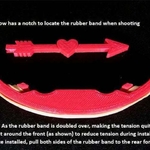
Ejecutar la banda de goma alrededor de la parte delantera de la proa (hacerlo de esta forma, alrededor de la que tiene menos tensión en la banda de goma, así es más fácil de instalar). Empuje ambos lados del extremo suelto de la banda de goma (es decir, hacer un bucle) a través del segundo agujero en la proa en el otro extremo y gancho en la oreja.
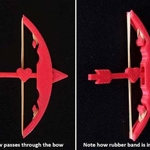
Tire de ambas hebras de la banda de goma en cada extremo de la pinza en la parte de atrás de la proa. Alimentación de la flecha a través del centro de la ranura en el arco y la posición de ambas hebras de la banda de goma en las flechas de la muesca.
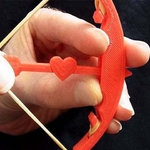
La posición de los dedos cómodamente con el interior dedo recovecos y alrededor de la parte delantera de la proa, por lo que el arco se mantiene de forma segura, pero también clara de las flechas camino fuera del cuerpo de la proa.
Tirar la flecha hacia atrás con la banda de goma en la ranura hasta que sólo la punta de la banda de goma que sobresalga fuera del centro de la proa.
Apuntar y soltar la flecha...
Nota: no Hay un montón de espacio entre la flecha y la ranura a través de la proa. Esto es intencional y es para mantener la plaza de la sección de flecha recta como su longitud pasa a través del arco. Sin embargo, compruebe que no hay suficiente espacio para un parto sin complicaciones para garantizar la fiabilidad de rodaje y que la flecha viaja una distancia razonable. Si la flecha de su ranura y se imprime con suficiente espacio de utilizar un archivo pequeño en la ranura en el arco para aumentar la eliminación de una pequeña cantidad. También puede utilizar una fracción de un spray de silicona para reducir la fricción... piense en esto como una mejora de rendimiento.
Diseñador
MUZZ64Descripción del modelo 3d
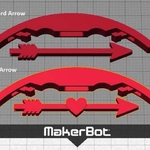
Esta es una banda de goma powered arco y la flecha. Hay dos opciones, una que tiene un corazón en la flecha para el Día de san valentín de la diver...sión y el otro solo un plano de flecha. Un archivo adicional para repuesto flechas (con y sin el corazón) también están disponibles.Sólo tiene que utilizar un pequeño regular hogar de banda de caucho (probado con una banda de goma aprox. 37mm ronda x 2.0 mm x 1.0 mm de espesor) y instalar como se muestra en las imágenes.
ADVERTENCIA: Dependiendo de la banda de goma instalado este pequeño arco se puede disparar la flecha de 5 metros o más. Que se diviertan con ella, pero tenga cuidado al disparar alrededor de la gente. No apunte hacia la cara de nadie.
Por favor, consulte las instrucciones para el correcto montaje, etc. .
Si te gusta este tómese el tiempo para revisar mis otros diseños!
Parametros de impresión 3d
En un Replicador 2 uso de la Balsa, 0,20 mm (estándar) resolución de 4 de las conchas y el 50% de relleno para asegurar una resistencia adecuada cua...ndo la banda de goma se tensa. Una vez impreso y la balsa se quita usted debería disparar en cuestión de un par de minutos.Utilizar un hogar estándar de goma de la banda de aprox. 37mm de diámetro x 2.0 mm de ancho x 1.0 mm de espesor.
Instale la banda de goma por parte de la celebración de la banda de goma para hacer un lazo. Empujando el bucle parte de la banda de goma a través del agujero en un extremo de la proa. Gancho el lazo sobre la retención de lug en la proa.
Ejecutar la banda de goma alrededor de la parte delantera de la proa (hacerlo de esta forma, alrededor de la que tiene menos tensión en la banda de goma, así es más fácil de instalar). Empuje ambos lados del extremo suelto de la banda de goma (es decir, hacer un bucle) a través del segundo agujero en la proa en el otro extremo y gancho en la oreja.
Tire de ambas hebras de la banda de goma en cada extremo de la pinza en la parte de atrás de la proa. Alimentación de la flecha a través del centro de la ranura en el arco y la posición de ambas hebras de la banda de goma en las flechas de la muesca.
La posición de los dedos cómodamente con el interior dedo recovecos y alrededor de la parte delantera de la proa, por lo que el arco se mantiene de forma segura, pero también clara de las flechas camino fuera del cuerpo de la proa.
Tirar la flecha hacia atrás con la banda de goma en la ranura hasta que sólo la punta de la banda de goma que sobresalga fuera del centro de la proa.
Apuntar y soltar la flecha...
Nota: no Hay un montón de espacio entre la flecha y la ranura a través de la proa. Esto es intencional y es para mantener la plaza de la sección de flecha recta como su longitud pasa a través del arco. Sin embargo, compruebe que no hay suficiente espacio para un parto sin complicaciones para garantizar la fiabilidad de rodaje y que la flecha viaja una distancia razonable. Si la flecha de su ranura y se imprime con suficiente espacio de utilizar un archivo pequeño en la ranura en el arco para aumentar la eliminación de una pequeña cantidad. También puede utilizar una fracción de un spray de silicona para reducir la fricción... piense en esto como una mejora de rendimiento.


