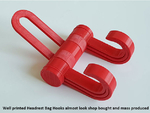
Car headrest bag hooks 3D for print


4695 Views 0 Likes 0 Downloads Download
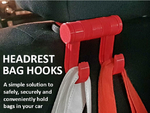
Headrest Bag Hooks are a great solution for your own use but will also be appreciated by many people as a practical gift for everyday use. And, they look great printed in any color or even multiple colors.
Before starting you will need to measure your cars headrest seat posts to decide which Bracket and Spacer to download and print. Most cars will use the (up to) 15mm seat post version but an 18mm alternative set is provided.
Assembly and fitting is easy, as follows:
(1) Raise the headrest in your car so the U shaped Bracket can be pushed onto one of your headrest posts
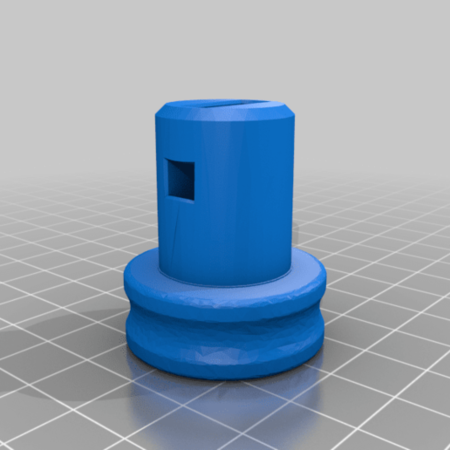
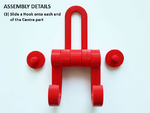
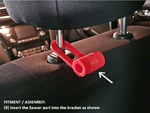
(2) Insert the Spacer to close off the open end of the Bracket
(3) Slide the Centre section through the Bracket and Spacer until it is centred (protrudes out of the Bracket equally on each side). You will need to align the flat surface of the Centre section with the flat surfaces inside the holes in the Bracket.
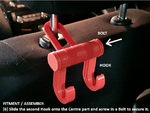
(4) Slide two Hooks onto the assemble (one on each side)
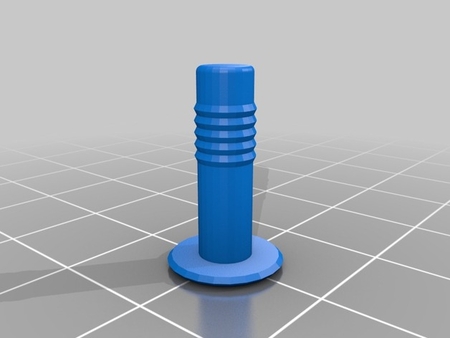
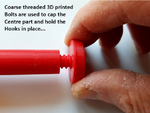
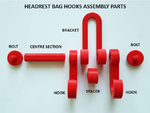
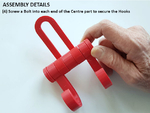
(5) Screw one Bolt into each end of the Centre section and tighten.
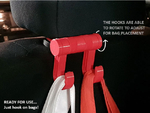
(6) Make sure the hooks can still swing freely and individually on the Centre section.
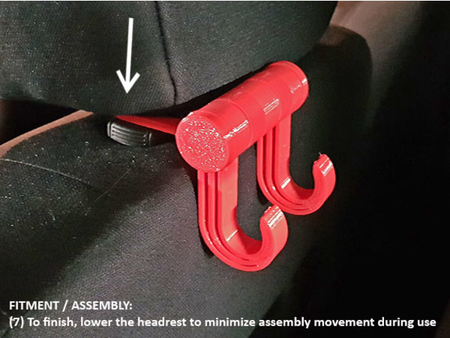
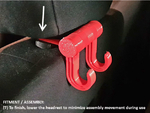
(7) Lowering the headrest is suggested as this will reduce how much the assembly can move around in use.
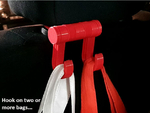
(8) Place one or two bags onto the Hooks as required...
For a great result that assembles easily, functions well and is strong / durable files need to be precisely sliced and the parts printed on an accurate well set up machine. This should be easy to print, fit / assemble and ready for use within minutes of the last part being completed.
Please refer to the images and instructions for additional information including fitting and assembly. And, please also post images of your Headrest Bag Hooks in use for other members to see.
Note: If you like this check out the rest of my practical and fun designs.
Tips: Tips are not expected but are appreciated as they help offset my filament costs as much as anything else. However, as I live outside the USA tips cannot be sent to me via PayPal.Me as that service is not supported in my region and this is beyond Thingverse's control. If you feel like sending a tip please use regular PayPal and send it to muzz64nz@gmail.com and, to those who do, thanks in advance!
MakerBot
Printer:
MakerBot Replicator+
Rafts:
Yes
Supports:
No
Resolution:
Standard / 0.20mm
Infill:
3 shells and ...25% or more recommended for strength
Filament_brand:
Good quality
Filament_color:
Will look great and work well in any color
Filament_material:
Quality PLA
Notes:
Easy prints but use more shells and infill than usual to ensure the assembly is strong and durable in use. Before starting you will need to measure your cars headrest seat posts to decide which Bracket and Spacer to download and print. Most cars will use the (up to) 15mm seat post version but an 18mm alternative set is provided.
Post-Printing
Assembly required...
Assembly and fitting is easy, as follows: (1) Raise the headrest in your car so the U shaped Bracket can be pushed onto one of your headrest posts (2) Insert the Spacer to close off the open end of the Bracket (3) Slide the Centre section through the Bracket and Spacer until it is centred (protrudes out of the Bracket equally on each side). You will need to align the flat surface of the Centre section with the flat surfaces inside the holes in the Bracket. (4) Slide two Hooks onto the assemble (one on each side) (5) Screw one Bolt into each end of the Centre section and tighten. (6) Make sure the hooks can still swing freely and individually on the Centre section. (7) Lowering the headrest is suggested as this will reduce how much the assembly can move around in use. (8) Place one or two bags onto the Hooks as required...
Designer
muzz643d model description
The Car Headrest Bag Hooks design is similar to some commercially available... but unlike other designs this is made in a way that this cannot be acci...dentally detached / unhooked from the heat rest posts due to the way it assembles.Headrest Bag Hooks are a great solution for your own use but will also be appreciated by many people as a practical gift for everyday use. And, they look great printed in any color or even multiple colors.
Before starting you will need to measure your cars headrest seat posts to decide which Bracket and Spacer to download and print. Most cars will use the (up to) 15mm seat post version but an 18mm alternative set is provided.
Assembly and fitting is easy, as follows:
(1) Raise the headrest in your car so the U shaped Bracket can be pushed onto one of your headrest posts
(2) Insert the Spacer to close off the open end of the Bracket
(3) Slide the Centre section through the Bracket and Spacer until it is centred (protrudes out of the Bracket equally on each side). You will need to align the flat surface of the Centre section with the flat surfaces inside the holes in the Bracket.
(4) Slide two Hooks onto the assemble (one on each side)
(5) Screw one Bolt into each end of the Centre section and tighten.
(6) Make sure the hooks can still swing freely and individually on the Centre section.
(7) Lowering the headrest is suggested as this will reduce how much the assembly can move around in use.
(8) Place one or two bags onto the Hooks as required...
For a great result that assembles easily, functions well and is strong / durable files need to be precisely sliced and the parts printed on an accurate well set up machine. This should be easy to print, fit / assemble and ready for use within minutes of the last part being completed.
Please refer to the images and instructions for additional information including fitting and assembly. And, please also post images of your Headrest Bag Hooks in use for other members to see.
Note: If you like this check out the rest of my practical and fun designs.
Tips: Tips are not expected but are appreciated as they help offset my filament costs as much as anything else. However, as I live outside the USA tips cannot be sent to me via PayPal.Me as that service is not supported in my region and this is beyond Thingverse's control. If you feel like sending a tip please use regular PayPal and send it to muzz64nz@gmail.com and, to those who do, thanks in advance!
3d model print parameters
Printer brand:MakerBot
Printer:
MakerBot Replicator+
Rafts:
Yes
Supports:
No
Resolution:
Standard / 0.20mm
Infill:
3 shells and ...25% or more recommended for strength
Filament_brand:
Good quality
Filament_color:
Will look great and work well in any color
Filament_material:
Quality PLA
Notes:
Easy prints but use more shells and infill than usual to ensure the assembly is strong and durable in use. Before starting you will need to measure your cars headrest seat posts to decide which Bracket and Spacer to download and print. Most cars will use the (up to) 15mm seat post version but an 18mm alternative set is provided.
Post-Printing
Assembly required...
Assembly and fitting is easy, as follows: (1) Raise the headrest in your car so the U shaped Bracket can be pushed onto one of your headrest posts (2) Insert the Spacer to close off the open end of the Bracket (3) Slide the Centre section through the Bracket and Spacer until it is centred (protrudes out of the Bracket equally on each side). You will need to align the flat surface of the Centre section with the flat surfaces inside the holes in the Bracket. (4) Slide two Hooks onto the assemble (one on each side) (5) Screw one Bolt into each end of the Centre section and tighten. (6) Make sure the hooks can still swing freely and individually on the Centre section. (7) Lowering the headrest is suggested as this will reduce how much the assembly can move around in use. (8) Place one or two bags onto the Hooks as required...