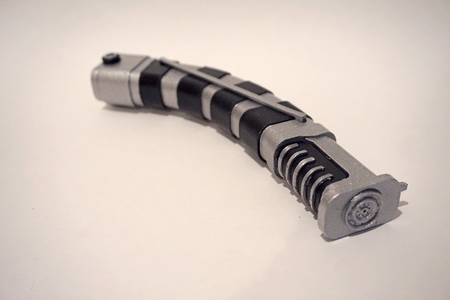
Kenobi lightsaber 3D for print
5238 Views 4 Likes 6 Downloads Download the piece here from 3dforprint
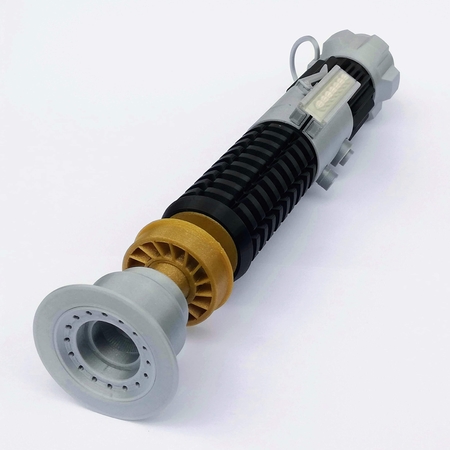
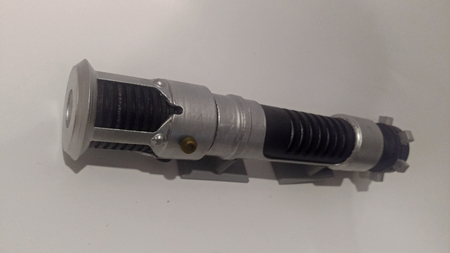
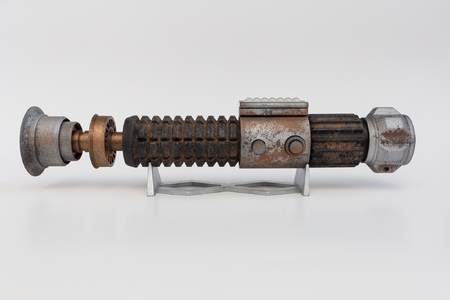
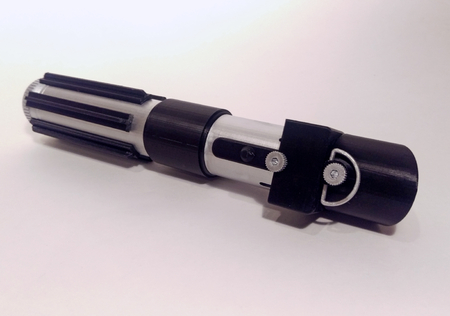
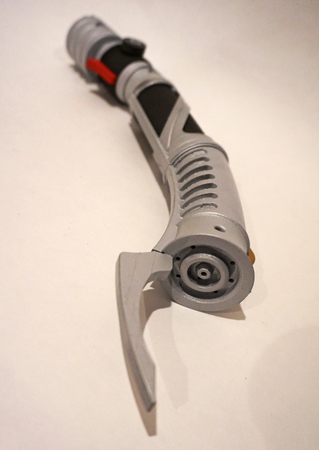
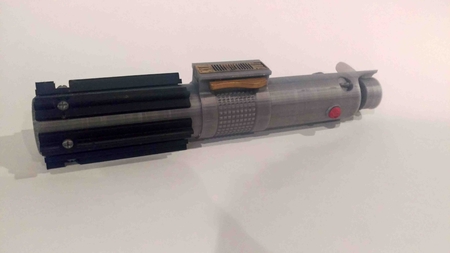
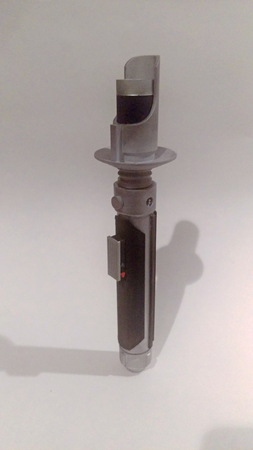
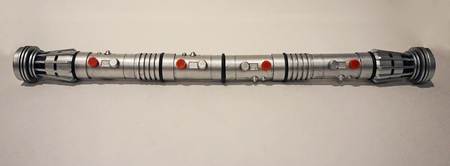
This year I've decided to do another iconic weapon from the Original Trilogy and so I've remixed the lightsaber ...model of Jacky Wan aka Valcrow of Redicubrics (one of the first things, I've ever 3D printed).
The original model is pretty amazing with technical solutions that should be taught, however it has a bit of a weak spot at the clamp-pin connection that tends to break while playing with the hilt or wearing it for cosplay unless you glue it together.
First I've decided to only implement the connections, I've used for my graflex lightsaber, but then I got carried away in the process and remodeled other parts of the hilt too.
As Jacky's original model this one is also optimized for support free fdm printing and easy assembly that requires no glue. I've printed most parts at 0,15 mm layer height with Fillamentum PLA on my Ultimaker 2+.
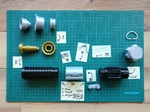
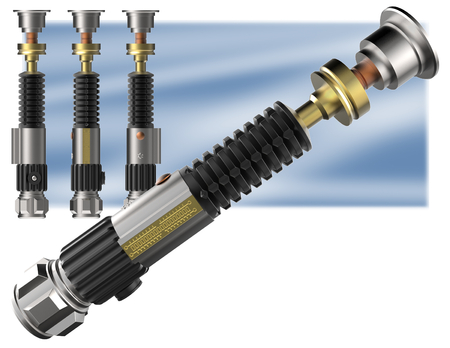
For assembly see the improvised instructions in the photos! :) Sorry for the crappy crop! Here is the full version: https://www.instagram.com/p/BxjmPRfHvT-/
Assembly instructions:
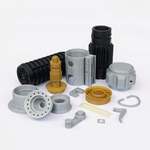
-> I. Assemble the three emitter pieces in the orientation and order seen on the photo. They should friction fit nicely. This is also a good test for the other parts too. If they fit together easily, you won't have problems assembling the rest of the hilt, but if they don't try adjusting your horizontal offset/compensation values in your slicer.
-> II. Put the pinwheel on the threaded axle and tighten it. The wider part of the pinwheel should face the wider part (bottom) of the axle.
Attach the axle on one end to the riflegrenade and on the other end to the emitter assembly. Both connections use the same twist-lock mechanism.
-> III. Place the knobs into the clamp. The bottom side of the knobs should be flush with the inner side of the clamp.
-> IV. Insert the matching ends of the riflegrenade and the heatsink (the end WITHOUT snap fits) into the clamp and turn them clockwise. The smaller one of the knobs should be closer to the riflegrenade.
IMPORTANT: Notice the angular window on the clamp! Both the riflegrenade and the heatsink has a specific groove on them, that matches the corresponding end of the window. The groove on the heatsink is rectangular, while the one on the riflegrenade is chamfered. Make sure, that AFTER you have turned the parts the grooves are aligned with the window!
-> V. Place the washer on the side pin of the lever and insert it into the hole on the side of the clamp. You should see the pin through the window. The lever should point towards the bottom of the hilt.
-> VI. Push the latch into the window on the clamp until its flush with the surrounding surface.
-> VII. Slide the lightbulbs into the rail on the clamp.
-> VIII. Slide the pummel onto the heatsink and turn it clockwise until you hear a satisfying click. :)
For the D-ring you have three options:
-1. Print the included model. (Boring/easy one)
-2. Find a D-ring of similar shape in a hardware store and if necessary cut a 5 mm gap in it. Place it into the pommel mid-print or bend it in place later. (Challenging one)
-3. Print the attached D-ring jig model. Cut a 80 mm long piece of 2,85 filament and dip it in hot water. When it softened place it in the jig so it would take the form of a D-ring. (Dangerous one)
Happy printing and may the sticking force be with your buildplates!
Original model by Jacky Wan:
https://www.youmagine.com/designs/star-wars-lightsaber-complex-version
Post processing tips also by him:
https://ultimaker.com/en/blog/82-painting-3d-printed-models
Graflex Lighsaber: https://cults3d.com/en/3d-model/gadget/graflex-lightsaber
Designer
DANIEL JOSVAI3d model description
Happy (post) Star Wars day everyone!This year I've decided to do another iconic weapon from the Original Trilogy and so I've remixed the lightsaber ...model of Jacky Wan aka Valcrow of Redicubrics (one of the first things, I've ever 3D printed).
The original model is pretty amazing with technical solutions that should be taught, however it has a bit of a weak spot at the clamp-pin connection that tends to break while playing with the hilt or wearing it for cosplay unless you glue it together.
First I've decided to only implement the connections, I've used for my graflex lightsaber, but then I got carried away in the process and remodeled other parts of the hilt too.
As Jacky's original model this one is also optimized for support free fdm printing and easy assembly that requires no glue. I've printed most parts at 0,15 mm layer height with Fillamentum PLA on my Ultimaker 2+.
For assembly see the improvised instructions in the photos! :) Sorry for the crappy crop! Here is the full version: https://www.instagram.com/p/BxjmPRfHvT-/
Assembly instructions:
-> I. Assemble the three emitter pieces in the orientation and order seen on the photo. They should friction fit nicely. This is also a good test for the other parts too. If they fit together easily, you won't have problems assembling the rest of the hilt, but if they don't try adjusting your horizontal offset/compensation values in your slicer.
-> II. Put the pinwheel on the threaded axle and tighten it. The wider part of the pinwheel should face the wider part (bottom) of the axle.
Attach the axle on one end to the riflegrenade and on the other end to the emitter assembly. Both connections use the same twist-lock mechanism.
-> III. Place the knobs into the clamp. The bottom side of the knobs should be flush with the inner side of the clamp.
-> IV. Insert the matching ends of the riflegrenade and the heatsink (the end WITHOUT snap fits) into the clamp and turn them clockwise. The smaller one of the knobs should be closer to the riflegrenade.
IMPORTANT: Notice the angular window on the clamp! Both the riflegrenade and the heatsink has a specific groove on them, that matches the corresponding end of the window. The groove on the heatsink is rectangular, while the one on the riflegrenade is chamfered. Make sure, that AFTER you have turned the parts the grooves are aligned with the window!
-> V. Place the washer on the side pin of the lever and insert it into the hole on the side of the clamp. You should see the pin through the window. The lever should point towards the bottom of the hilt.
-> VI. Push the latch into the window on the clamp until its flush with the surrounding surface.
-> VII. Slide the lightbulbs into the rail on the clamp.
-> VIII. Slide the pummel onto the heatsink and turn it clockwise until you hear a satisfying click. :)
For the D-ring you have three options:
-1. Print the included model. (Boring/easy one)
-2. Find a D-ring of similar shape in a hardware store and if necessary cut a 5 mm gap in it. Place it into the pommel mid-print or bend it in place later. (Challenging one)
-3. Print the attached D-ring jig model. Cut a 80 mm long piece of 2,85 filament and dip it in hot water. When it softened place it in the jig so it would take the form of a D-ring. (Dangerous one)
Happy printing and may the sticking force be with your buildplates!
Original model by Jacky Wan:
https://www.youmagine.com/designs/star-wars-lightsaber-complex-version
Post processing tips also by him:
https://ultimaker.com/en/blog/82-painting-3d-printed-models
Graflex Lighsaber: https://cults3d.com/en/3d-model/gadget/graflex-lightsaber
