Um2e+ dry-filament-dispenser 3D for print


839 Views 0 Likes 0 Downloads Download
The effect of humidity on filament for 3D printers can c...ause some serious printing problems…
All filament-types are, more or less, hygroscopic, meaning they absorb moisture from the air.
This has consequences, often destructively bad, for the quality of the prints…
In storing filament you can eliminate moisture-absorption by combining silica-sachets with
vacuum-enclosure, giving your print a good start, however, during a generally long printing proces,
filament will be exposed to the air...
With containers and dryers you can reduce quality problems considerably while printing, but
slow moving and exposed filament is insufficient and the energy consumption and fire hazard
of a filament-dryer left unattended for many hours, is dangerous…
After considering different options and combining existing products, i was still experiencing
difficulty and it seemed to me that, to gain control over these moisture-related problems, i had
to make my own tightly tailored printer-specific solution…
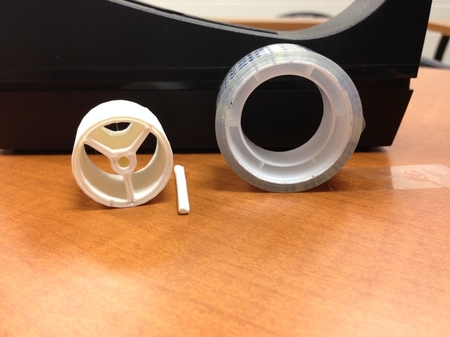
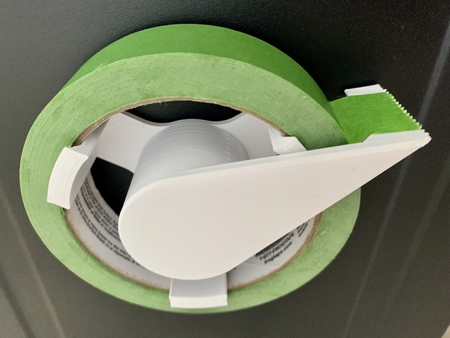
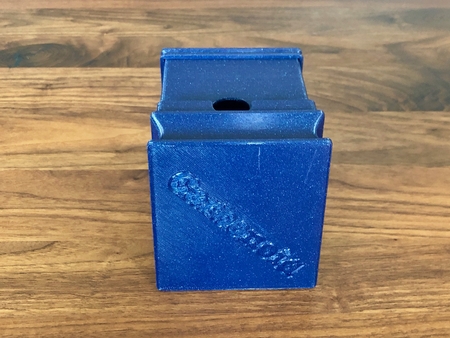
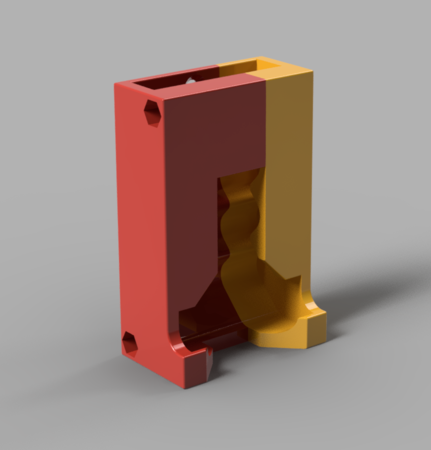
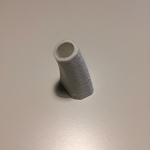
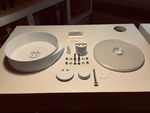
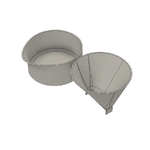
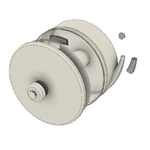
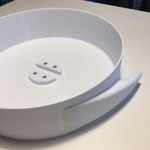
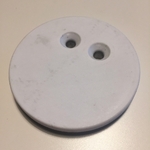
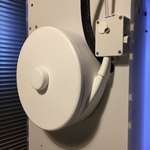
So i designed a container with a transit channel that seals filament from the environment as
well as possible, but also absorbs ingressing moisture in a reservoir filled with silica-granules,
placed in the lid…
NO (!) moisture-related problem has occurred since the installation of the filament-dispenser…
No layer-separation, no brittle print or blob-forming due to humidity…Combined with a simple
drying & storage-protocol, this printer add-on proved to be a problem-discarder…
For me, this solution worked effectively, and although the design is specific for the UM2 Ext+,
i wanted to share my findings with the community and be helpful in tackling a nasty problem…
I Hope the images and files are self-explanatory, if you have any questions let me know…
For the dutch version go to:
https://jim-kool.jimdofree.com/actueel/sub-home/03-filament-dispenser/
no drilling extra holes, no cutting or sawing into the bod...y...
The dispenser is designed to use the Ultimaker-perforations, so if you ever want to sell
your printer, it will be original, as far as this intervention is concerned...
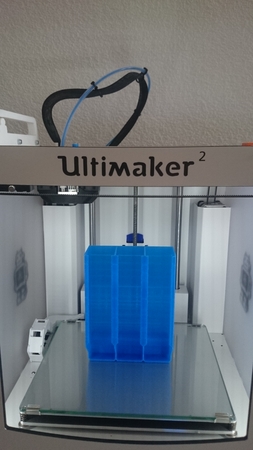
The filament i used to print most parts is PET-G, but any will do ... the parts that needed to be
flexible i used TPU-98A for which shows in the names of the STL-files...
For glueing PET-G parts i used polyurethane glue, commonly known as foaming wood-glue,
which works perfectly and only little is needed... these are the parts i glued together:
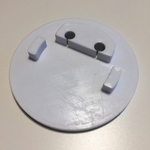
Lid-grate on the dispenser-lid
Dispenser-funnel (or filament-channel) to the dispenser body
Fastener-plug on the lid-fastener (don’t forget the m8 nut...!)
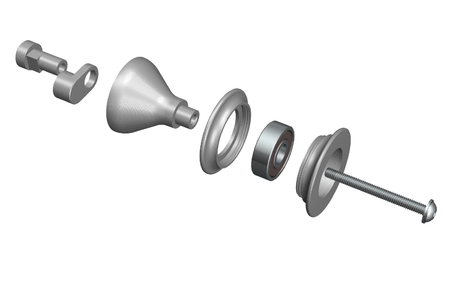
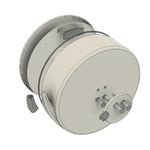
Hardware used is:
1x m8 x 70mm hexagonal bolt and nut
2x m6 x 40mm allen bolt with recessed head and matching lock-nuts and washers
2x m6 x 30mm allen bolt with recessed head and matching lock-nuts and washers
In the lid-fastener an m8-nut, which i forgot to show in the parts-image, needs to be embedded
and than enclosed, so tightening and loosening of the lid can withstand wear...
I spray-painted non-TPU parts with acrylic paint, but any finish is up to you...
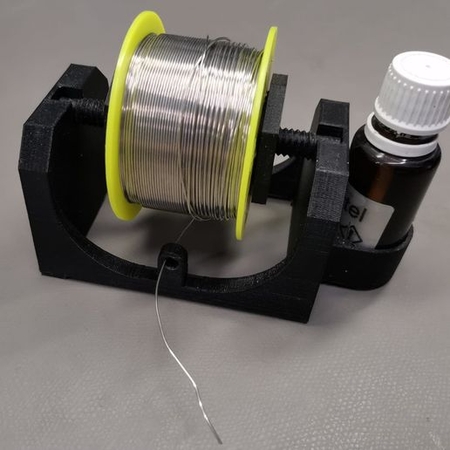
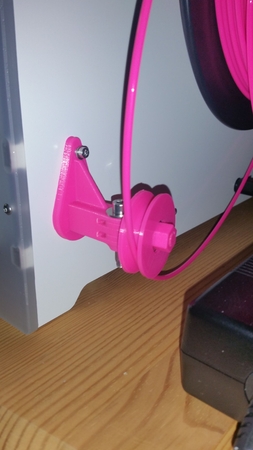
Feeding the extruder is a little different, because you can’t mount a spool, which is standard
Ultimaker-size by-the-way, before you insert filament... there’s no room for your fingers to do
so, so you hold the spool outside nearby the nexus, stick the filament through the funnel into
the extruder when it is in ‘inserting new material-mode’ until it grips and then slip the spool
over the nexus... check if the filament is within the walls of the spool, but... you’ll manage...
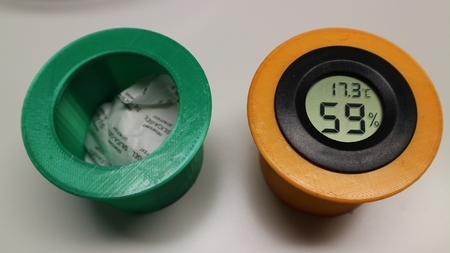
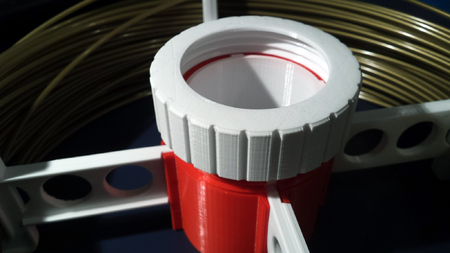
To fill the lid with silica-granules i used bags of 1 kg and cut them open... i store the granules
in a vacuum-box and take out what i need and pour them with the scoop in the wide TPU-funnel
which i plug in the lid-grate-opening... when filled i close the grate with the plug and slide the
lid over the bolt that sticks out of the nexus...
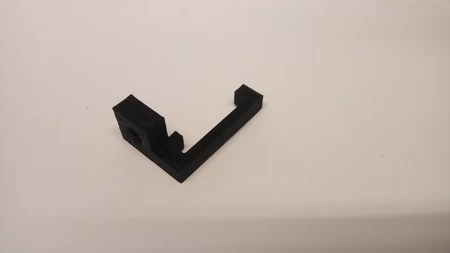
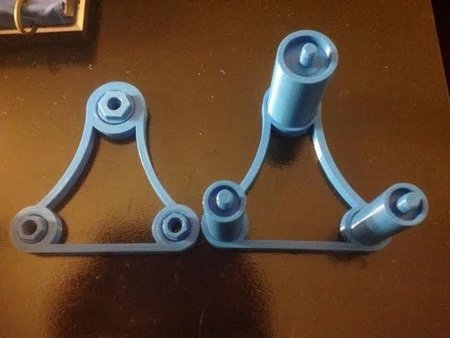
- Issue #1 : Countersinks of dispenser-mount need to be scraped out
David F. mentioned to me that the dispenser-mount in it’s unadjusted form will
obstruct the buildplate in it’s movement...
I assembled the dispenser over a year ago and forgot about this, however at the time
i solved this problem by a little scraping and sanding of the mount...
The countersinks of the bolts that go in the dispenser-mount need to be scraped out
with a counterbore to level the heads of the bolts with the surface of the mount. In
combination with that the surface of the mount may need sanding so that the mount
leaves just enough clearance for the buildplate to pass...
Of course you can redesign the mount and print it again, but in my experience it
worked out fine...
- Issue #2 : Nexus needs to be shortened by 4mm
While disassembling my dispenser for alterations, i remembered there was another adjustment
i made when i first installed it on my printer...
Because the lid proved to be more flexible than i expected, the lid fastener pressed
the center of the lid inside so that the space between the lid and nexus closed completely...
The lid could then not press hard enough on the lid-gasket to sufficiently seal of the
dispenser-body, so i took off 4 mm of the nexus on the lid-side which did the trick,
without hindering the spool inside...
Added:
I have uploaded 2 STL-files (nr.19 and nr. 20) of additions that extend/elongate the dispenser about 8 mm.
If you want to apply these alterations, take into consideration that the lid-gasket will be
discarded and the Nexus will get a sock/shoe... also you need to replace the hexagonal bolt with an 80 mm-version...
My filament-supplier changed the spools on which the filament is delivered with an environment-friendly version, which is broader and has a non-tubular nexus... anyway, i had to make changes to my dispenser and share these with you...
Designer
Jim Kool3d model description
Moisture reducing filament-dispenser with silica-granulesreservoir for Ultimaker 2 Extended+The effect of humidity on filament for 3D printers can c...ause some serious printing problems…
All filament-types are, more or less, hygroscopic, meaning they absorb moisture from the air.
This has consequences, often destructively bad, for the quality of the prints…
In storing filament you can eliminate moisture-absorption by combining silica-sachets with
vacuum-enclosure, giving your print a good start, however, during a generally long printing proces,
filament will be exposed to the air...
With containers and dryers you can reduce quality problems considerably while printing, but
slow moving and exposed filament is insufficient and the energy consumption and fire hazard
of a filament-dryer left unattended for many hours, is dangerous…
After considering different options and combining existing products, i was still experiencing
difficulty and it seemed to me that, to gain control over these moisture-related problems, i had
to make my own tightly tailored printer-specific solution…
So i designed a container with a transit channel that seals filament from the environment as
well as possible, but also absorbs ingressing moisture in a reservoir filled with silica-granules,
placed in the lid…
NO (!) moisture-related problem has occurred since the installation of the filament-dispenser…
No layer-separation, no brittle print or blob-forming due to humidity…Combined with a simple
drying & storage-protocol, this printer add-on proved to be a problem-discarder…
For me, this solution worked effectively, and although the design is specific for the UM2 Ext+,
i wanted to share my findings with the community and be helpful in tackling a nasty problem…
I Hope the images and files are self-explanatory, if you have any questions let me know…
For the dutch version go to:
https://jim-kool.jimdofree.com/actueel/sub-home/03-filament-dispenser/
3d model print parameters
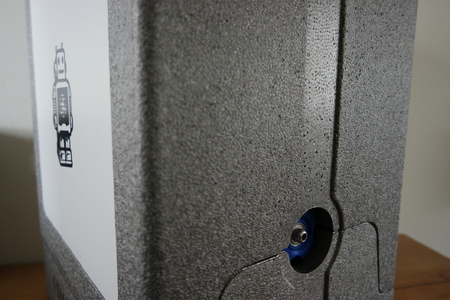
First of all, you don't have to make any alterations to your printer-housing what so ever:no drilling extra holes, no cutting or sawing into the bod...y...
The dispenser is designed to use the Ultimaker-perforations, so if you ever want to sell
your printer, it will be original, as far as this intervention is concerned...
The filament i used to print most parts is PET-G, but any will do ... the parts that needed to be
flexible i used TPU-98A for which shows in the names of the STL-files...
For glueing PET-G parts i used polyurethane glue, commonly known as foaming wood-glue,
which works perfectly and only little is needed... these are the parts i glued together:
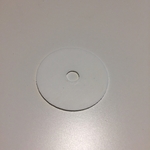
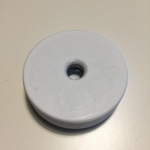
Lid-grate on the dispenser-lid
Dispenser-funnel (or filament-channel) to the dispenser body
Fastener-plug on the lid-fastener (don’t forget the m8 nut...!)
Hardware used is:
1x m8 x 70mm hexagonal bolt and nut
2x m6 x 40mm allen bolt with recessed head and matching lock-nuts and washers
2x m6 x 30mm allen bolt with recessed head and matching lock-nuts and washers
In the lid-fastener an m8-nut, which i forgot to show in the parts-image, needs to be embedded
and than enclosed, so tightening and loosening of the lid can withstand wear...
I spray-painted non-TPU parts with acrylic paint, but any finish is up to you...
Feeding the extruder is a little different, because you can’t mount a spool, which is standard
Ultimaker-size by-the-way, before you insert filament... there’s no room for your fingers to do
so, so you hold the spool outside nearby the nexus, stick the filament through the funnel into
the extruder when it is in ‘inserting new material-mode’ until it grips and then slip the spool
over the nexus... check if the filament is within the walls of the spool, but... you’ll manage...
To fill the lid with silica-granules i used bags of 1 kg and cut them open... i store the granules
in a vacuum-box and take out what i need and pour them with the scoop in the wide TPU-funnel
which i plug in the lid-grate-opening... when filled i close the grate with the plug and slide the
lid over the bolt that sticks out of the nexus...
- Issue #1 : Countersinks of dispenser-mount need to be scraped out
David F. mentioned to me that the dispenser-mount in it’s unadjusted form will
obstruct the buildplate in it’s movement...
I assembled the dispenser over a year ago and forgot about this, however at the time
i solved this problem by a little scraping and sanding of the mount...
The countersinks of the bolts that go in the dispenser-mount need to be scraped out
with a counterbore to level the heads of the bolts with the surface of the mount. In
combination with that the surface of the mount may need sanding so that the mount
leaves just enough clearance for the buildplate to pass...
Of course you can redesign the mount and print it again, but in my experience it
worked out fine...
- Issue #2 : Nexus needs to be shortened by 4mm
While disassembling my dispenser for alterations, i remembered there was another adjustment
i made when i first installed it on my printer...
Because the lid proved to be more flexible than i expected, the lid fastener pressed
the center of the lid inside so that the space between the lid and nexus closed completely...
The lid could then not press hard enough on the lid-gasket to sufficiently seal of the
dispenser-body, so i took off 4 mm of the nexus on the lid-side which did the trick,
without hindering the spool inside...
Added:
I have uploaded 2 STL-files (nr.19 and nr. 20) of additions that extend/elongate the dispenser about 8 mm.
If you want to apply these alterations, take into consideration that the lid-gasket will be
discarded and the Nexus will get a sock/shoe... also you need to replace the hexagonal bolt with an 80 mm-version...
My filament-supplier changed the spools on which the filament is delivered with an environment-friendly version, which is broader and has a non-tubular nexus... anyway, i had to make changes to my dispenser and share these with you...