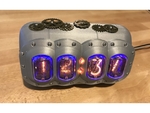
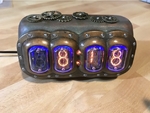
Steampunk nixie tube clock 3D for print
3679 Views 1 Likes 0 Downloads Download
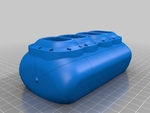
...Quantity 1: 3D Print of Nixie_Tube_Front.STL
Alternate: Nixie_Tube Front_lower_resolution.STL (this is a smaller file but some detail is lost during printing)
Quantity 1: 3D Print of Nixie_Tube_Back.STL
Quantity 2: 3D Print of Nixie_Tube_Button M2.STL or Nixie_Tube_Button M1.STL or Nixie_Tube_Button_No_Gear.STL
Select from the three Nixie_Tube_Buttons depending which size screw you intend to use to install on the back of the clock. M1x3mm or M2x5mm screws. You can also just print the button with no gear on it.
Quantity 1 Nixie Tube Clock Kit (FunKlock)
https://www.pvelectronics.co.uk/index.php?main_page=product_info&cPath=1&products_id=140
Quantity 2 Tack Switch Panasonic part number: EVQ-PAC09K - these replace the switches which come with the FunKlock kit such that the adjustment switches are accessible from the back of the clock. Note: PV Electronics sells compatible buttons with the Finned Case for the FunKlock, you might be able to source these switches from them when you get your Nixie Tube Clock Kit.
https://www.digikey.ca/product-detail/en/panasonic-electronic-components/EVQ-PAC09K/P8012S-ND/91455
Quantity 35 of M2x5mm Stainless Steel Button Screws
https://www.amazon.ca/gp/product/B01E5CEKFY/ref=oh_aui_detailpage_o00_s00?ie=UTF8&psc=1
Quantity 4 M2x22mm Scew Bolt
https://www.amazon.ca/gp/product/B011BNU9EQ/ref=oh_aui_detailpage_o03_s00?ie=UTF8&psc=1
Quantity 7 M2x6mmx3.5mm Female Threaded Brass Knurled Insert Embedded Nuts
https://www.amazon.ca/gp/product/B01BHDXL18/ref=od_aui_detailpages00?ie=UTF8&psc=1
Quantity 1 Packet of Antique Steampunk Gears
https://www.amazon.ca/gp/product/B076Z7H5HZ/ref=oh_aui_detailpage_o04_s00?ie=UTF8&psc=1
Optional Quantity 3 M1x3mm screws to install smaller gears.
I used these to install small gears on the buttons and one of the sides. You can just use M2x5mm screws and gears with larger holes in the centre instead. These screws can be found in eye glasses repair kits for cheap.
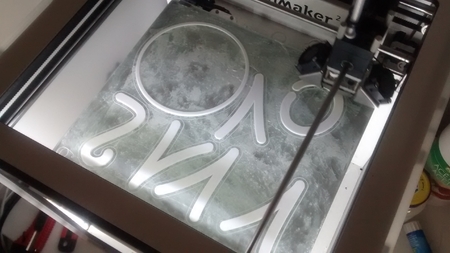
Ultimaker
Printer:
Ultimaker 3
Rafts:
Yes
Supports:
Yes
Resolution:
0.1mm
Infill:
20%
Notes:
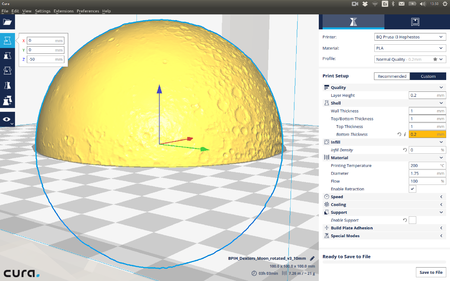
The settings used... may not be all that important, I used these settings in order to get the supports so they were very easy to remove by hand. I used dissolvable PVA supports, but just pulled them off by hand. You could easily use regular supports and cut them out by hand. You may need to drill out some of the holes if your supports go into the holes. I setup Cura to only create supports for overhangs over 75 degrees, this prevents supports from going inside some of the screw holes. Wall Thickness: 1mm Top/Bottom Thickness: 1mm Infill Density: 20% Generate Supports: Yes Supports: PVA or PLA Support Placement: Everywhere Support Overhang Angle: 75 degrees Build plate Adhesion: Yes
Post-Printing
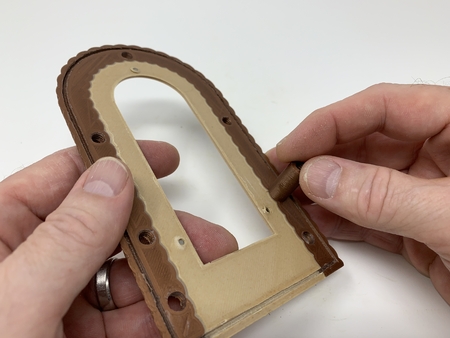
Step 1: Add Nuts into the front of the case
Using a soldering iron melt the nuts into the print. Repeat for 4 nuts to hold the circuit boards in place, and 3 more to hold the back on. Note: Alternatively you can use M3 screws directly into the plastic, but these nuts will allow you to disassemble the clock many times without worry of stripping the plastic.
Designer
fastkite3d model description
Create a desktop Steampunk style Nixie Tube Clock. You will need to acquire a Nixie Tube Clock kit and other misc hardware to assemble this clock....Quantity 1: 3D Print of Nixie_Tube_Front.STL
Alternate: Nixie_Tube Front_lower_resolution.STL (this is a smaller file but some detail is lost during printing)
Quantity 1: 3D Print of Nixie_Tube_Back.STL
Quantity 2: 3D Print of Nixie_Tube_Button M2.STL or Nixie_Tube_Button M1.STL or Nixie_Tube_Button_No_Gear.STL
Select from the three Nixie_Tube_Buttons depending which size screw you intend to use to install on the back of the clock. M1x3mm or M2x5mm screws. You can also just print the button with no gear on it.
Quantity 1 Nixie Tube Clock Kit (FunKlock)
https://www.pvelectronics.co.uk/index.php?main_page=product_info&cPath=1&products_id=140
Quantity 2 Tack Switch Panasonic part number: EVQ-PAC09K - these replace the switches which come with the FunKlock kit such that the adjustment switches are accessible from the back of the clock. Note: PV Electronics sells compatible buttons with the Finned Case for the FunKlock, you might be able to source these switches from them when you get your Nixie Tube Clock Kit.
https://www.digikey.ca/product-detail/en/panasonic-electronic-components/EVQ-PAC09K/P8012S-ND/91455
Quantity 35 of M2x5mm Stainless Steel Button Screws
https://www.amazon.ca/gp/product/B01E5CEKFY/ref=oh_aui_detailpage_o00_s00?ie=UTF8&psc=1
Quantity 4 M2x22mm Scew Bolt
https://www.amazon.ca/gp/product/B011BNU9EQ/ref=oh_aui_detailpage_o03_s00?ie=UTF8&psc=1
Quantity 7 M2x6mmx3.5mm Female Threaded Brass Knurled Insert Embedded Nuts
https://www.amazon.ca/gp/product/B01BHDXL18/ref=od_aui_detailpages00?ie=UTF8&psc=1
Quantity 1 Packet of Antique Steampunk Gears
https://www.amazon.ca/gp/product/B076Z7H5HZ/ref=oh_aui_detailpage_o04_s00?ie=UTF8&psc=1
Optional Quantity 3 M1x3mm screws to install smaller gears.
I used these to install small gears on the buttons and one of the sides. You can just use M2x5mm screws and gears with larger holes in the centre instead. These screws can be found in eye glasses repair kits for cheap.
3d model print parameters
Printer brand:Ultimaker
Printer:
Ultimaker 3
Rafts:
Yes
Supports:
Yes
Resolution:
0.1mm
Infill:
20%
Notes:
The settings used... may not be all that important, I used these settings in order to get the supports so they were very easy to remove by hand. I used dissolvable PVA supports, but just pulled them off by hand. You could easily use regular supports and cut them out by hand. You may need to drill out some of the holes if your supports go into the holes. I setup Cura to only create supports for overhangs over 75 degrees, this prevents supports from going inside some of the screw holes. Wall Thickness: 1mm Top/Bottom Thickness: 1mm Infill Density: 20% Generate Supports: Yes Supports: PVA or PLA Support Placement: Everywhere Support Overhang Angle: 75 degrees Build plate Adhesion: Yes
Post-Printing
Step 1: Add Nuts into the front of the case
Using a soldering iron melt the nuts into the print. Repeat for 4 nuts to hold the circuit boards in place, and 3 more to hold the back on. Note: Alternatively you can use M3 screws directly into the plastic, but these nuts will allow you to disassemble the clock many times without worry of stripping the plastic.