Printrbot simple metal heatbed en 3D para imprimir

5549 Visualizaciones 1 Me gusta 0 Descargas realizadas Descarga aqui la pieza desde 3dforprint
ACTUALIZ...ACIÓN de la Printrbot ha creado un kit para agregar un calor de la cama a la Simple Metal Aquí: http://printrbot.com/shop/simple-metal-heated-bed/ usted también puede comprar un aftermarked adhesivo de uno en http://3dpaftermarket.bigcartel.com/product/printrbot-metal-bundle
El stock de Printrbot de Metal Simple es una fantástica poco de la impresora con un
excepcional grado de precisión, por su precio, yo realmente no cambiaría
cosa sobre ella. Recientemente he tenido que imprimir un par de grandes diseños planos y
quería intente conectar el calor de la cama para conseguir perfectamente plana.
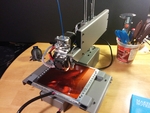
La ideología de montaje en el calor de la cama sobre una plataforma elevada de diseño publicado
aquí es que usted es capaz de aislar las partes móviles de calor, el uso de
menos energía y mantener una mayor temperatura constante - no tengo idea de cómo este mod
se compara con la de otros diseños. Su Printrbot Simple de Metal puede imprimir
PLA super plano y a experimentar en otros filamentos como ABS y Nylon. Si
planea imprimir con alta temperatura de los filamentos, recomiendo impresión
estas piezas en ABS para la durabilidad a largo plazo.
Instrucciones:
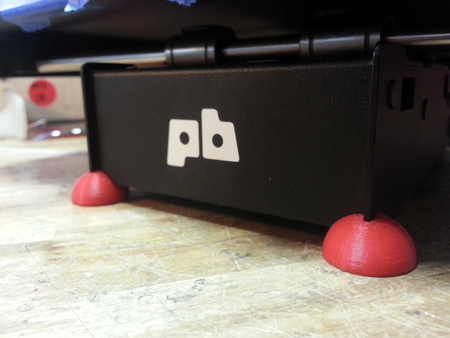
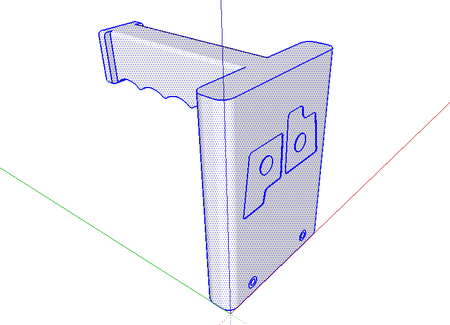
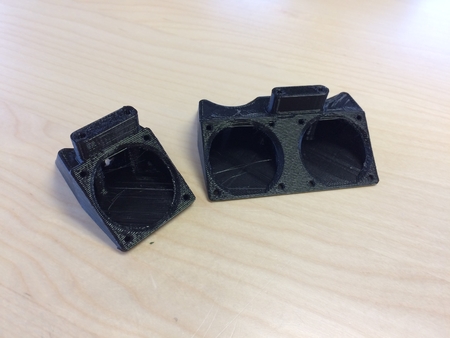
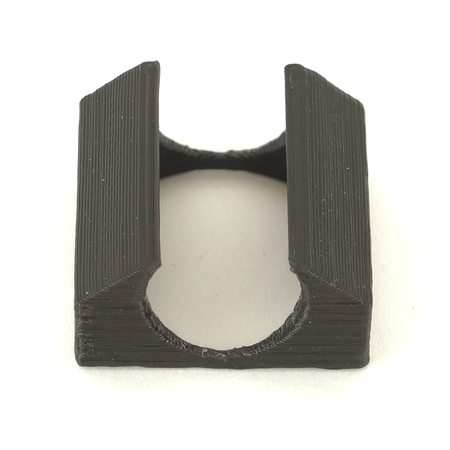
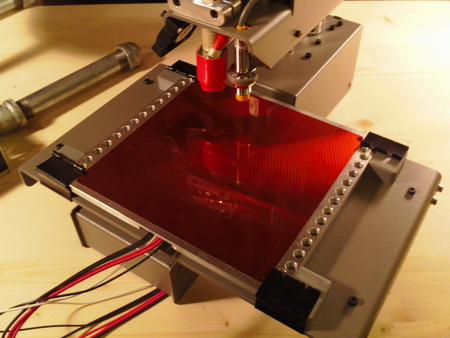
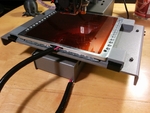
Imprimir cuatro de estos soportes y adjuntar el 6X6 de impresión de aluminio de la cama heatbed y termistor de http://printrbot.com/ Ver lista de materiales para obtener más detalles e instrucciones.
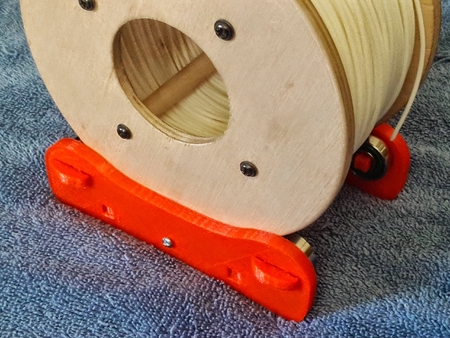
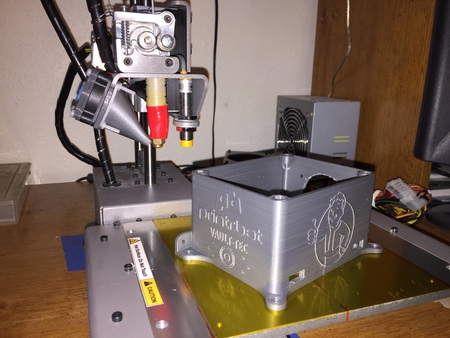
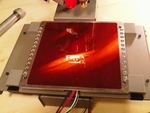
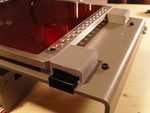
Montaje como se muestra en la foto, los agujeros de montaje en el archivo STL son apretados, pero permiten una mejor autorroscantes en el plástico, también puede insertar una tuerca en la captura de espacio.
Utilizando el calor de aluminio de la cama de printrbot usted no necesita hacer ningún cambio a su z sensor (yo uso precaución el primer tiempo para asegurarse de que no se mueve nada al instalar este mod - ir a través de la M212 proceso de calibración). Una vez instalado, usted puede fácilmente agregar o quitar de la cama sin hacer los ajustes de calibración. Recuerda hacer todos los de su altura z de calibración con el calor de la cama a la temperatura.
He incluido un archivo PDF que muestra dónde se enchufe en el calor de la cama, cable del termistor, y la fuente de alimentación.
Finalmente, se desea enviar el siguiente código a su máquina M211 X150 Y150 Z140 para compensar la leve disminución en el eje Z debido a que el calor de la cama de espesor, a continuación, M500 para guardar y M501 para comprobar su trabajo.
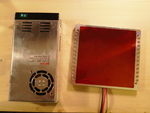
- ADVERTENCIA - debe sustituir el ordenador portátil de estilo de la fuente de alimentación y agregar a su
propio de 12 voltios fuente de alimentación con suficiente amperios para ejecutar la impresión térmico
de la superficie. Una fuente de alimentación ATX que puedes encontrar en una antigua torre de PC es una
muy buena opción.
Lista de materiales:
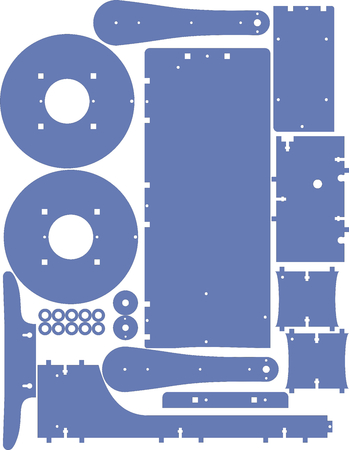
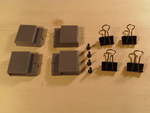
-2 de cada uno de los archivos stl
-4 pequeños clips de la carpeta de 20mm de ancho
-4 tornillos de 3mm ~10 mm de largo y nueces
-6X6 printrbot calor de la cama PCB de
http://printrbot.com/shop/6-6-heated-bed/ o
http://3dpaftermarket.bigcartel.com/product/printrbot-metal-bundle (este
incluye termistor)
-printrbot de impresión de aluminio de la cama de 6x6
http://printrbot.com/shop/printrbot-aluminum-6x6-build-platform/
-termistor con cable http://printrbot.com/shop/thermistor-with-cable/
-ATX fuente de alimentación o de otra fuente de 12 voltios capaz de ejecutar la mayor
sorteo de un calor de la cama.
-"Y" adaptador para la fuente de alimentación ATX de printrbot http://printrbot.com/shop/y-power-adapter/
Si usted es hábil puede hacer que el adaptador Y parte con la existente
los conectores que viene con la fuente de alimentación ATX y saltar el alambre verde
para que la caja de potencia de hasta
http://help.printrbot.com/Guide/Power+Fuente+de Cableado/16
-Opcional: Usted puede querer una caja ATX fuente de alimentación, hay un montón de todo.
Este es un soporte de bobina demasiado
http://printrbot.com/shop/power-tower-with-spool-rack/
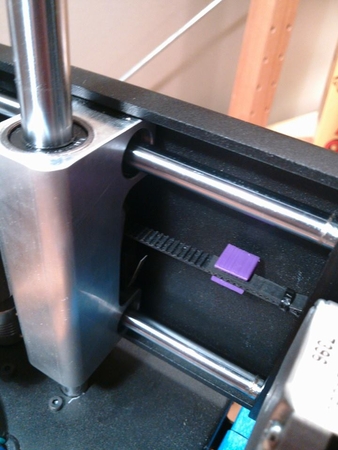
-Un poco de cable de envoltura para mantener el calor de la cama y
termistor cables limpio y ordenado.
-Por último, puede que desee aislar la parte inferior de la calor de la cama. He utilizado algunos metalizado plástico de burbujas diseñado para el aislamiento de conductos de trabajo, el corcho puede ser una buena opción también, que hace que el calor de la cama mucho más eficiente.
Instrucciones:
Montaje como se muestra en la foto, los agujeros de montaje en el archivo STL son apretados, pero
permiten una mejor autorroscantes en el plástico, usted también puede poner una tuerca en la captura de la tuerca de espacio.
Utilizando el calor de aluminio de la cama de printrbot que usted no tendrá que hacer
cualquier cambio a su z sensor (yo uso precaución la primera vez para hacer
asegúrese de que usted no se mueve nada al instalar este mod - ir a través de
el M212 proceso de calibración).
Una vez instalado, usted puede fácilmente agregar o
retire la cama sin hacer los ajustes de calibración. Recuerda hacer
todos los de su altura z de calibración con el calor de la cama a la temperatura.
He incluido un archivo PDF que muestra dónde se enchufe en el calor de la cama,
cable del termistor, y la fuente de alimentación.
He utilizado un lápiz marque ligeramente las cuatro esquinas de los soportes de montaje para que yo pueda instalar fácilmente y centro de mi calor de la cama por lo que el Z sensor lee la cama perfectamente. El último lugar en donde se lee la cama está cerca de la orilla y no desea que el sensor para leer fuera de la cama.
Finalmente, se desea enviar el siguiente código a su máquina M211
X150 Y150 Z140 para compensar la leve disminución en el eje Z porque
el calor de la cama de espesor, a continuación, M500 para guardar y M501 para comprobar su
trabajo.
Lista de materiales:
-2 de cada... uno de los archivos stl
-4 pequeños clips de la carpeta de 20mm de ancho
-4 tornillos de 3mm ~10 mm de largo y nueces
-6X6 printrbot calor de la cama PCB de http://printrbot.com/shop/6-6-heated-bed/ o http://3dpaftermarket.bigcartel.com/product/printrbot-metal-bundle (este incluye termistor)
-printrbot de impresión de aluminio de la cama de 6x6 http://printrbot.com/shop/printrbot-aluminum-6x6-build-platform/ -termistor con cable http://printrbot.com/shop/thermistor-with-cable/
-ATX fuente de alimentación o de otra fuente de 12 voltios capaz de ejecutar el mayor sorteo de un calor de la cama.
-"Y" adaptador para la fuente de alimentación ATX de printrbot http://printrbot.com/shop/y-power-adapter/ Si usted es hábil puede hacer que el adaptador Y parte con los conectores existentes que viene con la fuente de alimentación ATX y saltar el alambre verde para que la caja de potencia de hasta http://help.printrbot.com/Guide/Power+Fuente+de Cableado/16 en Este vídeo se muestra bastante claramente lo que la conexión se parece y cómo conectar el adaptador https://www.youtube.com/watch?v=bqF0m7xMMms
-Opcional: Usted puede querer una caja ATX fuente de alimentación, hay un montón de todo. Este es un soporte de bobina demasiado http://printrbot.com/shop/power-tower-with-spool-rack/
-Por último, es posible que desee algo envoltura de cable para mantener el calor de la cama y termistor de cables limpio y ordenado.
Instrucciones: Montar como se muestra en la foto, los agujeros de montaje en el archivo STL son apretados, pero permiten una mejor autorroscantes en el plástico, usted también puede poner una tuerca en la captura de la tuerca de espacio.
Utilizando el calor de aluminio de la cama de printrbot usted no necesita hacer ningún cambio a su z sensor (yo uso precaución el primer tiempo para asegurarse de que no se mueve nada al instalar este mod - ir a través de la M212 proceso de calibración).
Una vez instalado, usted puede fácilmente agregar o quitar de la cama sin hacer los ajustes de calibración. Recuerda hacer todos los de su altura z de calibración con el calor de la cama a la temperatura. He incluido un archivo PDF que muestra dónde se enchufe en el calor de la cama, cable del termistor, y la fuente de alimentación.
Finalmente, se desea enviar el siguiente código a su máquina M211 X150 Y150 Z140 para compensar la leve disminución en el eje Z debido a que el calor de la cama de espesor, a continuación, M500 para guardar y M501 para comprobar su trabajo.
Diseñador
Cameron WattDescripción del modelo 3d
Añadir un calor de la cama a la Printrbot Simple con la venta de piezas. Es fácilmente extraíble y no requiere ningún cambio permanente.ACTUALIZ...ACIÓN de la Printrbot ha creado un kit para agregar un calor de la cama a la Simple Metal Aquí: http://printrbot.com/shop/simple-metal-heated-bed/ usted también puede comprar un aftermarked adhesivo de uno en http://3dpaftermarket.bigcartel.com/product/printrbot-metal-bundle
El stock de Printrbot de Metal Simple es una fantástica poco de la impresora con un
excepcional grado de precisión, por su precio, yo realmente no cambiaría
cosa sobre ella. Recientemente he tenido que imprimir un par de grandes diseños planos y
quería intente conectar el calor de la cama para conseguir perfectamente plana.
La ideología de montaje en el calor de la cama sobre una plataforma elevada de diseño publicado
aquí es que usted es capaz de aislar las partes móviles de calor, el uso de
menos energía y mantener una mayor temperatura constante - no tengo idea de cómo este mod
se compara con la de otros diseños. Su Printrbot Simple de Metal puede imprimir
PLA super plano y a experimentar en otros filamentos como ABS y Nylon. Si
planea imprimir con alta temperatura de los filamentos, recomiendo impresión
estas piezas en ABS para la durabilidad a largo plazo.
Instrucciones:
Imprimir cuatro de estos soportes y adjuntar el 6X6 de impresión de aluminio de la cama heatbed y termistor de http://printrbot.com/ Ver lista de materiales para obtener más detalles e instrucciones.
Montaje como se muestra en la foto, los agujeros de montaje en el archivo STL son apretados, pero permiten una mejor autorroscantes en el plástico, también puede insertar una tuerca en la captura de espacio.
Utilizando el calor de aluminio de la cama de printrbot usted no necesita hacer ningún cambio a su z sensor (yo uso precaución el primer tiempo para asegurarse de que no se mueve nada al instalar este mod - ir a través de la M212 proceso de calibración). Una vez instalado, usted puede fácilmente agregar o quitar de la cama sin hacer los ajustes de calibración. Recuerda hacer todos los de su altura z de calibración con el calor de la cama a la temperatura.
He incluido un archivo PDF que muestra dónde se enchufe en el calor de la cama, cable del termistor, y la fuente de alimentación.
Finalmente, se desea enviar el siguiente código a su máquina M211 X150 Y150 Z140 para compensar la leve disminución en el eje Z debido a que el calor de la cama de espesor, a continuación, M500 para guardar y M501 para comprobar su trabajo.
- ADVERTENCIA - debe sustituir el ordenador portátil de estilo de la fuente de alimentación y agregar a su
propio de 12 voltios fuente de alimentación con suficiente amperios para ejecutar la impresión térmico
de la superficie. Una fuente de alimentación ATX que puedes encontrar en una antigua torre de PC es una
muy buena opción.
Lista de materiales:
-2 de cada uno de los archivos stl
-4 pequeños clips de la carpeta de 20mm de ancho
-4 tornillos de 3mm ~10 mm de largo y nueces
-6X6 printrbot calor de la cama PCB de
http://printrbot.com/shop/6-6-heated-bed/ o
http://3dpaftermarket.bigcartel.com/product/printrbot-metal-bundle (este
incluye termistor)
-printrbot de impresión de aluminio de la cama de 6x6
http://printrbot.com/shop/printrbot-aluminum-6x6-build-platform/
-termistor con cable http://printrbot.com/shop/thermistor-with-cable/
-ATX fuente de alimentación o de otra fuente de 12 voltios capaz de ejecutar la mayor
sorteo de un calor de la cama.
-"Y" adaptador para la fuente de alimentación ATX de printrbot http://printrbot.com/shop/y-power-adapter/
Si usted es hábil puede hacer que el adaptador Y parte con la existente
los conectores que viene con la fuente de alimentación ATX y saltar el alambre verde
para que la caja de potencia de hasta
http://help.printrbot.com/Guide/Power+Fuente+de Cableado/16
-Opcional: Usted puede querer una caja ATX fuente de alimentación, hay un montón de todo.
Este es un soporte de bobina demasiado
http://printrbot.com/shop/power-tower-with-spool-rack/
-Un poco de cable de envoltura para mantener el calor de la cama y
termistor cables limpio y ordenado.
-Por último, puede que desee aislar la parte inferior de la calor de la cama. He utilizado algunos metalizado plástico de burbujas diseñado para el aislamiento de conductos de trabajo, el corcho puede ser una buena opción también, que hace que el calor de la cama mucho más eficiente.
Instrucciones:
Montaje como se muestra en la foto, los agujeros de montaje en el archivo STL son apretados, pero
permiten una mejor autorroscantes en el plástico, usted también puede poner una tuerca en la captura de la tuerca de espacio.
Utilizando el calor de aluminio de la cama de printrbot que usted no tendrá que hacer
cualquier cambio a su z sensor (yo uso precaución la primera vez para hacer
asegúrese de que usted no se mueve nada al instalar este mod - ir a través de
el M212 proceso de calibración).
Una vez instalado, usted puede fácilmente agregar o
retire la cama sin hacer los ajustes de calibración. Recuerda hacer
todos los de su altura z de calibración con el calor de la cama a la temperatura.
He incluido un archivo PDF que muestra dónde se enchufe en el calor de la cama,
cable del termistor, y la fuente de alimentación.
He utilizado un lápiz marque ligeramente las cuatro esquinas de los soportes de montaje para que yo pueda instalar fácilmente y centro de mi calor de la cama por lo que el Z sensor lee la cama perfectamente. El último lugar en donde se lee la cama está cerca de la orilla y no desea que el sensor para leer fuera de la cama.
Finalmente, se desea enviar el siguiente código a su máquina M211
X150 Y150 Z140 para compensar la leve disminución en el eje Z porque
el calor de la cama de espesor, a continuación, M500 para guardar y M501 para comprobar su
trabajo.
Parametros de impresión 3d
Escribí la lista de materiales en la parte inferior de la descripción, hay problemas de formato a continuación.Lista de materiales:
-2 de cada... uno de los archivos stl
-4 pequeños clips de la carpeta de 20mm de ancho
-4 tornillos de 3mm ~10 mm de largo y nueces
-6X6 printrbot calor de la cama PCB de http://printrbot.com/shop/6-6-heated-bed/ o http://3dpaftermarket.bigcartel.com/product/printrbot-metal-bundle (este incluye termistor)
-printrbot de impresión de aluminio de la cama de 6x6 http://printrbot.com/shop/printrbot-aluminum-6x6-build-platform/ -termistor con cable http://printrbot.com/shop/thermistor-with-cable/
-ATX fuente de alimentación o de otra fuente de 12 voltios capaz de ejecutar el mayor sorteo de un calor de la cama.
-"Y" adaptador para la fuente de alimentación ATX de printrbot http://printrbot.com/shop/y-power-adapter/ Si usted es hábil puede hacer que el adaptador Y parte con los conectores existentes que viene con la fuente de alimentación ATX y saltar el alambre verde para que la caja de potencia de hasta http://help.printrbot.com/Guide/Power+Fuente+de Cableado/16 en Este vídeo se muestra bastante claramente lo que la conexión se parece y cómo conectar el adaptador https://www.youtube.com/watch?v=bqF0m7xMMms
-Opcional: Usted puede querer una caja ATX fuente de alimentación, hay un montón de todo. Este es un soporte de bobina demasiado http://printrbot.com/shop/power-tower-with-spool-rack/
-Por último, es posible que desee algo envoltura de cable para mantener el calor de la cama y termistor de cables limpio y ordenado.
Instrucciones: Montar como se muestra en la foto, los agujeros de montaje en el archivo STL son apretados, pero permiten una mejor autorroscantes en el plástico, usted también puede poner una tuerca en la captura de la tuerca de espacio.
Utilizando el calor de aluminio de la cama de printrbot usted no necesita hacer ningún cambio a su z sensor (yo uso precaución el primer tiempo para asegurarse de que no se mueve nada al instalar este mod - ir a través de la M212 proceso de calibración).
Una vez instalado, usted puede fácilmente agregar o quitar de la cama sin hacer los ajustes de calibración. Recuerda hacer todos los de su altura z de calibración con el calor de la cama a la temperatura. He incluido un archivo PDF que muestra dónde se enchufe en el calor de la cama, cable del termistor, y la fuente de alimentación.
Finalmente, se desea enviar el siguiente código a su máquina M211 X150 Y150 Z140 para compensar la leve disminución en el eje Z debido a que el calor de la cama de espesor, a continuación, M500 para guardar y M501 para comprobar su trabajo.