Perseverance, petite 3D for print
882 Views 0 Likes 0 Downloads Download
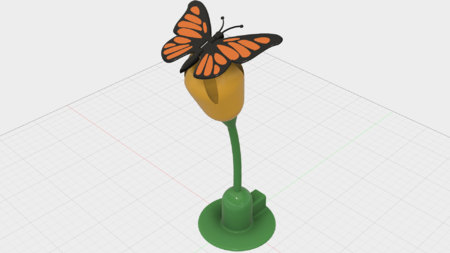
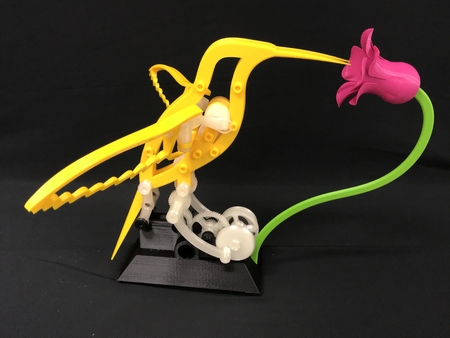
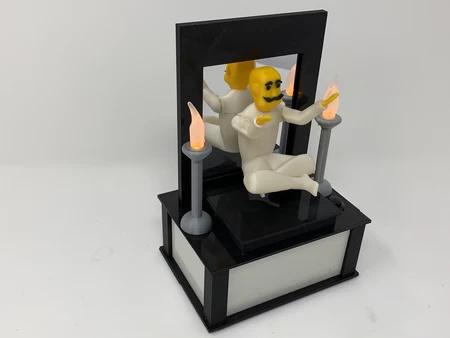
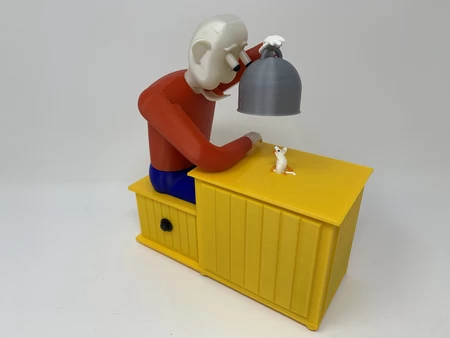
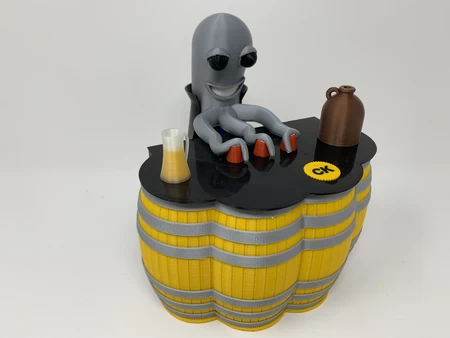
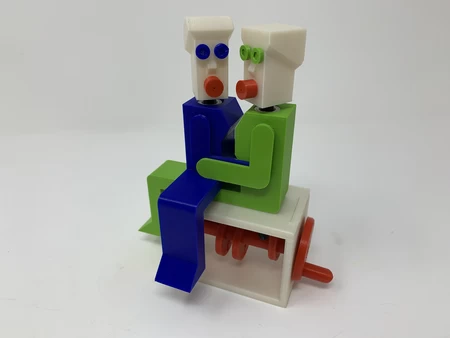
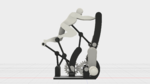
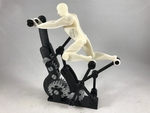
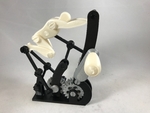
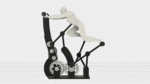
"Perseverance, Petite" is a smaller version of my original Perseverance design (inspired by a Disney Research ...animation study video) of June, 2014. Perseverance, Petite utilizes threaded assembly as opposed to the press fit assembly of the original, and as such travels better. And being smaller, it takes up less of my desktop (which is becoming quite crowded).
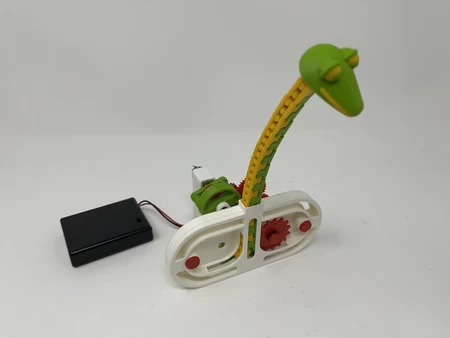
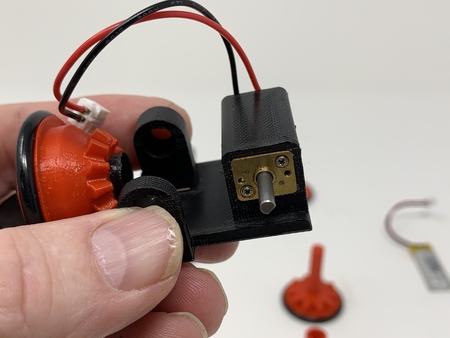
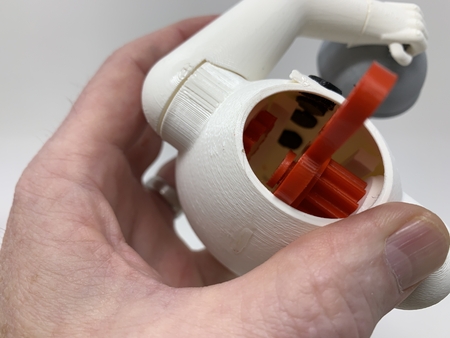
The solar powered motorized version is coming soon:
As usual, I probably forgot a file or two or who knows what else, so if you have any questions, please do not hesitate to ask as I do make mistakes in plenty.
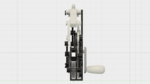
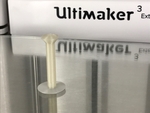
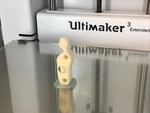
Designed using Autodesk Fusion 360, sliced using Cura 2.3.1, and printed in PLA on an Ultimaker 2+ Extended and an Ultimaker 3 Extended.
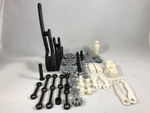
I printed all parts on an Ultimaker 2+ Extended and an Ultimaker 3 Extended at .1mm vertical resolution. I've attac...hed a PDF containing the name, count, infill, brim and raft settings for each of the parts.
Prior to assembly, test fit and trim, file, sand, etc. all parts as necessary for smooth movement of moving surfaces, and tight fit for non moving surfaces. Depending on the colors you chose and your printer settings, more or less trimming, filing and/or sanding may be required. Carefully file all edges that contacted the build plate to make absolutely sure that all build plate "ooze" is removed and that all edges are smooth. I used small jewelers files and plenty of patience to perform this step.
This model uses threaded assembly and all threads are M6 by 1. Note in the PDF that I printed certain parts with threaded holes on a raft in order to make post printing clean up of these parts much easier. If after printing the threaded holes are difficult to install a part into, then use an M6 by 1 steel screw, or an M6 by 1 tap to clean them.
Note also I printed "Torso.stl", "Crank Bolt.stl", "Crank Knob.stl" and "Axle Gear Idler.stl" using a brim to assist in keeping these parts in place during printing.
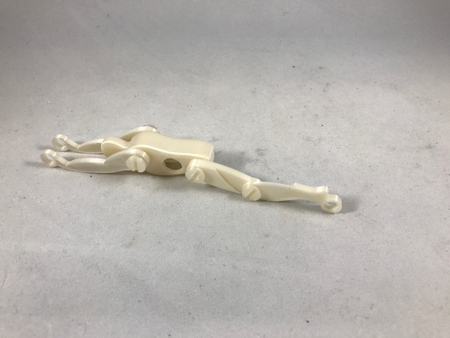
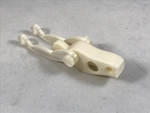
2) Assemble the Character.
Attach the two "Arm.stl" to "Torso.stl" using two "Axle Arm Leg Torso.stl" as shown. The arms should pivot freely.
Attach "Leg Left Lower.stl" to "Leg Left Upper.stl" using "Axle Leg Lower.stl". The lower leg should pivot freely.
Attach "Leg Right Lower.stl" to "Leg Right Upper.stl" using the remaining "Axle Leg Lower.stl". Again, the lower leg should pivot freely.
Attach the left leg assembly to the left side of the torso using one "Axle Arm Leg Torso.stl" as shown. The assembly should pivot freely.
Attach the right leg assembly to the right side of the torso using the remaining "Axle Arm Leg Torso.stl" as shown. Again, the assembly should pivot freely.
3) Assemble the Crank.
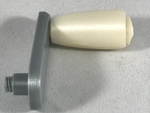
Slide "Crank Bold.stl" into "Crank Knob.stl" as shown. Thread this assembly into "Crank.stl".
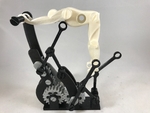
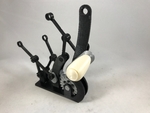
4) Assemble the Base.
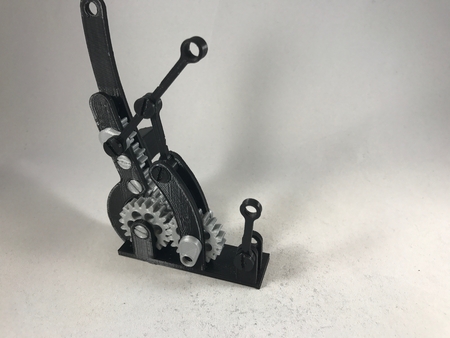
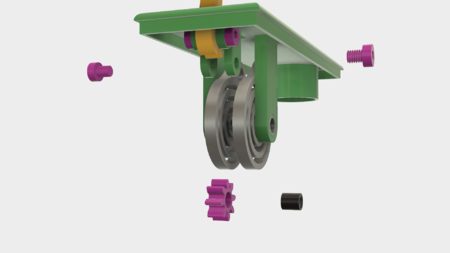
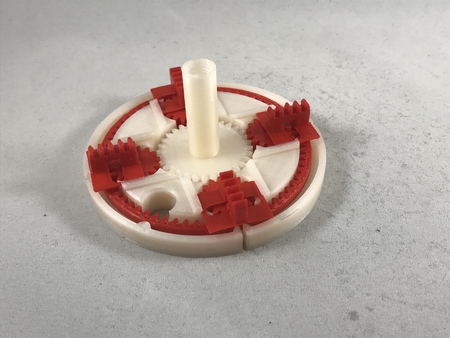
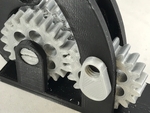
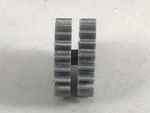
Use "Axle Gear Idler.stl" to join two "Spur Gear (20 teeth).stl" to make the large idler assembly. Make sure the assembly is tight, the teeth of the spur gears align, and the two gears are parallel to each other as shown. Slide this assembly into "Base.stl" in the position shown and secure in place with two "Axle Gear.stl". Once secure, the large idler assembly should spin freely in the base.
Install the remaining "Spur Gear (20 teeth).stl" into the base as shown and secure in place using two "Eccentric Leg.stl". When securely tightened the two eccentrics must be 180 degrees apart from each other (when one eccentric is pointing straight up, the other must be pointing straight down). If when securely tightened the two eccentrics are not 180 degrees apart, remove them, make a small ball using a 4mm square piece of tissue, place it inside the gear threads, then reinstall the eccentrics and try again. When complete, the gears should spin freely in the base.
Install the first "Spur Gear (10 teeth).stl" into the lowest spur gear 10 teeth position in the base as shown and secure in place using two "Axle Gear.stl". Test to make sure the gears spin freely in the base.
Install the second "Spur Gear (10 teeth).stl" into the highest spur gear 10 teeth position in the base as shown and secure in place using one "Axle Gear.stl" and one "Eccentric Torso.stl". The gear should spin freely in the base.
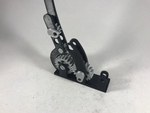
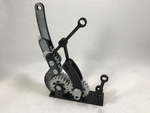
The final spur gear 10 teeth is installed last, in the center spur gear 10 teeth position. After this gear is installed, "Eccentric Torso.stl" must be pointing to the rear of the base (to the right in the photograph), and the left "Eccentric Leg.stl" must be pointing straight down. To accomplish this, rotate the left "Eccentric Leg.stl" so that it points straight down, and rotate "Eccentric Torso.stl" such that it points straight down, then slide the final "Spur Gear (10 teeth).stl" into position between the first two "Spur Gear (10 teeth).stl". When sliding the final spur gear into position, hold "Eccentric Leg.stl" pointing downward, and allow "Eccentric Torso.stl" to rotate into position. Secure the final spur gear 10 teeth into position using one "Axle Gear.stl", and crank assembly as shown. Make sure all gears are spinning freely.
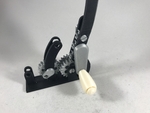
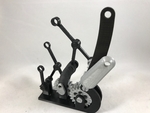
Install "Arm Torso Short.stl" into the base in the position shown using "Axle Arm Torso.stl". The arm should pivot freely in the base. Next install "Arm Torso Long.stl" into position as shown using two "Axle Arm.stl". Attach the end of "Arm Torso Long.stl" that has a small dot on the arm face to "Eccentric Torso.stl", and the center to "Arm Torso Short.stl". The gears should spin freely after these arms are installed.
Install one "Arm Leg Short.stl" into the base in the position shown using one "Axle Arm.stl". The arm should pivot freely in the base. Next install "Arm Leg Long.stl" into position as shown using two "Axle Arm.stl". Attach the end of "Arm Leg Long.stl" that does not have a small dot on the arm face to "Eccentric Leg.stl", and the center to "Arm Leg Short.stl". The gears should spin freely after these arms are installed. Repeat this process for the remaining side.
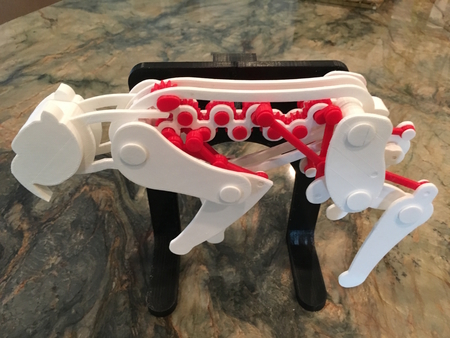
5) Attach the Character to the Base.
Attach the Characters arms to the base using "Axle Arms.stl" as shown.
Attach the Characters torso to "Arm Torso Long.stl" using "Axle Torso.stl" as shown.
Attach the Characters Legs to the two "Arm Leg Long.stl" using two "Axle Arms.stl" as shown.
Congratulations, you are done!
Hope you enjoy it!
Designer
Greg Zumwalt3d model description
A smaller version of Perseverance."Perseverance, Petite" is a smaller version of my original Perseverance design (inspired by a Disney Research ...animation study video) of June, 2014. Perseverance, Petite utilizes threaded assembly as opposed to the press fit assembly of the original, and as such travels better. And being smaller, it takes up less of my desktop (which is becoming quite crowded).
The solar powered motorized version is coming soon:
As usual, I probably forgot a file or two or who knows what else, so if you have any questions, please do not hesitate to ask as I do make mistakes in plenty.
Designed using Autodesk Fusion 360, sliced using Cura 2.3.1, and printed in PLA on an Ultimaker 2+ Extended and an Ultimaker 3 Extended.
3d model print parameters
1) Print and Prepare the Parts.I printed all parts on an Ultimaker 2+ Extended and an Ultimaker 3 Extended at .1mm vertical resolution. I've attac...hed a PDF containing the name, count, infill, brim and raft settings for each of the parts.
Prior to assembly, test fit and trim, file, sand, etc. all parts as necessary for smooth movement of moving surfaces, and tight fit for non moving surfaces. Depending on the colors you chose and your printer settings, more or less trimming, filing and/or sanding may be required. Carefully file all edges that contacted the build plate to make absolutely sure that all build plate "ooze" is removed and that all edges are smooth. I used small jewelers files and plenty of patience to perform this step.
This model uses threaded assembly and all threads are M6 by 1. Note in the PDF that I printed certain parts with threaded holes on a raft in order to make post printing clean up of these parts much easier. If after printing the threaded holes are difficult to install a part into, then use an M6 by 1 steel screw, or an M6 by 1 tap to clean them.
Note also I printed "Torso.stl", "Crank Bolt.stl", "Crank Knob.stl" and "Axle Gear Idler.stl" using a brim to assist in keeping these parts in place during printing.
2) Assemble the Character.
Attach the two "Arm.stl" to "Torso.stl" using two "Axle Arm Leg Torso.stl" as shown. The arms should pivot freely.
Attach "Leg Left Lower.stl" to "Leg Left Upper.stl" using "Axle Leg Lower.stl". The lower leg should pivot freely.
Attach "Leg Right Lower.stl" to "Leg Right Upper.stl" using the remaining "Axle Leg Lower.stl". Again, the lower leg should pivot freely.
Attach the left leg assembly to the left side of the torso using one "Axle Arm Leg Torso.stl" as shown. The assembly should pivot freely.
Attach the right leg assembly to the right side of the torso using the remaining "Axle Arm Leg Torso.stl" as shown. Again, the assembly should pivot freely.
3) Assemble the Crank.
Slide "Crank Bold.stl" into "Crank Knob.stl" as shown. Thread this assembly into "Crank.stl".
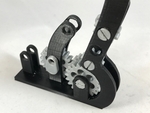
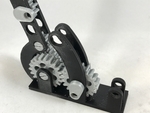
4) Assemble the Base.
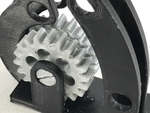
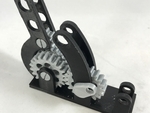
Use "Axle Gear Idler.stl" to join two "Spur Gear (20 teeth).stl" to make the large idler assembly. Make sure the assembly is tight, the teeth of the spur gears align, and the two gears are parallel to each other as shown. Slide this assembly into "Base.stl" in the position shown and secure in place with two "Axle Gear.stl". Once secure, the large idler assembly should spin freely in the base.
Install the remaining "Spur Gear (20 teeth).stl" into the base as shown and secure in place using two "Eccentric Leg.stl". When securely tightened the two eccentrics must be 180 degrees apart from each other (when one eccentric is pointing straight up, the other must be pointing straight down). If when securely tightened the two eccentrics are not 180 degrees apart, remove them, make a small ball using a 4mm square piece of tissue, place it inside the gear threads, then reinstall the eccentrics and try again. When complete, the gears should spin freely in the base.
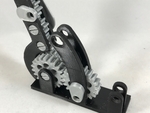
Install the first "Spur Gear (10 teeth).stl" into the lowest spur gear 10 teeth position in the base as shown and secure in place using two "Axle Gear.stl". Test to make sure the gears spin freely in the base.
Install the second "Spur Gear (10 teeth).stl" into the highest spur gear 10 teeth position in the base as shown and secure in place using one "Axle Gear.stl" and one "Eccentric Torso.stl". The gear should spin freely in the base.
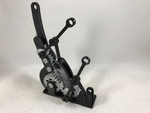
The final spur gear 10 teeth is installed last, in the center spur gear 10 teeth position. After this gear is installed, "Eccentric Torso.stl" must be pointing to the rear of the base (to the right in the photograph), and the left "Eccentric Leg.stl" must be pointing straight down. To accomplish this, rotate the left "Eccentric Leg.stl" so that it points straight down, and rotate "Eccentric Torso.stl" such that it points straight down, then slide the final "Spur Gear (10 teeth).stl" into position between the first two "Spur Gear (10 teeth).stl". When sliding the final spur gear into position, hold "Eccentric Leg.stl" pointing downward, and allow "Eccentric Torso.stl" to rotate into position. Secure the final spur gear 10 teeth into position using one "Axle Gear.stl", and crank assembly as shown. Make sure all gears are spinning freely.
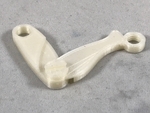
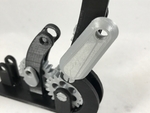
Install "Arm Torso Short.stl" into the base in the position shown using "Axle Arm Torso.stl". The arm should pivot freely in the base. Next install "Arm Torso Long.stl" into position as shown using two "Axle Arm.stl". Attach the end of "Arm Torso Long.stl" that has a small dot on the arm face to "Eccentric Torso.stl", and the center to "Arm Torso Short.stl". The gears should spin freely after these arms are installed.
Install one "Arm Leg Short.stl" into the base in the position shown using one "Axle Arm.stl". The arm should pivot freely in the base. Next install "Arm Leg Long.stl" into position as shown using two "Axle Arm.stl". Attach the end of "Arm Leg Long.stl" that does not have a small dot on the arm face to "Eccentric Leg.stl", and the center to "Arm Leg Short.stl". The gears should spin freely after these arms are installed. Repeat this process for the remaining side.
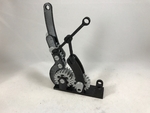
5) Attach the Character to the Base.
Attach the Characters arms to the base using "Axle Arms.stl" as shown.
Attach the Characters torso to "Arm Torso Long.stl" using "Axle Torso.stl" as shown.
Attach the Characters Legs to the two "Arm Leg Long.stl" using two "Axle Arms.stl" as shown.
Congratulations, you are done!
Hope you enjoy it!