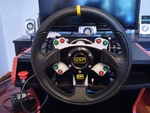
Shifter & buttons for simulator - wireless/wired 3D for print


3486 Views 1 Likes 0 Downloads Download the piece here from 3dforprint
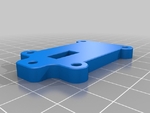
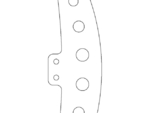
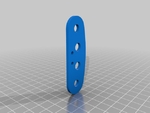
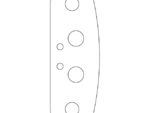
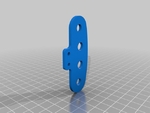
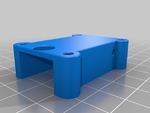
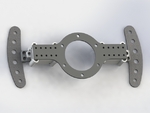
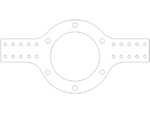
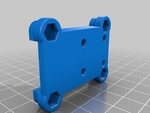
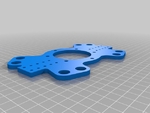
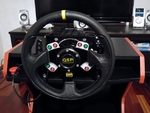
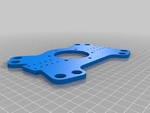
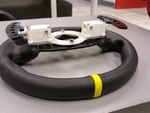
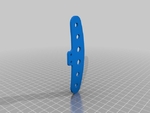
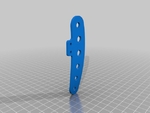
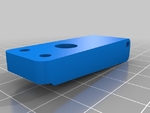
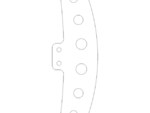
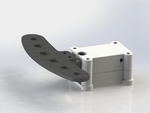
The complete shifter consists of two shifter assemblies and a base plate. The shifter unit and paddle hinge should be 3D printed. Paddle and steering wheel mount plate can be printed, but I recommend laser cutting or CNC milling for maximum rigidity.
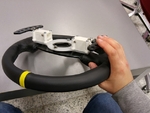
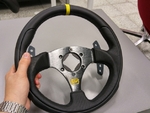
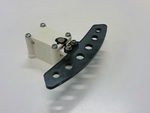
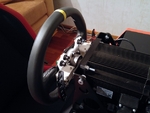
The shifter has a nice and well defined click. It is magnetically returned, and it uses a micro switch. It mounts to the back side of any steering wheel with standard 70 mm bolt pattern.
YouTube video showing paddle shifter operation:
https://www.youtube.com/watch?v=Pz5LogKsN7o
BOM:
Printed / laser / cnc-cut parts
4x 8mm dia, 5mm tall neodymium magnet
2x KW10 long r shaped lever micro switches (from ebay, 13 x 6 mm footprint)
10 mm M3 mounting hardware for paddle, shifter base mount and end-of-travel stop
28 mm M3 mounting hardware for shifter units
3 mm rod for paddle hinge
Some hot glue, epoxy or CA-glue
Notes: The parts are not in optimal print orientation. Rotate them before printing. Some nut holes are closed with 0,2 mm thick extrude to improve print quality, use a small drill or a file to open them after printing. The shifter paddle in real world pictures is different from the one that is available for download.
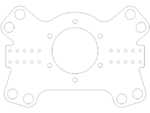
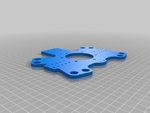
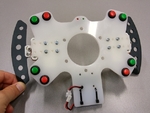
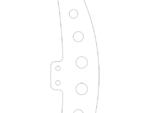
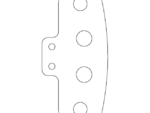
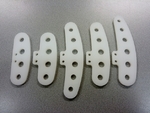
Update 1: Added a shifter mount plate with buttons. It accepts buttons with 12 mm mounting hole diameter. I used buttons with 16 mm housing outer diameter.
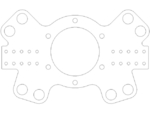
Update 2: Added shifter mount plate /w buttons version 2. The buttons are arranged further away from wheel center. This version also comes as a variant, that has mounting holes for wireless hardware & two status indicator leds
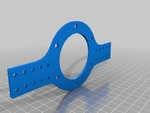
Update 3: Added wireless instructions, wireless base station enclosure and F1 style paddles
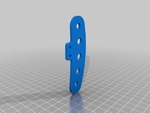
Update 4: Added a stronger paddle hinge to fix the small flex in the paddle. Print hinge with high infill. PLA, PETT or PETG recommended.
Wireless connectivity
Overview
This button & shifter combo can be made wireless via Bluetooth. The system has about 15ms of measured lag, which is about 1 frame in a game. The base station appears as a game controller for a PC. Building the wireless system requires some electrical skills. The wireless side was developed by me and my friend Mika, code is available in GitHub, compile with Arduino + Teensyduino IDE. https://github.com/mtakala/simracing_wireless_buttons
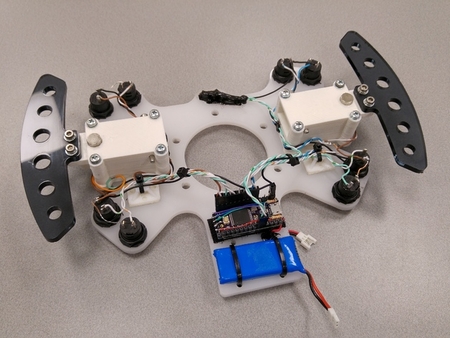
Wheel setup
Refer to software project git for exact wiring. Each button should be wired to one I/O pin in Teensy and ground of Teensy. Wheel software can read battery voltage, but the max voltage for Teensy ADC is 3.3V, thus voltage division is necessary. 10k + 3.3k divider works ok with max 4.2v (3.7v nominal) LiPo. The GND, VCC, TX, RX and status pins of HC-05 should be connected to Teensy. The battery and status indicator LEDs should have current limiting resistors of about 80 ohms if using regular LEDs. It is recommended to compile the wheel side with 24 MHz Teensy CPU speed to reduce current consumption and improve battery life. I am using 16 MHz no USB mode and it seems to work fine. With lower than stock Teensy clock speed, this setup works easily 12 hours, maybe up to 24 hours with 500 mAh battery. BOM: * Teensy 3.2 * HC-05 BT module * 3.7V LiPo, my lipo is 500mAh and ~ 48 x 20 x 8 mm * Two LEDs for battery and link status indication * Resistors for LEDs and battery voltage division
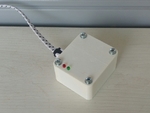
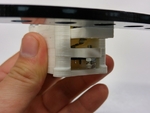
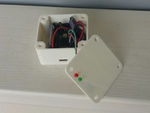
Base station setup
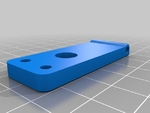
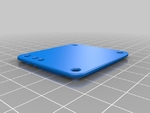
The base station is easy to wire up, the pre-configured HC-05 BT unit just has to be connected to Teensy, requiring power, TX, RX and status pin wires. The code in GitHub lists specific pins. USB HID is done via same USB port as programming. Compile with Teensy configured as USB FlightSimControls + Joystick. 72 MHz core clock recommended, although it should not matter much as the software is lightweight. BOM: * Teensy 3.2 * HC-05 BT module * 28 mm M3 bolts and nuts for enclosure * Some hot glue to mount electronics * LEDs and current limit resistors for power and connection indication (optional)
Designer
jkoljo3d model description
This is a paddle shifter system for 280 mm and larger diameter steering wheels with 70 mm bolt mounting pattern. This design can be built with only sh...ifters or shifters + buttons, wired or wireless via BT.The complete shifter consists of two shifter assemblies and a base plate. The shifter unit and paddle hinge should be 3D printed. Paddle and steering wheel mount plate can be printed, but I recommend laser cutting or CNC milling for maximum rigidity.
The shifter has a nice and well defined click. It is magnetically returned, and it uses a micro switch. It mounts to the back side of any steering wheel with standard 70 mm bolt pattern.
YouTube video showing paddle shifter operation:
https://www.youtube.com/watch?v=Pz5LogKsN7o
BOM:
Printed / laser / cnc-cut parts
4x 8mm dia, 5mm tall neodymium magnet
2x KW10 long r shaped lever micro switches (from ebay, 13 x 6 mm footprint)
10 mm M3 mounting hardware for paddle, shifter base mount and end-of-travel stop
28 mm M3 mounting hardware for shifter units
3 mm rod for paddle hinge
Some hot glue, epoxy or CA-glue
Notes: The parts are not in optimal print orientation. Rotate them before printing. Some nut holes are closed with 0,2 mm thick extrude to improve print quality, use a small drill or a file to open them after printing. The shifter paddle in real world pictures is different from the one that is available for download.
Update 1: Added a shifter mount plate with buttons. It accepts buttons with 12 mm mounting hole diameter. I used buttons with 16 mm housing outer diameter.
Update 2: Added shifter mount plate /w buttons version 2. The buttons are arranged further away from wheel center. This version also comes as a variant, that has mounting holes for wireless hardware & two status indicator leds
Update 3: Added wireless instructions, wireless base station enclosure and F1 style paddles
Update 4: Added a stronger paddle hinge to fix the small flex in the paddle. Print hinge with high infill. PLA, PETT or PETG recommended.
Wireless connectivity
Overview
This button & shifter combo can be made wireless via Bluetooth. The system has about 15ms of measured lag, which is about 1 frame in a game. The base station appears as a game controller for a PC. Building the wireless system requires some electrical skills. The wireless side was developed by me and my friend Mika, code is available in GitHub, compile with Arduino + Teensyduino IDE. https://github.com/mtakala/simracing_wireless_buttons
Wheel setup
Refer to software project git for exact wiring. Each button should be wired to one I/O pin in Teensy and ground of Teensy. Wheel software can read battery voltage, but the max voltage for Teensy ADC is 3.3V, thus voltage division is necessary. 10k + 3.3k divider works ok with max 4.2v (3.7v nominal) LiPo. The GND, VCC, TX, RX and status pins of HC-05 should be connected to Teensy. The battery and status indicator LEDs should have current limiting resistors of about 80 ohms if using regular LEDs. It is recommended to compile the wheel side with 24 MHz Teensy CPU speed to reduce current consumption and improve battery life. I am using 16 MHz no USB mode and it seems to work fine. With lower than stock Teensy clock speed, this setup works easily 12 hours, maybe up to 24 hours with 500 mAh battery. BOM: * Teensy 3.2 * HC-05 BT module * 3.7V LiPo, my lipo is 500mAh and ~ 48 x 20 x 8 mm * Two LEDs for battery and link status indication * Resistors for LEDs and battery voltage division
Base station setup
The base station is easy to wire up, the pre-configured HC-05 BT unit just has to be connected to Teensy, requiring power, TX, RX and status pin wires. The code in GitHub lists specific pins. USB HID is done via same USB port as programming. Compile with Teensy configured as USB FlightSimControls + Joystick. 72 MHz core clock recommended, although it should not matter much as the software is lightweight. BOM: * Teensy 3.2 * HC-05 BT module * 28 mm M3 bolts and nuts for enclosure * Some hot glue to mount electronics * LEDs and current limit resistors for power and connection indication (optional)