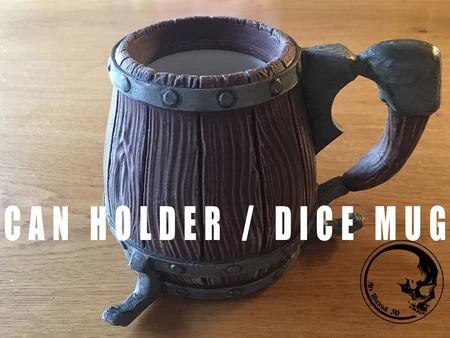
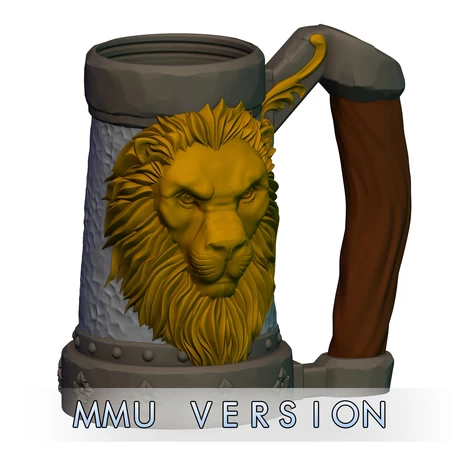
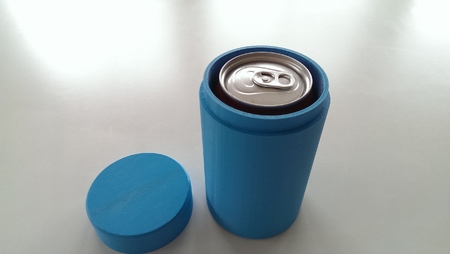
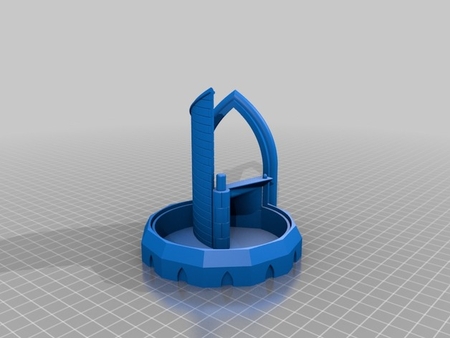
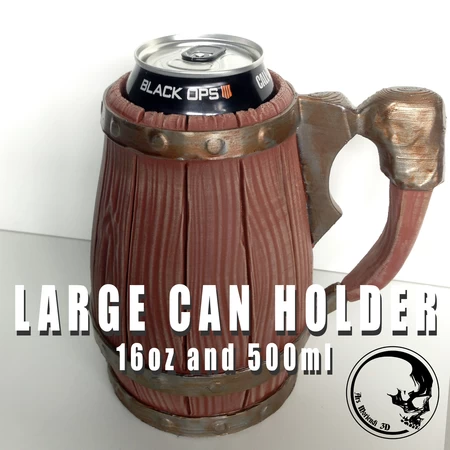
16oz and 500ml can holder, now including 12oz fl (slim), 23oz, 23.5oz, and 25oz 3D for print


1704 Views 0 Likes 0 Downloads Download
https://arsmoriendi3d.com/
Wondering how to paint them? Check out this great video tutorial made ...by Gaming Geek (linked with permission).
https://www.youtube.com/watch?v=tiAM-7UmqrQ&feature=youtu.be&t=394/
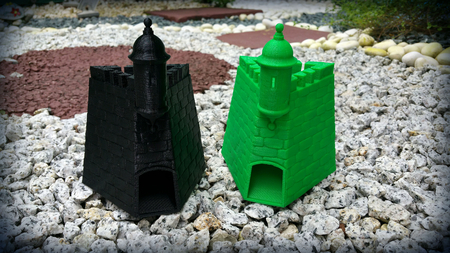
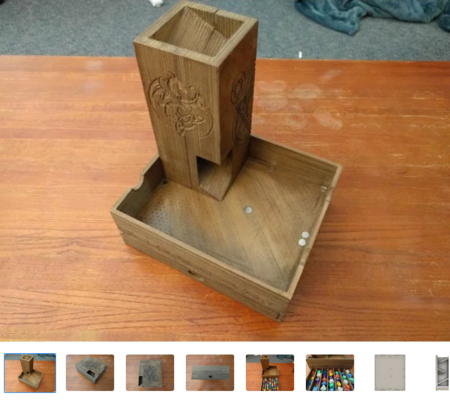
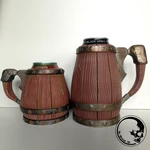
A larger version of the mug was requested and here it is. There are two versions, one for EU 500ml cans and for US 16oz cans. Or simply just room for a lot more dice!
EDIT:
The mugs have been updated and all of the existing mug sizes come in all three variations now! You can get the latest versions here:
33cl
https://cults3d.com/en/3d-model/home/can-holder-33cl
50cl
https://cults3d.com/en/3d-model/home/can-holder-50cl
12oz
https://cults3d.com/en/3d-model/game/can-holder-12oz
12oz fl (slim)
https://cults3d.com/en/3d-model/game/can-holder-12-fl-oz
16oz
https://cults3d.com/en/3d-model/game/can-holder-16oz
23, 23.5, and 25oz
https://cults3d.com/en/3d-model/game/can-holder-23-23-5-and-25oz
The biggest mug (The Beast!) should be compatible with all these sizes: 23, 23.5, and 25oz. A huge thanks to David Washburn, "dcwsaranac", for helping me test print and make this possible!
Creality
Printer:
Ender 3 Pro
Resolution:
0.2-0.3
Infill:
10%
Notes:
Please note that the model is a hi-res mode...l and might be heavy to handle.
Took around 18 hours to print with 0.3 mm layer height and 24 hours with 0.2 mm layer height. There's actually not much of a difference between 0.2 and 0.3, so I can recommend a higher layer height if the printer can handle it.
Post-Printing
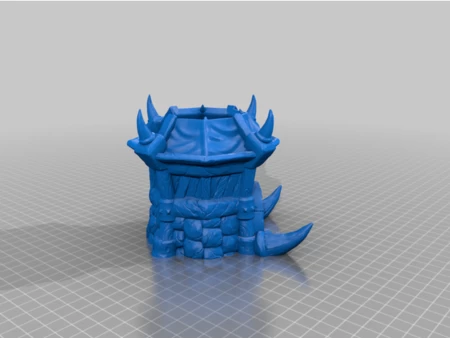
HOW TO PAINT A MUG
Here's a simple painting tutorial on how I painted this mug.
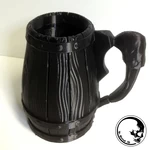
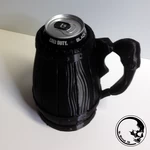
Step 1: Base coat the mug. Spray it either a dark brown or black. This will make the next steps of colors stick better.
Step 2. Paint in the flat dark brown color if you spray painted it black.
Step 3. Use a flat wide brush, around 15-30mm wide. Use or mix a lighter brown color and work it into the brush tip, then wipe it all off in a paper towel. This leaves a very "dry" paint left in the brush that you can brush across the wooden veins. If in doubt, try to brush over your knuckles to test it out. (This technique is called dry-brushing).
Step 4. Mix again a lighter color, up to a near white, wipe it off again and dry-brush, but this time doing it even more gently, so it doesn't cover your previous layer too much.
That's basically how the wood was painted!
The metal parts were first base coated with a metal color. When dry, I used a very diluted black and orange to give the metal a bit of a rusty look. You want this diluted paint to be -very- diluted with water.
Done!
Designer
Ars Moriendi 3D3d model description
Check out all of the Mythic Mugs in our webshop!https://arsmoriendi3d.com/
Wondering how to paint them? Check out this great video tutorial made ...by Gaming Geek (linked with permission).
https://www.youtube.com/watch?v=tiAM-7UmqrQ&feature=youtu.be&t=394/
A larger version of the mug was requested and here it is. There are two versions, one for EU 500ml cans and for US 16oz cans. Or simply just room for a lot more dice!
EDIT:
The mugs have been updated and all of the existing mug sizes come in all three variations now! You can get the latest versions here:
33cl
https://cults3d.com/en/3d-model/home/can-holder-33cl
50cl
https://cults3d.com/en/3d-model/home/can-holder-50cl
12oz
https://cults3d.com/en/3d-model/game/can-holder-12oz
12oz fl (slim)
https://cults3d.com/en/3d-model/game/can-holder-12-fl-oz
16oz
https://cults3d.com/en/3d-model/game/can-holder-16oz
23, 23.5, and 25oz
https://cults3d.com/en/3d-model/game/can-holder-23-23-5-and-25oz
The biggest mug (The Beast!) should be compatible with all these sizes: 23, 23.5, and 25oz. A huge thanks to David Washburn, "dcwsaranac", for helping me test print and make this possible!
3d model print parameters
Printer brand:Creality
Printer:
Ender 3 Pro
Resolution:
0.2-0.3
Infill:
10%
Notes:
Please note that the model is a hi-res mode...l and might be heavy to handle.
Took around 18 hours to print with 0.3 mm layer height and 24 hours with 0.2 mm layer height. There's actually not much of a difference between 0.2 and 0.3, so I can recommend a higher layer height if the printer can handle it.
Post-Printing
HOW TO PAINT A MUG
Here's a simple painting tutorial on how I painted this mug.
Step 1: Base coat the mug. Spray it either a dark brown or black. This will make the next steps of colors stick better.
Step 2. Paint in the flat dark brown color if you spray painted it black.
Step 3. Use a flat wide brush, around 15-30mm wide. Use or mix a lighter brown color and work it into the brush tip, then wipe it all off in a paper towel. This leaves a very "dry" paint left in the brush that you can brush across the wooden veins. If in doubt, try to brush over your knuckles to test it out. (This technique is called dry-brushing).
Step 4. Mix again a lighter color, up to a near white, wipe it off again and dry-brush, but this time doing it even more gently, so it doesn't cover your previous layer too much.
That's basically how the wood was painted!
The metal parts were first base coated with a metal color. When dry, I used a very diluted black and orange to give the metal a bit of a rusty look. You want this diluted paint to be -very- diluted with water.
Done!
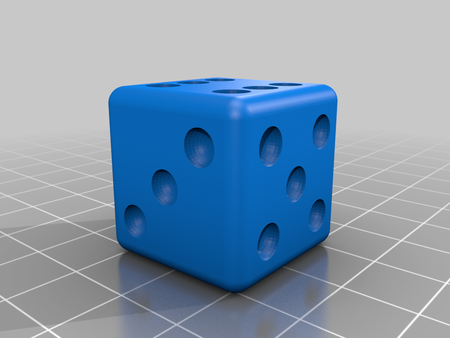
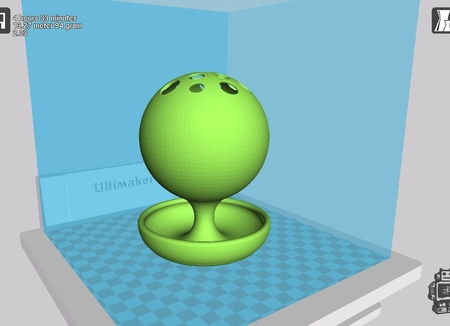
![Dice Holder [D6]](https://www.3dforprint.com/modelos/1184/dice-holder-d1_medium.jpg)