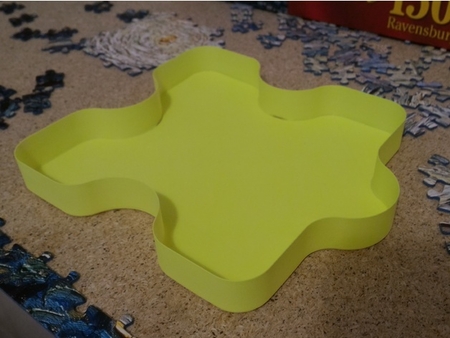
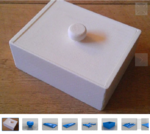
Centrifugal puzzel box 3D for print


 Centrifugal puzzel box  3d model for 3d printers

 Centrifugal puzzel box  3d model for 3d printers
947 Views 0 Likes 0 Downloads Download

Designer

richards

3d model description

This is my design for a puzzle box that uses centrifugal force to open the locks. I have seen centrifugal boxes before but none that had the locking m...echanism totally in the lid,
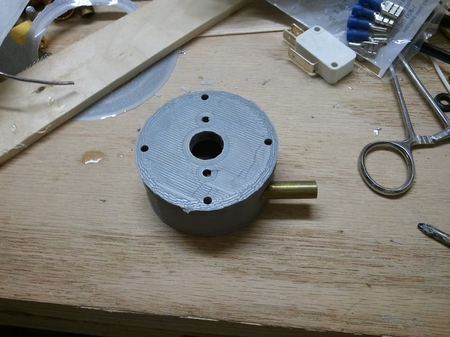
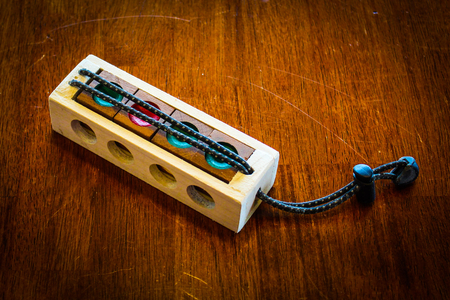
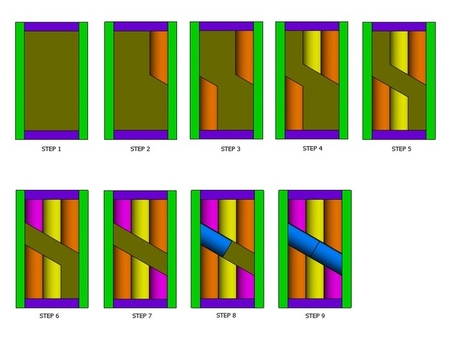
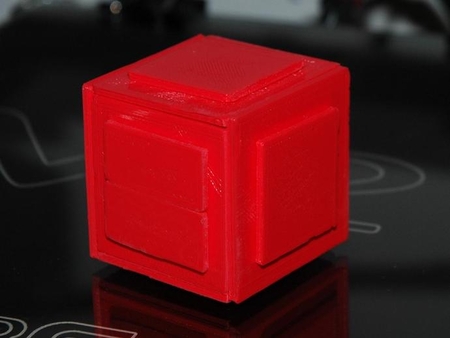
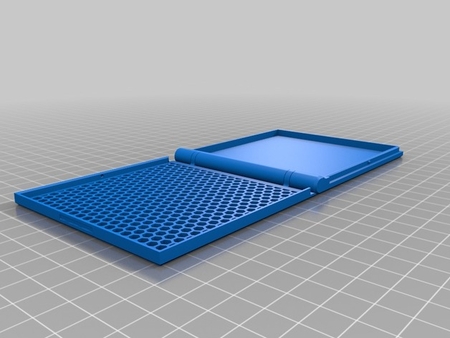
This design includes an anti-pick mechanism that locks the locking slides in place to prevent opening by random shaking or tilting, a problem with my first prototype.
To unlock just spin (quite fast) and then lift the lid.
To lock, make sure the locks are in the unlock position, if not then just spin the lid to reset them. Then replace the lid and shake the box along its long axis. You will hear the locks engage and lock into place.
Enjoy.


3d model print parameters

You will need the following parts as well as the printed parts: 6 x UK 1p coins (or equivalent coins - US 1 Cent / washers, 20mm diameter) 2 x UK 2p c...oins (or equivalent coins - US Quarter / washers, 26mm diameter) 1 x small elastic band. 4 x M3 x 10mm screws (8-12mm will be ok) - optional. Lid: Print out the following: 2 x lock 2 x slide 1 x lid 1 x lid_floor 1 x handle For the Base I have given two options; For people who are using PLA or are gurus at printing ABS boxes without corner distortion there is the complete box base (base). For lesser mortals such as myself I have split it into 3 parts, print: 2 x base_side1 2 x base_side2 1 x base_floor Glue together. Lid Assembly: Please refer to the photos for more info. You will require some washers or coins to make the box work. Its been designed for use with UK 1p and 2p pieces but should work with any metal disks that will add some mass, the more the better it will work. I will be referring to 1p and 2p coins in the description. To assemble the locking pieces glue a 1p coin in the bottom of each lock. Cut a small elastic band and tie a knot or two in the end. Thread through from the inside of a locking piece to the inside of the other locking piece, Use one of the slides as a spacer and place the locks either side of the locking notch in the centre. Pull the elastic band so its straight but not stretched. Glue the elastic band in place and glue in two more 1p coins into the top of each lock. You should have an assembly like the one pictured. Don't worry too much about getting the tension right just now, it can be adjusted tighter in the final assembly. Glue two 2p coins into the recesses in each slide. Allow enough time for the glue to fully set. Using sandpaper or a fine file give all surfaces a clean. The smoother these are the better the box will work. This will also remove any excess glue. Final assembly: The pillars in the lid have 4 holes that can be threaded M3 if you have some m3 screws available (or use self-tapping), if not the lid_base can be carefully glued into place in the last stage. If you have screws then tap the 4 pillars on the underside of the lid been careful not to strip or drive the tap too far in that it marks the top of the lid. Glue the handle to the top of the lid. Assemble the lock as follows. Put into the lid over the four posts a slide with the coin visible. Next put the locking pieces in, one with the coins showing, the other with the coins to the lid (see photo) Put the second slide over the posts rotated so the coin is at the opposite end of the lid to the first slide and so the coin is not visible (recess towards the lid). Hold the lid_base in place and hold the lid on its side. By moving the slides with your fingers you should feel the slide lock into place. Test both slides. Pressure will overcome the locks, don't worry, you just want them to engage and resist movement. Repeat the test for both slides with the box on its other side. If one of the slides moves freely and does not lock with the lid is on its side then the elastic band is not tight enough. Just remove the top slide and lift a lock out giving it a 360 degree twist, this will tighten the elastic band and give more locking force. Repeat the above test until you are happy with the locking force. The more force the harder the box will be to open. You want the locks to operate without making the box difficult to spin fast enough. Finally glue or screw the lid_base in place and test the final puzzle box. I hope this give you as mush fun as I have had designing it.

Tags

Box Centrifugal Puzzle

License

CC Atribution

Related 3d models with tags

Small water pump

Small water pump

Rope / Ring Puzzle

Rope / Ring Puzzle

Disentanglement Puzzle

Disentanglement Puzzle

35x35 12VDC UM2 family Centrifugal Fan Shroud

35x35 12VDC UM2 family Centrifugal Fan Shroud

Instant Insanity Puzzle

Instant Insanity Puzzle

Rope Puzzle

Rope Puzzle

Impossible Nut & Bolt Puzzle

Impossible Nut & Bolt Puzzle

Pin Puzzle

Pin Puzzle

Dowel Puzzle

Dowel Puzzle

UM2 Centrifugal Fans Duct

UM2 Centrifugal Fans Duct

Oliver String Puzzle

Oliver String Puzzle

(Almost) Impossible Puzzle Box

(Almost) Impossible Puzzle Box

Block and Pin Puzzle

Block and Pin Puzzle

Puzzle Cube

Puzzle Cube

Barrel Puzzle

Barrel Puzzle

Black Nightmare Puzzle Box

Black Nightmare Puzzle Box

Elastic Cubes Puzzle Therapy

Elastic Cubes Puzzle Therapy

Burr Puzzle

Burr Puzzle

Puzzle of Evil

Puzzle of Evil

Cthulhu Puzzle Box

Cthulhu Puzzle Box

Animals Puzzle

Animals Puzzle

3D Puzzle - Pyramid

3D Puzzle - Pyramid

Impossible Object! Triangle + Circle + Square Puzzle

Impossible Object! Triangle + Circle + Square Puzzle

Small Travel Puzzle

Small Travel Puzzle

Slideways Cube Puzzle

Slideways Cube Puzzle

Impossible Dovetail Puzzle Box

Impossible Dovetail Puzzle Box

Puzzle pieces tray

Puzzle pieces tray

XYZ Puzzle

XYZ Puzzle

Apparently Impossilbe Egg- Large

Apparently Impossilbe Egg- Large