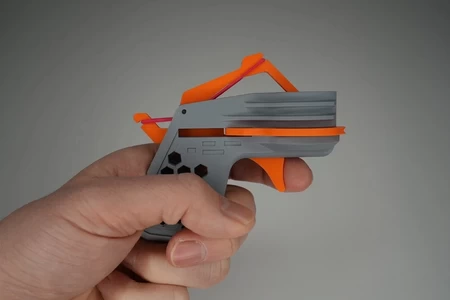
Pea shooter 3D for print


570 Views 0 Likes 0 Downloads Download
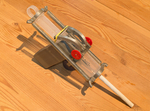
- Print out all parts.
- Mount the handle with 3 x (...3 x 20)mm screws and 3 nuts.
The foremost hole remains empty (yet).
- Bead the "clamps" and "brackets" on the (3 x 60)mm screw
and the foremost hole.
Install washers on both sides of each "clamp" (see image).
- Add 2 nuts on each side of the screw (counternut)
or use locking nuts (I used 2 red plastic gears).
- Insert the (3 x 65)mm bolt through the rearmost holes of the "clamps".
Let 5mm jut out on each side (for rubber band). Fix bolt with glue.
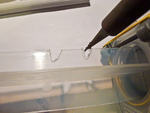
- Use a soldering iron or a side cutter to cut a triangle shaped
flute into the upper part of the syringes piston (see image).
- Apply some drops of oil to the rubber seal of the syringe.
- Attach the front and rear "brackets" and mount the springs.
- Fix the rubber band that pulls down the "clamps".
- Clip the barrel (bird perch) onto the syringe.
BOM:
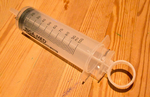
- 1 x 100ml bladder syringe, 40mm diameter, round handle
- 2 x 100mm tension spring or 2 strong rubber bands
- 1 x rubber band
- 1 x plastic bird perch, hollow (8-10mm diameter inside)
- 1 x 3mm bolt, length 65mm
- 1 x 3mm screw or thread rod, 60mm
- 3 x 3mm screw, 20mm
- 7 x 3mm nut
- 4 x 3mm washer
- a few drops of oil for the syringe
TOOLS:
- screwdriver
- soldering iron (best set to 250°C) or side cutter
Designer
FMMT6663d model description
A printable pea shooter, made of a syringe, springs from a desk lamp and a few printed parts.- Print out all parts.
- Mount the handle with 3 x (...3 x 20)mm screws and 3 nuts.
The foremost hole remains empty (yet).
- Bead the "clamps" and "brackets" on the (3 x 60)mm screw
and the foremost hole.
Install washers on both sides of each "clamp" (see image).
- Add 2 nuts on each side of the screw (counternut)
or use locking nuts (I used 2 red plastic gears).
- Insert the (3 x 65)mm bolt through the rearmost holes of the "clamps".
Let 5mm jut out on each side (for rubber band). Fix bolt with glue.
- Use a soldering iron or a side cutter to cut a triangle shaped
flute into the upper part of the syringes piston (see image).
- Apply some drops of oil to the rubber seal of the syringe.
- Attach the front and rear "brackets" and mount the springs.
- Fix the rubber band that pulls down the "clamps".
- Clip the barrel (bird perch) onto the syringe.
BOM:
- 1 x 100ml bladder syringe, 40mm diameter, round handle
- 2 x 100mm tension spring or 2 strong rubber bands
- 1 x rubber band
- 1 x plastic bird perch, hollow (8-10mm diameter inside)
- 1 x 3mm bolt, length 65mm
- 1 x 3mm screw or thread rod, 60mm
- 3 x 3mm screw, 20mm
- 7 x 3mm nut
- 4 x 3mm washer
- a few drops of oil for the syringe
TOOLS:
- screwdriver
- soldering iron (best set to 250°C) or side cutter