Us bobber caboose scale 1/32 - openrailway 3D for print


5218 Views 1 Likes 0 Downloads Download the piece here from 3dforprint
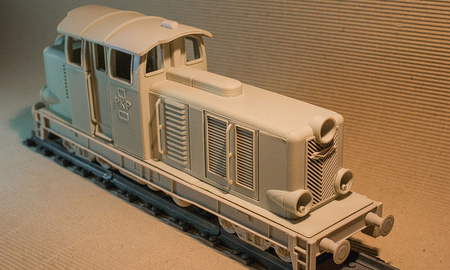
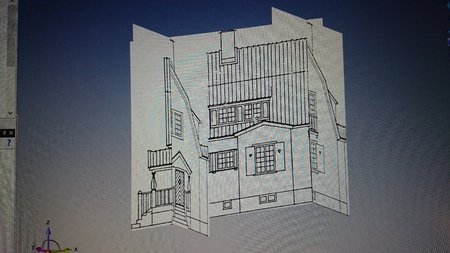
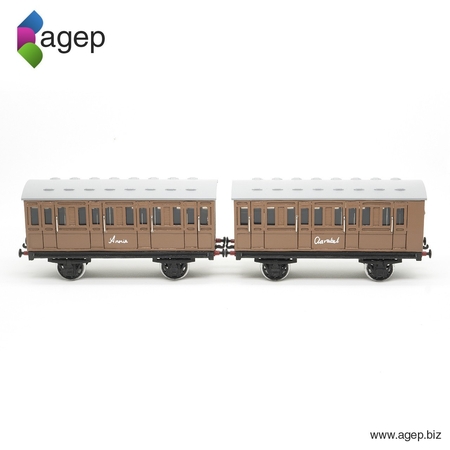
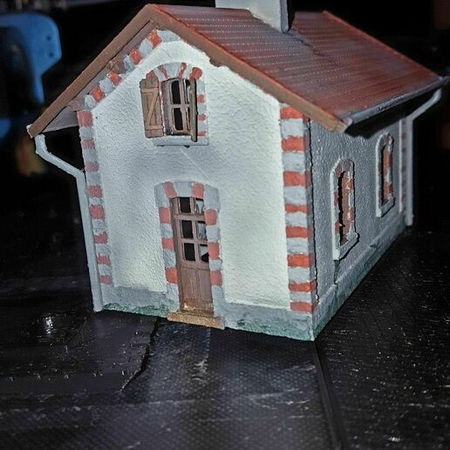
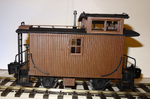
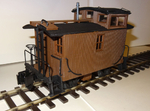
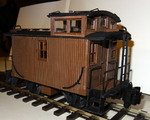
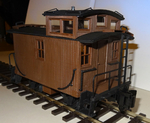
This is a scale (1/32) model of a Bobber Caboose for a garden railway (runs on 45mm tracks). Cabooses ar...e manned North American railroad cars coupled at the end of a freight train. Early cabooses were named "Way cars". This model with a cupola began its service in the late 1890s. The 2 axles Bobber caboose was known for the uneven ride its lack of trucks created. The model uses 3 mm wheel axles.
Rafts: No
Supports: Yes
Resolution: 0.1 mm or 0.2 mm
Infill: 30-40%
I've printed everything in ABS (easier to sand/file an...d to glue) on a heated bed (100°) coated with a 3D adhesive spray.
The stairs need support and must be printed with 0.3 mm wall thickness.
The cupola is a bit tricky to print as there are big overhangs. I've included a file with support but the result is uneven and the file without support can give better results, depending on your printer.
All the small pieces are printed with a 0.1mm layer thickness and the bigger ones with 0.2 mm.
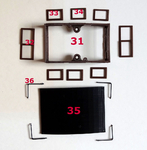
The roofs are printed vertically and are provided with an easily removable brim (I've added a version of the bigger one without brim for those who can't print it vertically).
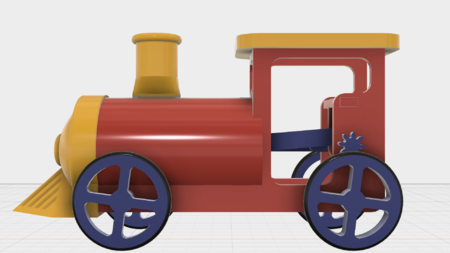
Bobber cabooses where usually painted a brownish red but also bright red or yellow. This model existed with or without a central window on the cupola. Both versions are available in the STL files.
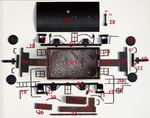
First assemble the wheels, outer axles and axles (better use metal shafts 3mm in diameter if you want your model rolling).
Insert the axle holders into the slots at the bottom of the cabin by tilting them outwards (the hinges of the tool box must be on the side opposite to the cupola). Insert the wheels assembly and then screw the toolbox to the bottom of the cabin with a 2x10 (or 2x12) mm screw. When the wheels are well adjusted, you can glue the axle holder in place to get a better rigidity. Glue the four brakes in the corresponding holes. Screw the coupler holders in place with two 2.5 mm screws on each side.
Glue all the windows in the cabin and the cupola (glue first clear plastic sheets on the inner side of the windows).
Glue a scrap of ABS to the inner side on the roof, to cover the chimney hole.
Insert the beam holding the roof and the cupola with the notched ends upwards (glue it when everything fits) and with the two close holes to the cupola side. Screw the cupola to the beam through the roof with two 2.5 mm screws. Use a 2 mm screw to hold the roof on the other side. Then screw the cupola roof with two 2mm screws.
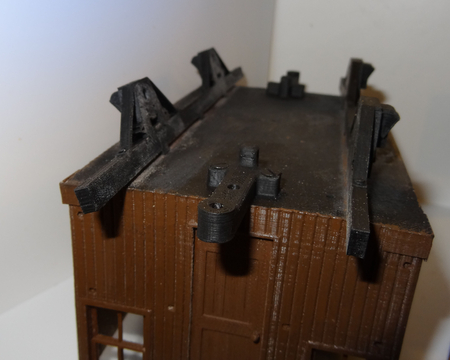
Glue the chimney (after gluing its parts together) in its hole and the front and rear gangways in their corresponding holes (the rear gangway and the lateral part of the front gangway can be bent to follow the curve of the roof).
Glue the handrails to the lateral and front sides of the cabin.
Glue the platforms (the one with the hole for the brake wheel is on the side opposite to the cupola).
Insert the big guardrail into the ladder (to make one of the rungs) and glue the assembly into the corresponding holes of the platforms (adjust the ladder so its upper part rests against the roof). Glue the two handles on the front side of the platforms. Glue the brake wheel in the remaining hole of the front platform.
Glue the handrails on the cupola roof and the handles on the gangways and you're done.
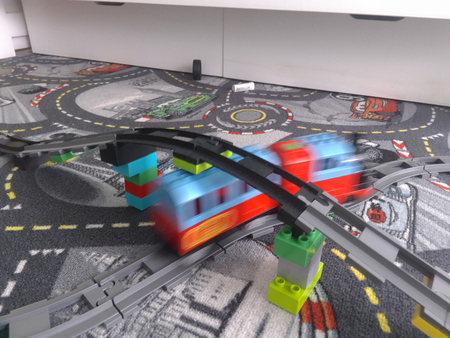
Now you can install your favorite coupler and get your caboose rolling.
Designer
raby3d model description
1/32 scale Bobber Caboose for garden railwayThis is a scale (1/32) model of a Bobber Caboose for a garden railway (runs on 45mm tracks). Cabooses ar...e manned North American railroad cars coupled at the end of a freight train. Early cabooses were named "Way cars". This model with a cupola began its service in the late 1890s. The 2 axles Bobber caboose was known for the uneven ride its lack of trucks created. The model uses 3 mm wheel axles.
3d model print parameters
Printer: Vertex 8400Rafts: No
Supports: Yes
Resolution: 0.1 mm or 0.2 mm
Infill: 30-40%
I've printed everything in ABS (easier to sand/file an...d to glue) on a heated bed (100°) coated with a 3D adhesive spray.
The stairs need support and must be printed with 0.3 mm wall thickness.
The cupola is a bit tricky to print as there are big overhangs. I've included a file with support but the result is uneven and the file without support can give better results, depending on your printer.
All the small pieces are printed with a 0.1mm layer thickness and the bigger ones with 0.2 mm.
The roofs are printed vertically and are provided with an easily removable brim (I've added a version of the bigger one without brim for those who can't print it vertically).
Bobber cabooses where usually painted a brownish red but also bright red or yellow. This model existed with or without a central window on the cupola. Both versions are available in the STL files.
First assemble the wheels, outer axles and axles (better use metal shafts 3mm in diameter if you want your model rolling).
Insert the axle holders into the slots at the bottom of the cabin by tilting them outwards (the hinges of the tool box must be on the side opposite to the cupola). Insert the wheels assembly and then screw the toolbox to the bottom of the cabin with a 2x10 (or 2x12) mm screw. When the wheels are well adjusted, you can glue the axle holder in place to get a better rigidity. Glue the four brakes in the corresponding holes. Screw the coupler holders in place with two 2.5 mm screws on each side.
Glue all the windows in the cabin and the cupola (glue first clear plastic sheets on the inner side of the windows).
Glue a scrap of ABS to the inner side on the roof, to cover the chimney hole.
Insert the beam holding the roof and the cupola with the notched ends upwards (glue it when everything fits) and with the two close holes to the cupola side. Screw the cupola to the beam through the roof with two 2.5 mm screws. Use a 2 mm screw to hold the roof on the other side. Then screw the cupola roof with two 2mm screws.
Glue the chimney (after gluing its parts together) in its hole and the front and rear gangways in their corresponding holes (the rear gangway and the lateral part of the front gangway can be bent to follow the curve of the roof).
Glue the handrails to the lateral and front sides of the cabin.
Glue the platforms (the one with the hole for the brake wheel is on the side opposite to the cupola).
Insert the big guardrail into the ladder (to make one of the rungs) and glue the assembly into the corresponding holes of the platforms (adjust the ladder so its upper part rests against the roof). Glue the two handles on the front side of the platforms. Glue the brake wheel in the remaining hole of the front platform.
Glue the handrails on the cupola roof and the handles on the gangways and you're done.
Now you can install your favorite coupler and get your caboose rolling.