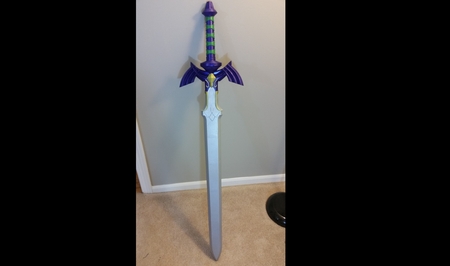
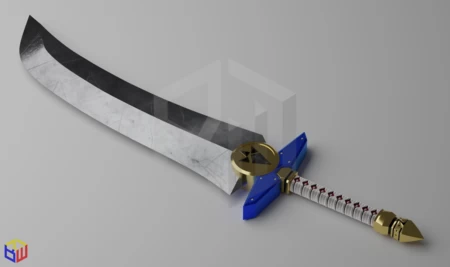
Master sword (no glue, assembles smooth! because banana bread wasn't enough for you people) 3D for print


2637 Views 0 Likes 0 Downloads Download
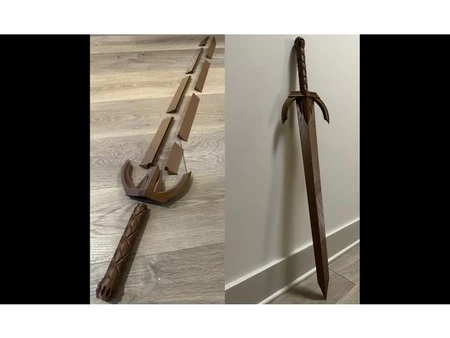
In case you haven't read my story about banana bread in the description of my last sword, I suggest starting there. TL;DR: I gave a clown a sword, tried to barter another sword for a loaf of bread, got rejected on Tinder, and posted it here instead.
Then, a couple thousand people thought it was pretty cool. So, thank you.
However, it wasn't enough for everyone. For some, there is only one sword that matters. My painstaking original designs cannot satisfy the fervor of these devoted, true believers. My banana sword—with its tiny, fragile pins that barely fit in thoose bizarrely angled holes—could never stand up to THE sword. The ONLY sword. The Master Sword… whatever that is.
Creativity is dead. Long live recycled ideas based off grainy reference images I found on the Zelda Wiki.
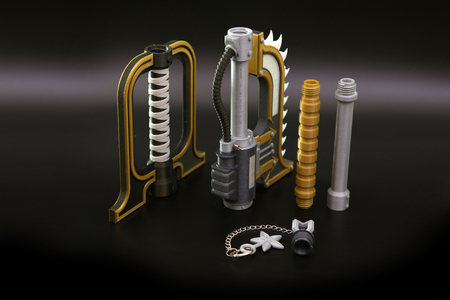
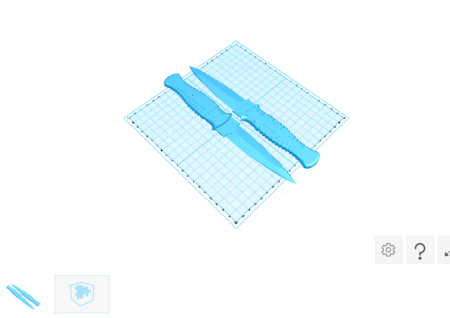
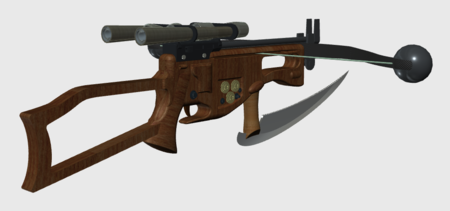
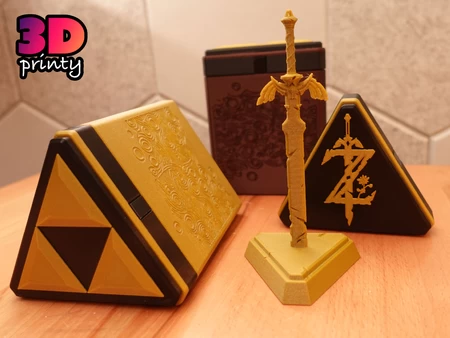
The Master Sword is longer, bigger, heavier, and more intricate. The full length matches my 39" banana sword, or can be increased to 48" by adding two more components in the blade stackup. I've allowed all different-colored components of the sword to print separately, so you can bring your make as close to—or far from—in-game colors as you wish, without the need for paint. Oh, and the news you've all been waiting for: No more pins inside the blade. I've got something much better this time.
Please enjoy this sword. Good luck figuring out Zelda's legend, or whatever it is you do. I have no idea what the game is about.
Also, I started a Patreon for those who feel VERY strongly about my work. See link on my profile.
Creality
Printer:
Ender 3
Rafts:
No
Supports:
No
Resolution:
0.16
Infill:
10
Filament brand:
Hatchbox
Filament colo...r:
Blue, Green, Copper, Silver
Filament material:
PLA
Notes:
BEFORE PRINTING: "B1" and "B2" were updated 2/8/2023 because I had uploaded the wrong versions, so please redownload those if you had already downloaded them.
Print 1x:
Silver "B1" through "B4-6", each standing upright on an angled end.
Silver "B7" through "B9", each standing upright on an angled end (note that "B7" looks a lot like "B4-6" but is not identical due to a slight curve where it meets "B9").
Blue "H1" and "H2", each with its flat cut-open side on the bed (seriously, no supports!).
"V" with a long flat side on the bed (internal component; color doesn't matter).
Blue "D" standing upright on its wider end (setting -0.2mm Horizontal Expansion recommended for ease of assembly).
Green "X" standing upright (recommend a brim for this part only).
Blue "E" with the pointy part upward.
Print 2x:
Copper "T" with the larger arrow-shaped side on the bed.
Copper "G" with the big flat side on the bed.
Print 5x:
"P" laying flat on the bed (internal component; color doesn't matter).
^ This will result in the 39" sword. To add nine inches to the blade (as shown in my photos) do the following.
Print 2x:
Silver "B4-6" each standing upright on an angled end (note that you must have already printed one of this component, so you will end up with three of them).
Print 2x:
Any color "P" laying flat on the bed (bringing total quantity of these to 7).
Technically, you can add nine inches to the blade over and over by adding more pairs of "B4-6" and "P". However, the blade may break under its own weight at some point. Imaginary bonus points to whoever posts the longest make of this sword.
Post-Printing
Assembly Directions
BEFORE ASSEMBLY: "B1" and "B2" were updated 2/8/2023 because I had uploaded the wrong versions, so please redownload and reprint those if you had already downloaded them.
1) Stack and join "B1", "B3", "B7", and "B9" in order using "P" components, which press into their slots on the back of "B#" components. If making the longer blade, add one "B4-6" between "B3" and "B7", and join it with another "P". This consitutes the Odd side of the blade.
2) Stack and join "B2", "B4-6", and "B8" in order using "P" components as in step 1. If making the longer blade, add one "B4-6" next to the one already in the stack, and join it with another "P". This constitutes the Even side of the blade.
3) Slide both Even and Odd sides of the blade together. Keep them together with the "P" components. The full blade should now be rigid, aside from the sides sliding along one another.
4) Slide both "T" components into the slots at the bottom of the blade. The wider arrow-shaped side of each should face the bottom of the blade.
5) Hold "H1" and "H2" onto the bottom of the blade so that they fit together. Slide "V" into the hole at the bottom of "H#", and insert it fully. Only a fraction of an inch of component "V" should remain exposed.
6) Attach "G" components. This step is hard to put into words. If you can operate a 3D-printer, you can figure this one out. Call it a fun little challenge.
7) Slide "X" onto "D" and screw "E" onto "D".
8) Screw assembly XDE onto "H#". Be gentle and don't rush. Hold the wide end of "D" (not "E") to avoid breakage. If needed, disassemble and screw "D" in and out of "H#" a few times to smooth-out the threads.
9) Your sword is complete. Feel free to show your thanks via the "Tip Designer" button, or become a Patron and tell me what to make next.
Designer
S.C. Giedzinski3d model description
Are you a gamer who's been begging for this in the comments of my last sword design? Well, I'm not a gamer, but it's your lucky day. Here's the Master... Sword, from a guy who knows nothing about video games.In case you haven't read my story about banana bread in the description of my last sword, I suggest starting there. TL;DR: I gave a clown a sword, tried to barter another sword for a loaf of bread, got rejected on Tinder, and posted it here instead.
Then, a couple thousand people thought it was pretty cool. So, thank you.
However, it wasn't enough for everyone. For some, there is only one sword that matters. My painstaking original designs cannot satisfy the fervor of these devoted, true believers. My banana sword—with its tiny, fragile pins that barely fit in thoose bizarrely angled holes—could never stand up to THE sword. The ONLY sword. The Master Sword… whatever that is.
Creativity is dead. Long live recycled ideas based off grainy reference images I found on the Zelda Wiki.
The Master Sword is longer, bigger, heavier, and more intricate. The full length matches my 39" banana sword, or can be increased to 48" by adding two more components in the blade stackup. I've allowed all different-colored components of the sword to print separately, so you can bring your make as close to—or far from—in-game colors as you wish, without the need for paint. Oh, and the news you've all been waiting for: No more pins inside the blade. I've got something much better this time.
Please enjoy this sword. Good luck figuring out Zelda's legend, or whatever it is you do. I have no idea what the game is about.
Also, I started a Patreon for those who feel VERY strongly about my work. See link on my profile.
3d model print parameters
Printer brand:Creality
Printer:
Ender 3
Rafts:
No
Supports:
No
Resolution:
0.16
Infill:
10
Filament brand:
Hatchbox
Filament colo...r:
Blue, Green, Copper, Silver
Filament material:
PLA
Notes:
BEFORE PRINTING: "B1" and "B2" were updated 2/8/2023 because I had uploaded the wrong versions, so please redownload those if you had already downloaded them.
Print 1x:
Silver "B1" through "B4-6", each standing upright on an angled end.
Silver "B7" through "B9", each standing upright on an angled end (note that "B7" looks a lot like "B4-6" but is not identical due to a slight curve where it meets "B9").
Blue "H1" and "H2", each with its flat cut-open side on the bed (seriously, no supports!).
"V" with a long flat side on the bed (internal component; color doesn't matter).
Blue "D" standing upright on its wider end (setting -0.2mm Horizontal Expansion recommended for ease of assembly).
Green "X" standing upright (recommend a brim for this part only).
Blue "E" with the pointy part upward.
Print 2x:
Copper "T" with the larger arrow-shaped side on the bed.
Copper "G" with the big flat side on the bed.
Print 5x:
"P" laying flat on the bed (internal component; color doesn't matter).
^ This will result in the 39" sword. To add nine inches to the blade (as shown in my photos) do the following.
Print 2x:
Silver "B4-6" each standing upright on an angled end (note that you must have already printed one of this component, so you will end up with three of them).
Print 2x:
Any color "P" laying flat on the bed (bringing total quantity of these to 7).
Technically, you can add nine inches to the blade over and over by adding more pairs of "B4-6" and "P". However, the blade may break under its own weight at some point. Imaginary bonus points to whoever posts the longest make of this sword.
Post-Printing
Assembly Directions
BEFORE ASSEMBLY: "B1" and "B2" were updated 2/8/2023 because I had uploaded the wrong versions, so please redownload and reprint those if you had already downloaded them.
1) Stack and join "B1", "B3", "B7", and "B9" in order using "P" components, which press into their slots on the back of "B#" components. If making the longer blade, add one "B4-6" between "B3" and "B7", and join it with another "P". This consitutes the Odd side of the blade.
2) Stack and join "B2", "B4-6", and "B8" in order using "P" components as in step 1. If making the longer blade, add one "B4-6" next to the one already in the stack, and join it with another "P". This constitutes the Even side of the blade.
3) Slide both Even and Odd sides of the blade together. Keep them together with the "P" components. The full blade should now be rigid, aside from the sides sliding along one another.
4) Slide both "T" components into the slots at the bottom of the blade. The wider arrow-shaped side of each should face the bottom of the blade.
5) Hold "H1" and "H2" onto the bottom of the blade so that they fit together. Slide "V" into the hole at the bottom of "H#", and insert it fully. Only a fraction of an inch of component "V" should remain exposed.
6) Attach "G" components. This step is hard to put into words. If you can operate a 3D-printer, you can figure this one out. Call it a fun little challenge.
7) Slide "X" onto "D" and screw "E" onto "D".
8) Screw assembly XDE onto "H#". Be gentle and don't rush. Hold the wide end of "D" (not "E") to avoid breakage. If needed, disassemble and screw "D" in and out of "H#" a few times to smooth-out the threads.
9) Your sword is complete. Feel free to show your thanks via the "Tip Designer" button, or become a Patron and tell me what to make next.