Windup bunny 2 with a pla spring motor and floating pinion drive. 3D for print


20699 Views 1 Likes 0 Downloads Download the piece here from 3dforprint
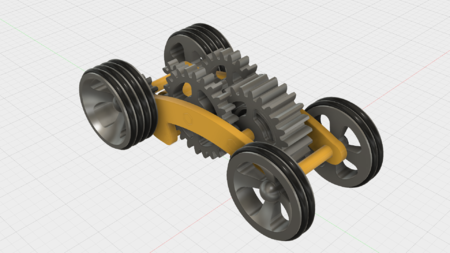
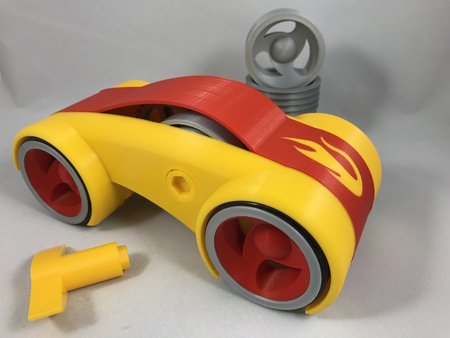
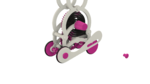
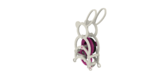
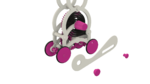
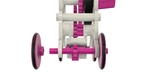
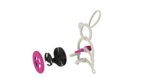
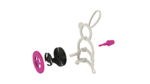
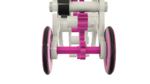
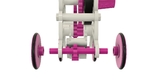
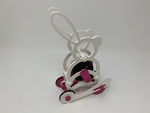
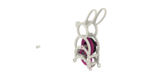
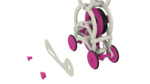
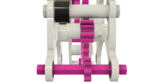
Windup Bunny 2 is a dual floating pinion all wheel drive update to my original Windup Bunny of years ago. E...ven though Windup Bunny 2 is larger (1.5 times) and heavier (120 grams versus 64 grams) than the original Windup Bunny, it runs faster and further thanks to its dual floating pinion / rotating pinion gear carriage design along with a stronger spring.
I've designed rear wheel drive floating pinion models before that utilize both gravity and rotational momentum in order to disengage the rear axle from the spring motor once the spring motor energy is depleted. Windup Bunny 2 is more complicated in that it is all wheel drive thus both the rear and front axles must disengage from the spring motor in order to coast and / or function as a push / pull toy. In order to accomplish this, the design incorporates a rotating dual floating pinion carriage with a rear mass heavy enough to disengage both the front and rear axles from the spring motor once the spring motor energy is depleted.
Windup Bunny 2 is another favorite of our kids and grandkids, providing both a windup and push / pull toy for the older and younger family members. And while much sturdier than the original Windup Bunny, it does require patience and finesse to print, assemble and test.
As usual, I probably forgot a file or two or who knows what else, so if you have any questions, please do not hesitate to point them out as I do make mistakes in plenty.
Designed using Autodesk Fusion 360, sliced using Cura 3.5.0, and printed in PLA and Tough PLA on an Ultimaker 2+ Extended and an Ultimaker 3 Extended.
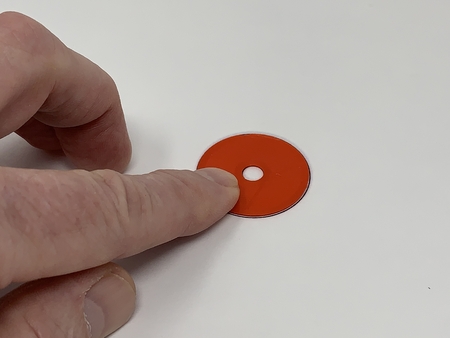
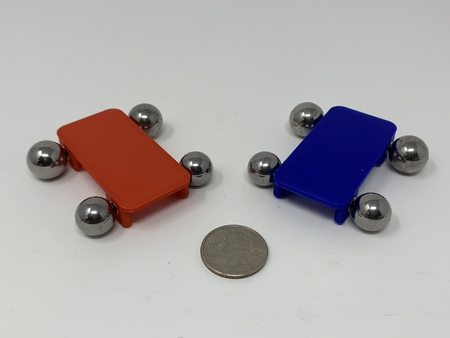
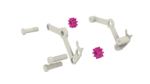
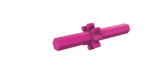
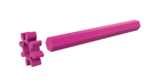
I purchased four 31mm I/D by 3.5mm section O-Rings for the "tires".
Please refer to the file "Win...dup Bunny 2.pdf" for the parts count and settings.
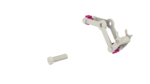
Prior to assembly, I test fit and trimmed, filed, sanded, etc. all parts as necessary for smooth movement of moving surfaces, and tight fit for non moving surfaces. If you decide to make your own Windup Bunny 2, depending on the colors you chose, your printer model and your printer settings, more or less trimming, filing and/or sanding may be required. I carefully filed all edges that contacted the build plate to make absolutely certain that all build plate "ooze" was removed and that all edges were smooth. I used small jewelers files and plenty of patience to perform this step. I also used 6mm by 1 right hand threaded taps and dies to prepare the threaded parts prior to assembly.
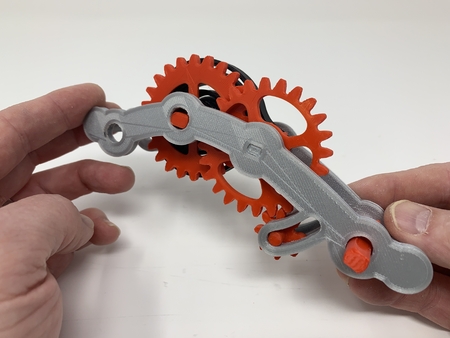
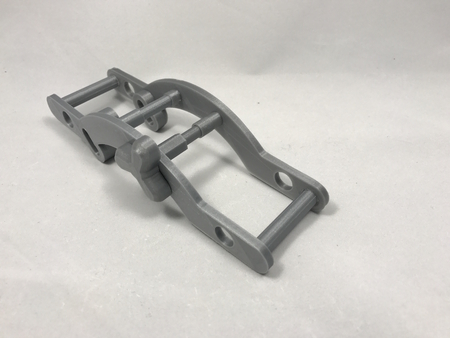
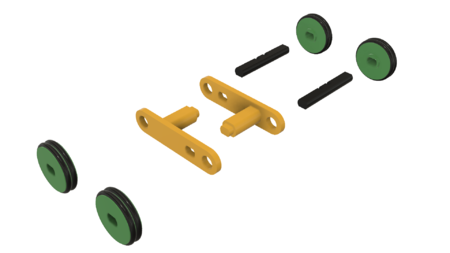
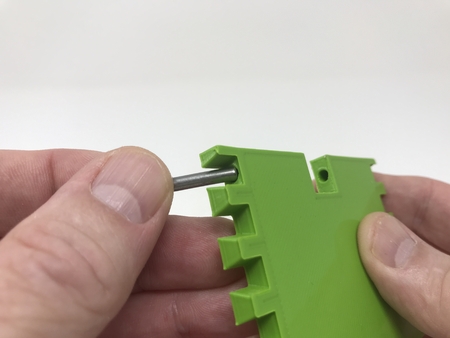
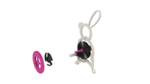
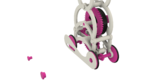
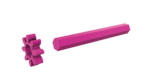
Step 2: Assemble the Floating Pinion Carriage.
I assembled the Floating Pinion Carriage as follows:
1) Positioned "Gear, Idler, Front (8, 1.5).stl" and "Gear, Idler, Rear (8, 1.5).stl" onto "Carriage, Left.stl".
2) Positioned "Carriage, Right.stl" onto the carriage assembly, then secured carriage right in place with two "Axle, Carriage.stl".
3) Threaded "Bolt, Carriage.stl" into the assembly.
4) With the floating pinion carriage assembled, I made sure the pinions rotated freely in the carriage.
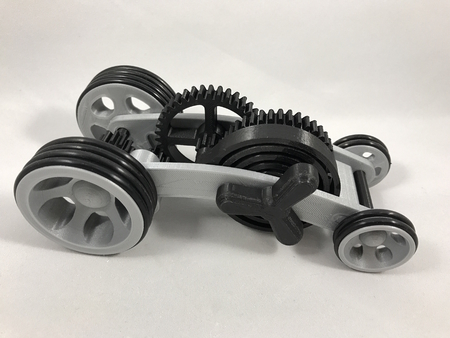
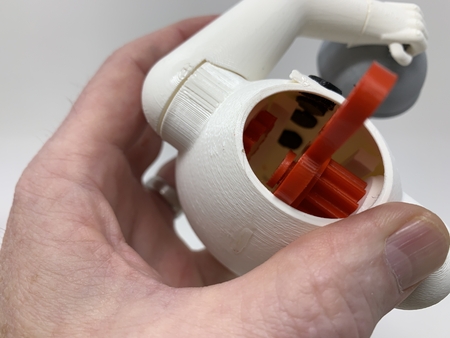
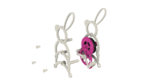
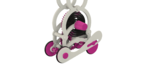
Step 3: Assemble the Frames.
To assemble the Frames, I performed the following steps:
1) Positioned "Knob and Axle.stl" into "Frame, Left.stl".
2) Pressed "Spring.stl" onto "Knob and Axle.stl" while positioning the spring end onto the spring mount in "Frame, Left.stl".
3) Pressed "Pawl.stl" onto "Knob and Axle.stl".
4) Positioned "Gear, Pawl (40, 1.5).stl" onto "Pawl.stl".
5) Positioned "Gear, Compound ((8, 1.5), (40, 1.5)).stl into the carriage assembly.
6) Slid the carriage assembly onto the frame assembly.
7) Secured "Frame, Right.stl" onto the assembly using three "Bolt, Frame.stl".
8) Secured "Frame, Left.stl" using three "Bolt, Frame.stl.
9) With the frames assembled, I made sure the spring motor functioned properly, and that the carriage assembly rotated freely.
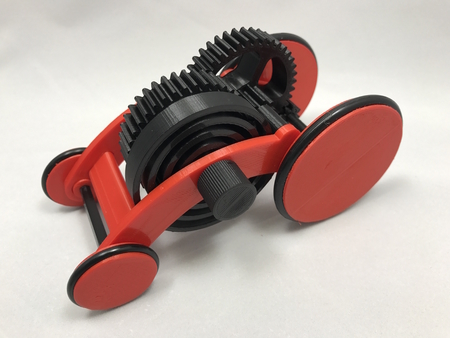
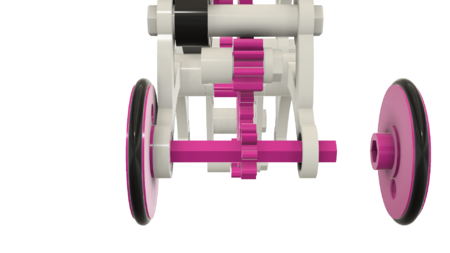
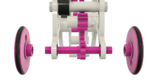
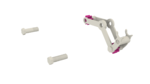
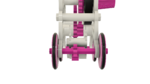
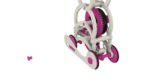
Step 4: Add the Wheel Axles and Wheels.
To add the Wheel Axles and Wheels, I performed the following steps:
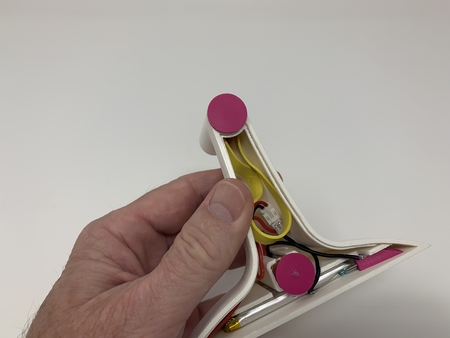
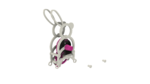
1) Wrapped the four O-Rings on each of the four wheels.
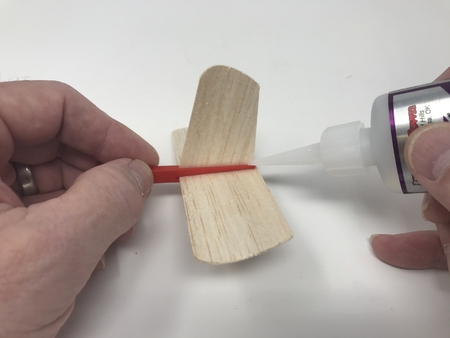
2) Pressed "Gear, Axle, Front (8, 1.5).stl" onto "Axle, Front.stl" exactly 21.20mm from one end of "Axle, Front.stl". If the gear was not tight on the axle, I used a small dot of
cyanoacrylate glue to secure it in place.
3) Pressed "Gear, Axle, Rear (8, 1.5).stl" onto "Axle, Rear.stl" exactly 25.20 mm from one end of "Axle, Rear.stl". If the gear was not tight on the axle, I used a small dot of cyanoacrylate glue to secure it in place.
3) Positioned the front axle assembly between the left and right frames such that the gear aligns with "Gear, Idler, Front (8, 1.5).stl".
4) Pressed one "Wheel, Front.stl" onto the front axle assembly, with the axle flush with the wheel outer surface.
5) Pressed the remaining "Wheel, Front.stl" onto the axle assembly, 180 degrees out of phase from the first wheel, with the axle flush with the wheel outer surface.
6) Positioned the rear axle assembly between the left and right frames such that the gear aligns with "Gear, Idler, Rear (8, 1.5).stl".
7) Pressed one "Wheel, Rear.stl" onto the rear axle assembly, with the axle exactly 4mm proud of the wheel outer surface.
8) Pressed the remaining "Wheel, Rear.stl" onto the rear axle assembly, with the axle exactly 4mm proud of the wheel outer surface.
9) With the wheel axles and wheels assembled, I made sure that both the front and rear axles rotated freely.
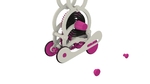
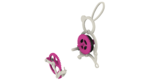
Step 5: Final Assembly.
I performed the following steps for Final Assembly:
1) Positioned "Foot, Right.stl" onto the assembly and secured in place with one "Axle, Foot.stl" and one "Hub, Foot.stl".
2) Positioned "Foot, Left.stl" onto the assembly and secured in place with the remaining "Axle, Foot.stl" and remaining "Hub, Foot.stl".
And that is how I printed and assembled Windup Bunny 2.
I hope you enjoy it!
Designer
Greg Zumwalt3d model description
A Floating Pinion update to Windup Bunny.Windup Bunny 2 is a dual floating pinion all wheel drive update to my original Windup Bunny of years ago. E...ven though Windup Bunny 2 is larger (1.5 times) and heavier (120 grams versus 64 grams) than the original Windup Bunny, it runs faster and further thanks to its dual floating pinion / rotating pinion gear carriage design along with a stronger spring.
I've designed rear wheel drive floating pinion models before that utilize both gravity and rotational momentum in order to disengage the rear axle from the spring motor once the spring motor energy is depleted. Windup Bunny 2 is more complicated in that it is all wheel drive thus both the rear and front axles must disengage from the spring motor in order to coast and / or function as a push / pull toy. In order to accomplish this, the design incorporates a rotating dual floating pinion carriage with a rear mass heavy enough to disengage both the front and rear axles from the spring motor once the spring motor energy is depleted.
Windup Bunny 2 is another favorite of our kids and grandkids, providing both a windup and push / pull toy for the older and younger family members. And while much sturdier than the original Windup Bunny, it does require patience and finesse to print, assemble and test.
As usual, I probably forgot a file or two or who knows what else, so if you have any questions, please do not hesitate to point them out as I do make mistakes in plenty.
Designed using Autodesk Fusion 360, sliced using Cura 3.5.0, and printed in PLA and Tough PLA on an Ultimaker 2+ Extended and an Ultimaker 3 Extended.
3d model print parameters
Step 1: Purchase, Print and Prepare the Parts.I purchased four 31mm I/D by 3.5mm section O-Rings for the "tires".
Please refer to the file "Win...dup Bunny 2.pdf" for the parts count and settings.
Prior to assembly, I test fit and trimmed, filed, sanded, etc. all parts as necessary for smooth movement of moving surfaces, and tight fit for non moving surfaces. If you decide to make your own Windup Bunny 2, depending on the colors you chose, your printer model and your printer settings, more or less trimming, filing and/or sanding may be required. I carefully filed all edges that contacted the build plate to make absolutely certain that all build plate "ooze" was removed and that all edges were smooth. I used small jewelers files and plenty of patience to perform this step. I also used 6mm by 1 right hand threaded taps and dies to prepare the threaded parts prior to assembly.
Step 2: Assemble the Floating Pinion Carriage.
I assembled the Floating Pinion Carriage as follows:
1) Positioned "Gear, Idler, Front (8, 1.5).stl" and "Gear, Idler, Rear (8, 1.5).stl" onto "Carriage, Left.stl".
2) Positioned "Carriage, Right.stl" onto the carriage assembly, then secured carriage right in place with two "Axle, Carriage.stl".
3) Threaded "Bolt, Carriage.stl" into the assembly.
4) With the floating pinion carriage assembled, I made sure the pinions rotated freely in the carriage.
Step 3: Assemble the Frames.
To assemble the Frames, I performed the following steps:
1) Positioned "Knob and Axle.stl" into "Frame, Left.stl".
2) Pressed "Spring.stl" onto "Knob and Axle.stl" while positioning the spring end onto the spring mount in "Frame, Left.stl".
3) Pressed "Pawl.stl" onto "Knob and Axle.stl".
4) Positioned "Gear, Pawl (40, 1.5).stl" onto "Pawl.stl".
5) Positioned "Gear, Compound ((8, 1.5), (40, 1.5)).stl into the carriage assembly.
6) Slid the carriage assembly onto the frame assembly.
7) Secured "Frame, Right.stl" onto the assembly using three "Bolt, Frame.stl".
8) Secured "Frame, Left.stl" using three "Bolt, Frame.stl.
9) With the frames assembled, I made sure the spring motor functioned properly, and that the carriage assembly rotated freely.
Step 4: Add the Wheel Axles and Wheels.
To add the Wheel Axles and Wheels, I performed the following steps:
1) Wrapped the four O-Rings on each of the four wheels.
2) Pressed "Gear, Axle, Front (8, 1.5).stl" onto "Axle, Front.stl" exactly 21.20mm from one end of "Axle, Front.stl". If the gear was not tight on the axle, I used a small dot of
cyanoacrylate glue to secure it in place.
3) Pressed "Gear, Axle, Rear (8, 1.5).stl" onto "Axle, Rear.stl" exactly 25.20 mm from one end of "Axle, Rear.stl". If the gear was not tight on the axle, I used a small dot of cyanoacrylate glue to secure it in place.
3) Positioned the front axle assembly between the left and right frames such that the gear aligns with "Gear, Idler, Front (8, 1.5).stl".
4) Pressed one "Wheel, Front.stl" onto the front axle assembly, with the axle flush with the wheel outer surface.
5) Pressed the remaining "Wheel, Front.stl" onto the axle assembly, 180 degrees out of phase from the first wheel, with the axle flush with the wheel outer surface.
6) Positioned the rear axle assembly between the left and right frames such that the gear aligns with "Gear, Idler, Rear (8, 1.5).stl".
7) Pressed one "Wheel, Rear.stl" onto the rear axle assembly, with the axle exactly 4mm proud of the wheel outer surface.
8) Pressed the remaining "Wheel, Rear.stl" onto the rear axle assembly, with the axle exactly 4mm proud of the wheel outer surface.
9) With the wheel axles and wheels assembled, I made sure that both the front and rear axles rotated freely.
Step 5: Final Assembly.
I performed the following steps for Final Assembly:
1) Positioned "Foot, Right.stl" onto the assembly and secured in place with one "Axle, Foot.stl" and one "Hub, Foot.stl".
2) Positioned "Foot, Left.stl" onto the assembly and secured in place with the remaining "Axle, Foot.stl" and remaining "Hub, Foot.stl".
And that is how I printed and assembled Windup Bunny 2.
I hope you enjoy it!