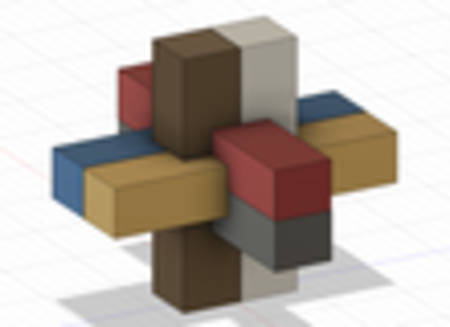
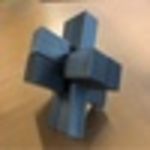
Zimmermannsknoten / carpenters knot 3D for print

15487 Views 1 Likes 0 Downloads Download the piece here from 3dforprint
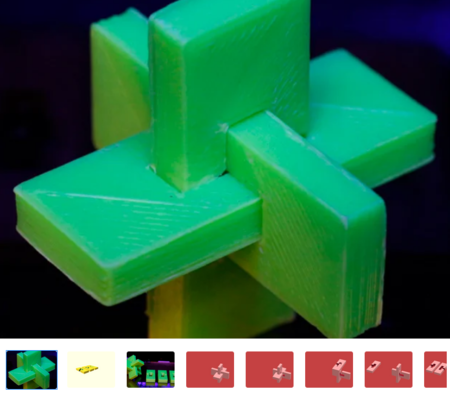
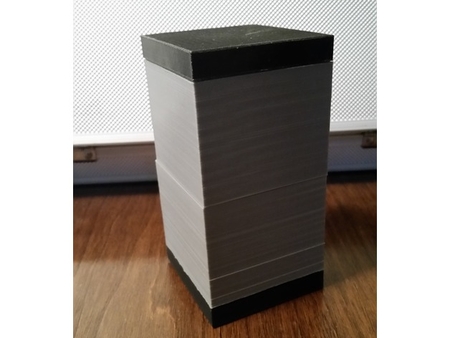
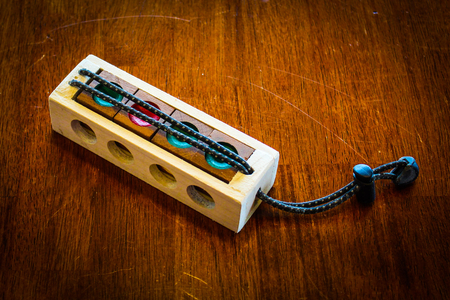
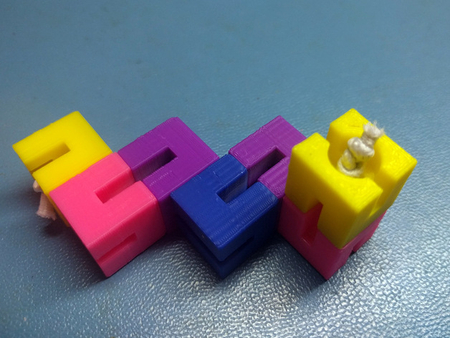
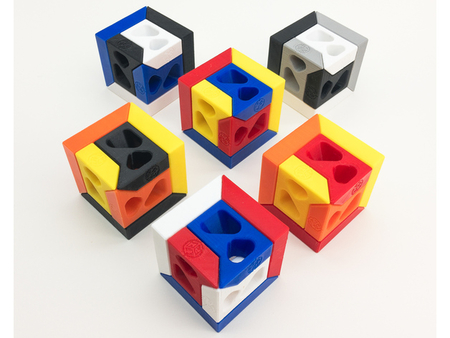
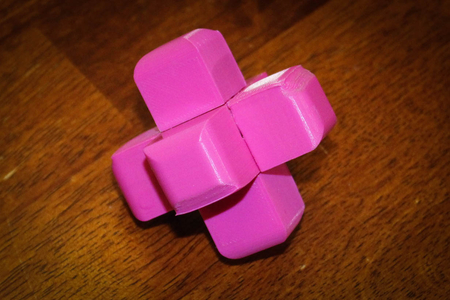
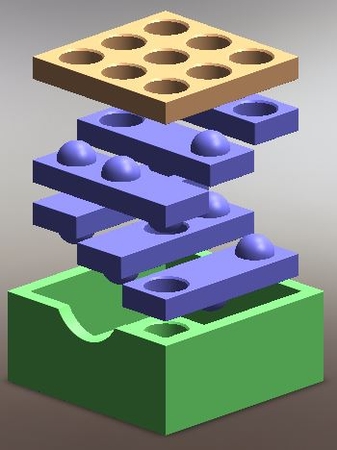
Building these knots is complex and has to be completed with utmost precision resulting in a sleek looking construction.
Prusa
Printer:
I3 MK3S
Rafts:
No
Supports:
No
Resolution:
0.2mm
Infill:
15%
Filament_brand:
Prusament
Filam...ent_material:
PLA
Notes:
This is an easy pint, and all pieces have been rotated to lay flat on the print bed. If possible, adjust the first layer so that it compensates for the elephant's foot (the first layer will be a bit wider). In Prusa Slicer 2.0 this can be set after activating Advanced or Expert settings under Print Settings -> Advanced -> Slicing -> Elephant foot compensation The included GCODE is for an Original Prusa i3 MK3/MK3S
Standards
NGSSCCSS
Overview and Background
The Art of Ancient Carpentry
Japan has many forests wich cultivated the carpentry profession. Wood was cheap, easy to work with, and usable for many purposes. Learn how these carpenters were building houses without the use of glues, nails or screws
Lesson Plan and Activity
Learn about ancient Japanese carpentry
In Japan, carpentry became the essential craft as wood was one of the only building materials. With his tools and craftmanship, he was able to construct the entire house, including furniture and cupboards. The Japanese carpenter was called "daiku" (= master craftsman) is represented in western countries as "architect" (greek archein = first, tekton = carpenter) The skeleton frame of wood is the inner discipline of Japanese architecture, and it is the physical outline of a conception of space. Slender poles of the house skeleton are placed in precise points in the coordinate system. Beams, paper walls, curtains, and sliding doors are attached to these poles, and therefore the thickness of the walls is thinner than that of the carrying poles. Thus, the poles have to be rigidly interlocked with a knot between the poles and beams. These knots are very complex to build, but they should look sleek. Construction of these parts needs utmost precision so that the parts firmly lock into place.
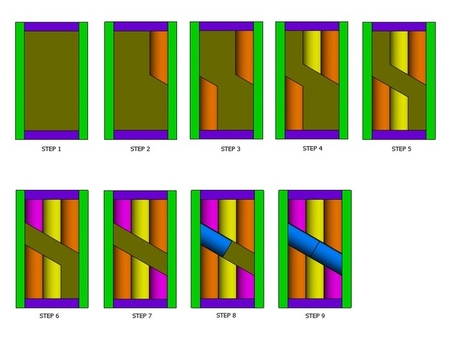
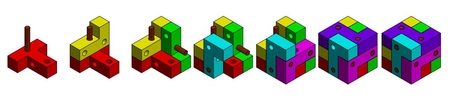
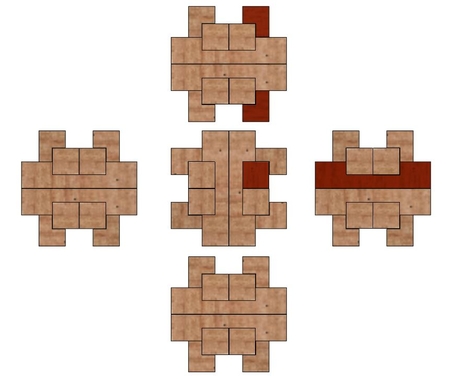
Print and assemble the knot
Slice and print the knot using the software and printers provided by the school. I recommend printing on a Prusa i3 MK3/S and slicing with the Prusa Slicer V2. There is also a pre-made .gcode that you can send directly to your printer. Use the parts included to build one of those knots. You will also see how strong it is without using glue, screws or nails. If you want to go the traditional way, try to construct these from wood without the help of machines.
Duration of Lesson
Printing: 6:30 hours, Assembly using instruction pictures: 10-15 minutes
Designer
wengeol23d model description
Carpenters knot also known as Zimmermannsknoten is a set of 6 interlocking parts originally designed by Japanese carpenters to securely fuse the inter...secting wood structures when building rooftops.Building these knots is complex and has to be completed with utmost precision resulting in a sleek looking construction.
3d model print parameters
Printer brand:Prusa
Printer:
I3 MK3S
Rafts:
No
Supports:
No
Resolution:
0.2mm
Infill:
15%
Filament_brand:
Prusament
Filam...ent_material:
PLA
Notes:
This is an easy pint, and all pieces have been rotated to lay flat on the print bed. If possible, adjust the first layer so that it compensates for the elephant's foot (the first layer will be a bit wider). In Prusa Slicer 2.0 this can be set after activating Advanced or Expert settings under Print Settings -> Advanced -> Slicing -> Elephant foot compensation The included GCODE is for an Original Prusa i3 MK3/MK3S
Standards
NGSSCCSS
Overview and Background
The Art of Ancient Carpentry
Japan has many forests wich cultivated the carpentry profession. Wood was cheap, easy to work with, and usable for many purposes. Learn how these carpenters were building houses without the use of glues, nails or screws
Lesson Plan and Activity
Learn about ancient Japanese carpentry
In Japan, carpentry became the essential craft as wood was one of the only building materials. With his tools and craftmanship, he was able to construct the entire house, including furniture and cupboards. The Japanese carpenter was called "daiku" (= master craftsman) is represented in western countries as "architect" (greek archein = first, tekton = carpenter) The skeleton frame of wood is the inner discipline of Japanese architecture, and it is the physical outline of a conception of space. Slender poles of the house skeleton are placed in precise points in the coordinate system. Beams, paper walls, curtains, and sliding doors are attached to these poles, and therefore the thickness of the walls is thinner than that of the carrying poles. Thus, the poles have to be rigidly interlocked with a knot between the poles and beams. These knots are very complex to build, but they should look sleek. Construction of these parts needs utmost precision so that the parts firmly lock into place.
Print and assemble the knot
Slice and print the knot using the software and printers provided by the school. I recommend printing on a Prusa i3 MK3/S and slicing with the Prusa Slicer V2. There is also a pre-made .gcode that you can send directly to your printer. Use the parts included to build one of those knots. You will also see how strong it is without using glue, screws or nails. If you want to go the traditional way, try to construct these from wood without the help of machines.
Duration of Lesson
Printing: 6:30 hours, Assembly using instruction pictures: 10-15 minutes