Complaint button ii: hammer time 3D for print


2779 Views 1 Likes 0 Downloads Download the piece here from 3dforprint
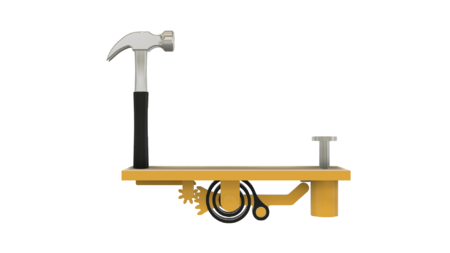
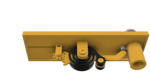
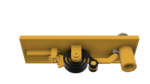
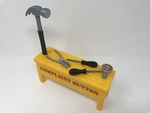
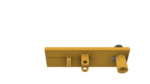
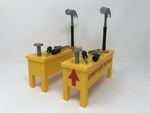
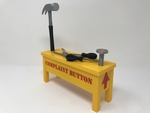
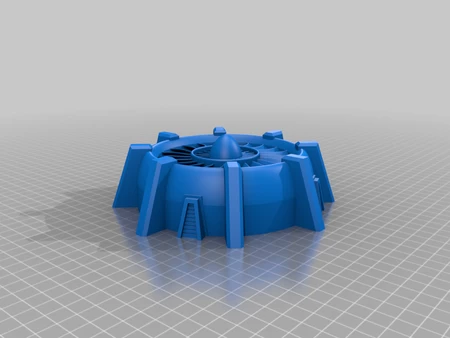
"Complaint Button II: Hammer Time" is another simple automata designed to discourage complaining. Desig...ned to appear as a cluttered workbench (as mine always is), this model was inspired by both my original "Complaint Button" and the numerous suggestions I received to update the design with a more "industrial" look, and perhaps incorporating a hammer (thanks to Donald Bell, https://makerprojectlab.com, for the "hammer" idea!).
I've include some options in the design including single and dual extrusion parts, and some optional accessories. The optional accessories, two screwdrivers and pliers, are, well, optional, but do assist in distracting the curious finger from the impending hammer strike.
As usual, I probably forgot a file or two or who knows what else, so if you have any questions, please do not hesitate to ask as I do make mistakes in plenty.
Designed using Autodesk Fusion 360, sliced using Cura 3.4.1 and printed with Ultimaker Tough PLA and Ultimaker PLA on both an Ultimaker 2+ Extended and an Ultimaker 3 Extended.
The design provides a few printing options included single or dual extrusion (the files with the ".3mf" exten...sion are for dual extrusion) and optional accessories (pliers and screwdrivers). I also used thick cyanoacrylate glue to assemble / secure certain components, and petroleum jelly for lubrication.
I printed "Base.stl" (or "Base.3mf) at .15mm layer height and 20% infill. I printed the remaining parts at .15mm layer height and 100% infill. I printed two each of "Axle, Gears", "Handle.stl" and "Bolt, 6mm by 8mm.stl", and one each of the remaining parts.
Prior to assembly, test fit and trim, file, sand, etc. all parts as necessary for smooth movement of moving surfaces, and tight fit for non moving surfaces. Depending on the colors you chose and your printer settings, more or less trimming, filing and/or sanding may be required. Carefully file all edges that contacted the build plate to make absolutely sure that all build plate "ooze" is removed and that all edges are smooth. I used small jewelers files and plenty of patience to perform this step. The model uses threaded assembly, so a tap and die set may be needed to clean the threads.
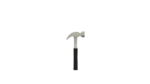
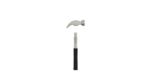
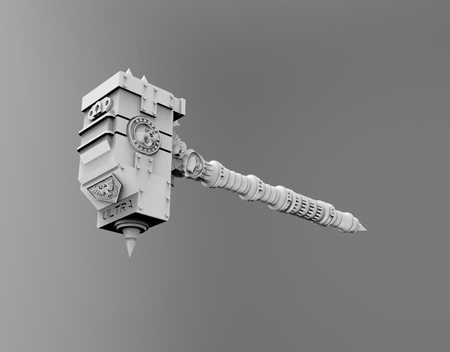
Assemble the Hammer.
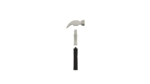
The hammer consists of three pieces: "Hammer Handle, Lower.stl", "Hammer Handle, Upper.stl" and "Hammer Head.stl". I glued these pieces together using thick cyanoacrylate glue.
Start by gluing the lower and upper handles together as shown. Once the glue has cured, glue the hammer head to the handle assembly as shown.
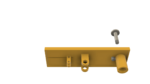
Assemble the Nail.
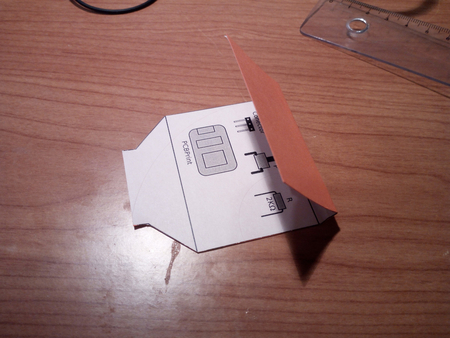
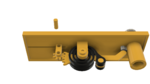
The nail assembly consists of two pieces, "Nail.stl" (or "Nail, Dual Extrusion.3mf) and "Piston.stl", and is assembled in place in "Top.stl".
I lubricated the inside of the cylinder (located on the lower side of the top, where the piston will reside) with petroleum jelly. You may use some other type of grease, but I use petroleum jelly since we have grandkids.
Next, slide the piston into the cylinder as shown, then completely thread the nail into the piston as shown. Slide the nail up and down to make sure the assembly operates smoothly.
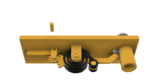
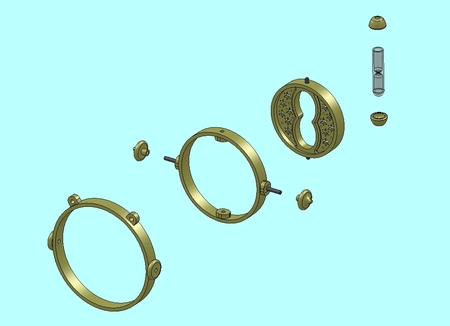
Add Gear Arm.
The gear arm assembly consists of seven pieces, "Gear, Arm.stl", "Pin Spring.stl", "Spring Left.stl", "Spring Right.stl", "Axle, Springs.stl" and two "Bolt, 6mm by 8mm.stl".
Start by pressing pin spring into the gear arm such that the pin is centered exactly in the arm as shown. This should be a tight fit, if not, secure it in place with cyanoacrylate glue.
Place the left spring into position in the top as shown.
The right spring requires some patience and finesse to install. To install it in the top, slide it as close to its final position as possible between the left spring and the right spring tower, carefully spread the spring towers apart, carefully slide it further between the left spring and right tower, then press it into position as shown. If this step is too difficult, you may remove some of the hexagonal spring shaft.
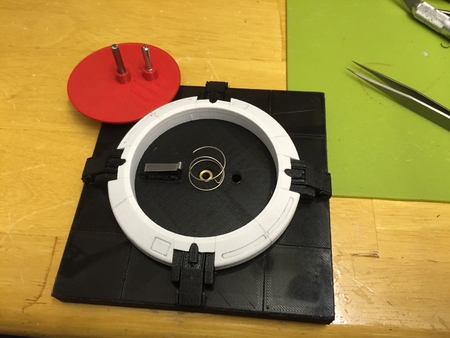
Slide the spring axle into position as shown, then secure in place with the two 6 by 8mm bolts as shown.
Carefully rotate the left and right springs and position the spring mounting holes onto the spring pin.
Lubricate all gear teeth with petroleum jelly.
Test the assembly by pressing and releasing the nail, checking for smooth operation nail return when released.
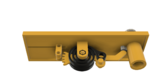
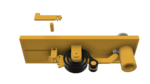
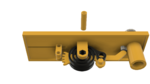
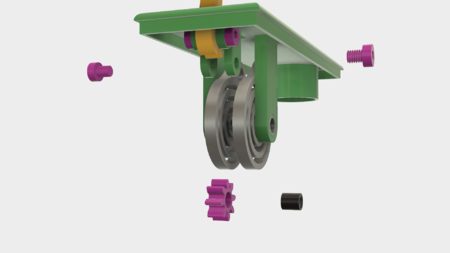
Add Gear Idler, Gear Hammer, Hammer and the Base.
This step requires five pieces, "Gear, Idler.stl", "Gear Hammer.stl", two "Axle, Gears.stl" and "Base.stl" (or "Base, Dual Extrusion.stl).
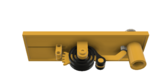
From the underside of the top, position the idler gear in the top as shown, then secure in place with the axle. The axle must fit tight in the gear, and loose in the top towers. Once installed, test the mechanism for smooth operation.
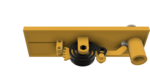
From the top side of the top, position the hammer gear into the top as shown, then secure in place with the axle. The axle must fit tight in the gear, and loose in the top towers. Once installed, again test the mechanism for smooth operation.
Press the hammer into position on gear hammer as shown.
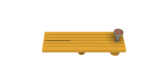
Finally, press the assembly onto "Base.stl" (or "Base, Dual Extrusion.stl").
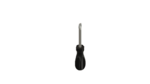
Optional Accessories.
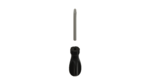
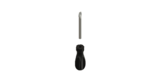
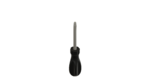
The optional accessories include the two screw drivers (standard and phillips) and pliers.
Each screw driver requires one "Handle.stl" and one of the blades (either "Blade, Phillips.stl" or "Blade, Standard.stl). To assemble either, press the blade into the handle.
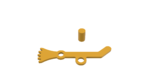
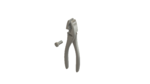
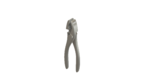
The pliers require one "Pliers, Slotted.stl", one "Pliers, Threaded.stl" and one "Pliers, Bolt.stl". To assemble, place the slotted and threaded components together as shown, then secure with the bolt.
I positioned the optional accessories as shown using double sided tape to hold them in place while deciding on a layout. Once I decided on a layout I liked, I used thick cyanoacrylate to secure them in place.
That's how I printed and assembled Complaint Button II: Hammer Time.
Hope you enjoy it!
Designer
Greg Zumwalt3d model description
A complaint button automata styled mechanism."Complaint Button II: Hammer Time" is another simple automata designed to discourage complaining. Desig...ned to appear as a cluttered workbench (as mine always is), this model was inspired by both my original "Complaint Button" and the numerous suggestions I received to update the design with a more "industrial" look, and perhaps incorporating a hammer (thanks to Donald Bell, https://makerprojectlab.com, for the "hammer" idea!).
I've include some options in the design including single and dual extrusion parts, and some optional accessories. The optional accessories, two screwdrivers and pliers, are, well, optional, but do assist in distracting the curious finger from the impending hammer strike.
As usual, I probably forgot a file or two or who knows what else, so if you have any questions, please do not hesitate to ask as I do make mistakes in plenty.
Designed using Autodesk Fusion 360, sliced using Cura 3.4.1 and printed with Ultimaker Tough PLA and Ultimaker PLA on both an Ultimaker 2+ Extended and an Ultimaker 3 Extended.
3d model print parameters
Print and Prepare the Required Parts.The design provides a few printing options included single or dual extrusion (the files with the ".3mf" exten...sion are for dual extrusion) and optional accessories (pliers and screwdrivers). I also used thick cyanoacrylate glue to assemble / secure certain components, and petroleum jelly for lubrication.
I printed "Base.stl" (or "Base.3mf) at .15mm layer height and 20% infill. I printed the remaining parts at .15mm layer height and 100% infill. I printed two each of "Axle, Gears", "Handle.stl" and "Bolt, 6mm by 8mm.stl", and one each of the remaining parts.
Prior to assembly, test fit and trim, file, sand, etc. all parts as necessary for smooth movement of moving surfaces, and tight fit for non moving surfaces. Depending on the colors you chose and your printer settings, more or less trimming, filing and/or sanding may be required. Carefully file all edges that contacted the build plate to make absolutely sure that all build plate "ooze" is removed and that all edges are smooth. I used small jewelers files and plenty of patience to perform this step. The model uses threaded assembly, so a tap and die set may be needed to clean the threads.
Assemble the Hammer.
The hammer consists of three pieces: "Hammer Handle, Lower.stl", "Hammer Handle, Upper.stl" and "Hammer Head.stl". I glued these pieces together using thick cyanoacrylate glue.
Start by gluing the lower and upper handles together as shown. Once the glue has cured, glue the hammer head to the handle assembly as shown.
Assemble the Nail.
The nail assembly consists of two pieces, "Nail.stl" (or "Nail, Dual Extrusion.3mf) and "Piston.stl", and is assembled in place in "Top.stl".
I lubricated the inside of the cylinder (located on the lower side of the top, where the piston will reside) with petroleum jelly. You may use some other type of grease, but I use petroleum jelly since we have grandkids.
Next, slide the piston into the cylinder as shown, then completely thread the nail into the piston as shown. Slide the nail up and down to make sure the assembly operates smoothly.
Add Gear Arm.
The gear arm assembly consists of seven pieces, "Gear, Arm.stl", "Pin Spring.stl", "Spring Left.stl", "Spring Right.stl", "Axle, Springs.stl" and two "Bolt, 6mm by 8mm.stl".
Start by pressing pin spring into the gear arm such that the pin is centered exactly in the arm as shown. This should be a tight fit, if not, secure it in place with cyanoacrylate glue.
Place the left spring into position in the top as shown.
The right spring requires some patience and finesse to install. To install it in the top, slide it as close to its final position as possible between the left spring and the right spring tower, carefully spread the spring towers apart, carefully slide it further between the left spring and right tower, then press it into position as shown. If this step is too difficult, you may remove some of the hexagonal spring shaft.
Slide the spring axle into position as shown, then secure in place with the two 6 by 8mm bolts as shown.
Carefully rotate the left and right springs and position the spring mounting holes onto the spring pin.
Lubricate all gear teeth with petroleum jelly.
Test the assembly by pressing and releasing the nail, checking for smooth operation nail return when released.
Add Gear Idler, Gear Hammer, Hammer and the Base.
This step requires five pieces, "Gear, Idler.stl", "Gear Hammer.stl", two "Axle, Gears.stl" and "Base.stl" (or "Base, Dual Extrusion.stl).
From the underside of the top, position the idler gear in the top as shown, then secure in place with the axle. The axle must fit tight in the gear, and loose in the top towers. Once installed, test the mechanism for smooth operation.
From the top side of the top, position the hammer gear into the top as shown, then secure in place with the axle. The axle must fit tight in the gear, and loose in the top towers. Once installed, again test the mechanism for smooth operation.
Press the hammer into position on gear hammer as shown.
Finally, press the assembly onto "Base.stl" (or "Base, Dual Extrusion.stl").
Optional Accessories.
The optional accessories include the two screw drivers (standard and phillips) and pliers.
Each screw driver requires one "Handle.stl" and one of the blades (either "Blade, Phillips.stl" or "Blade, Standard.stl). To assemble either, press the blade into the handle.
The pliers require one "Pliers, Slotted.stl", one "Pliers, Threaded.stl" and one "Pliers, Bolt.stl". To assemble, place the slotted and threaded components together as shown, then secure with the bolt.
I positioned the optional accessories as shown using double sided tape to hold them in place while deciding on a layout. Once I decided on a layout I liked, I used thick cyanoacrylate to secure them in place.
That's how I printed and assembled Complaint Button II: Hammer Time.
Hope you enjoy it!


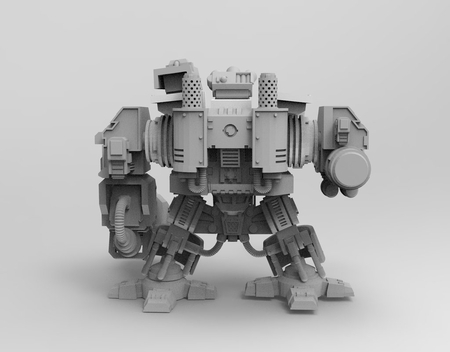
![soldier with hammer [FREE]](https://www.3dforprint.com/modelos/7796/soldier-with-hammer-free1_medium.jpeg)