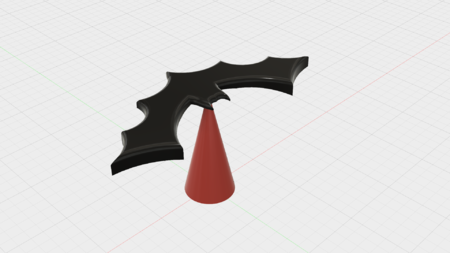
Designing a simple 3d printed rubber band car using autodesk fusion 360 3D for print

23463 Views 1 Likes 1 Downloads Download the piece here from 3dforprint
"Designing a Simple 3D Printed Rubber Band Car using Autodesk Fusion 360" is ...a tutorial illustrating how I designed, printed and assembled a simple rubber band powered car for the kids and grandkids.
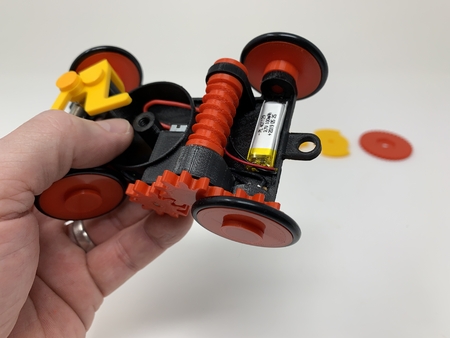
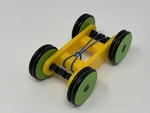
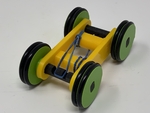
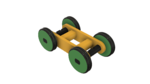
This little "pocket size" car will not win any distance or speed records, but the kids and grandkids love it for table top racing, it's quite durable, and it runs in two modes; "power" and "coast". Power mode is when the car is unwinding the rubber band from the axle. When the rubber band is completely unwound, it disconnects from the axle allowing the car to enter coast mode for additional distance.
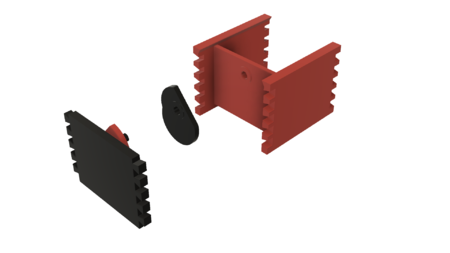
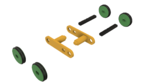
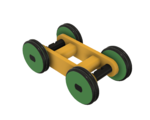
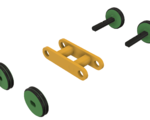
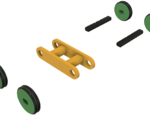
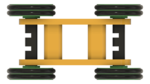
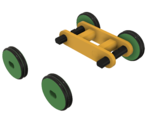
The symmetrical design of the car requires eight 3D printed parts (two chassis sides, two axles, and four wheels) yet only three unique parts (chassis, axle and wheel), with all parts small enough to fit on most if not all 3D printers.
I've included a step by step video of the design and assembly process, the Autodesk Fusion 360 cad file "Rubber Band Car v1.f3d" containing the design (familiarity with the Autodesk Fusion 360 environment is highly recommended), and all .STL files required to print the car.
As usual, I probably forgot a file or two or who knows what else, so if you have any questions, please do not hesitate to ask as I do make plenty of mistakes.
Designed using Autodesk Fusion 360, sliced using Cura 3.5.0, and printed in PLA on an Ultimaker 2+ Extended and an Ultimaker 3 Extended.
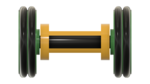
I purchased eight "R20" sized O-Rings (25mm ID, 3.5mm Section) for use as the tires and a bag of ass...orted rubber bands to use as the "motor".
I printed all parts at .15mm layer height with 50% infill. I printed two "Axle.stl", two "Chassis.stl" and four "Wheel.stl".
Prior to assembly, I test fit and trimmed, filed, sanded, etc. all parts as necessary for smooth movement of moving surfaces, and tight fit for non moving surfaces. If you decide to make your own Simple 3D Printed Rubber Band Car, depending on the colors you chose, your printer model and your printer settings, more or less trimming, filing and/or sanding may be required. I carefully filed all edges that contacted the build plate to make absolutely certain that all build plate "ooze" was removed and that all edges were smooth. I used small jewelers files and plenty of patience to perform this step.
Step 2: Assembly and Test.
As shown in the video and screen captures, I performed the following steps to assemble and test the car:
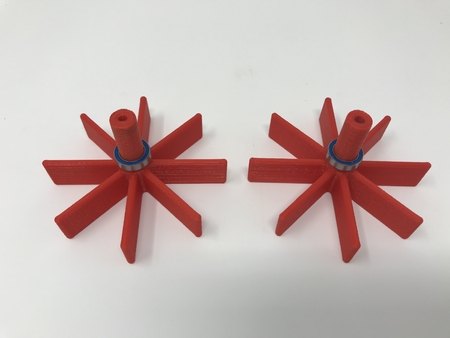
1) Placed the eight O-Rings onto the four "Wheel.stl" components.
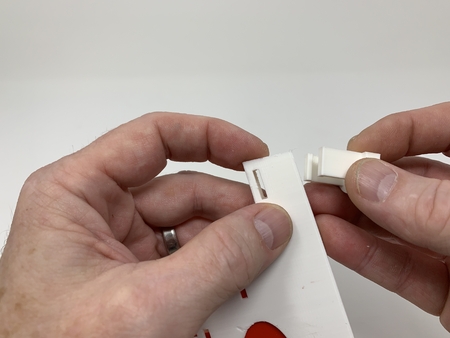
2) Pressed the two "Chassis.stl" together (if the fit is loose, use a small dot of thick cyanoacrylate glue).
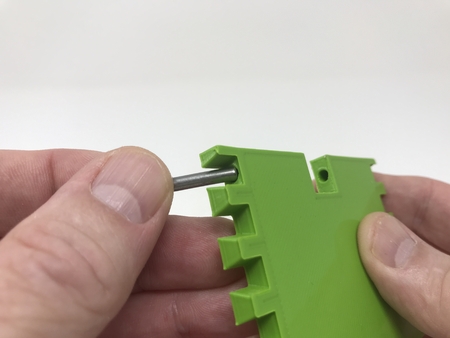
3) Pressed one "Axle.stl" into one wheel assembly until in was flush with the wheel outer surface, then repeated the process with the second "Axle.stl" and wheel assembly.
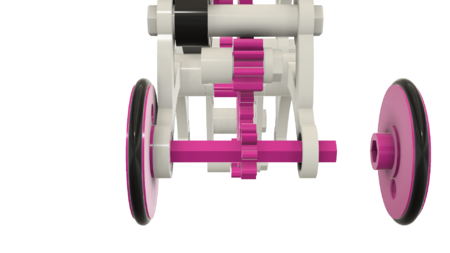
4) Slid the two axle assemblies into the chassis assembly.
5) Pressed the remaining two wheels onto the two axle assemblies.
6) Checked to make sure the wheels rotated smoothly.
7) Attached a rubber band to the car as shown in the video.
8) Wound the car as shown in the video and let it go!
And that is how I designed, printed and assembled Simple 3D Printed Rubber Band Car.
Hope you enjoy it!
Step 3: Oh, and Did I Forget to Mention...
https://www.youtube.com/edit?o=U&video_id=EN3VZ3YZDXM
The car can use twin rubber bands for all wheel drive!
Mount the rubber bands on both the top and bottom of the car as shown in the photograph (you may wish to tie or glue the rubber bands to the chassis to hold them in place). Hook the free ends of the rubber bands onto the axle rubber band hooks as shown, then draw the car backward and release for all wheel drive!
Designer
Greg Zumwalt3d model description
Designing a Simple 3D Printed Rubber Band Car Using Autodesk Fusion 360"Designing a Simple 3D Printed Rubber Band Car using Autodesk Fusion 360" is ...a tutorial illustrating how I designed, printed and assembled a simple rubber band powered car for the kids and grandkids.
This little "pocket size" car will not win any distance or speed records, but the kids and grandkids love it for table top racing, it's quite durable, and it runs in two modes; "power" and "coast". Power mode is when the car is unwinding the rubber band from the axle. When the rubber band is completely unwound, it disconnects from the axle allowing the car to enter coast mode for additional distance.
The symmetrical design of the car requires eight 3D printed parts (two chassis sides, two axles, and four wheels) yet only three unique parts (chassis, axle and wheel), with all parts small enough to fit on most if not all 3D printers.
I've included a step by step video of the design and assembly process, the Autodesk Fusion 360 cad file "Rubber Band Car v1.f3d" containing the design (familiarity with the Autodesk Fusion 360 environment is highly recommended), and all .STL files required to print the car.
As usual, I probably forgot a file or two or who knows what else, so if you have any questions, please do not hesitate to ask as I do make plenty of mistakes.
Designed using Autodesk Fusion 360, sliced using Cura 3.5.0, and printed in PLA on an Ultimaker 2+ Extended and an Ultimaker 3 Extended.
3d model print parameters
Step 1: Purchase, Print and Prepare the Parts.I purchased eight "R20" sized O-Rings (25mm ID, 3.5mm Section) for use as the tires and a bag of ass...orted rubber bands to use as the "motor".
I printed all parts at .15mm layer height with 50% infill. I printed two "Axle.stl", two "Chassis.stl" and four "Wheel.stl".
Prior to assembly, I test fit and trimmed, filed, sanded, etc. all parts as necessary for smooth movement of moving surfaces, and tight fit for non moving surfaces. If you decide to make your own Simple 3D Printed Rubber Band Car, depending on the colors you chose, your printer model and your printer settings, more or less trimming, filing and/or sanding may be required. I carefully filed all edges that contacted the build plate to make absolutely certain that all build plate "ooze" was removed and that all edges were smooth. I used small jewelers files and plenty of patience to perform this step.
Step 2: Assembly and Test.
As shown in the video and screen captures, I performed the following steps to assemble and test the car:
1) Placed the eight O-Rings onto the four "Wheel.stl" components.
2) Pressed the two "Chassis.stl" together (if the fit is loose, use a small dot of thick cyanoacrylate glue).
3) Pressed one "Axle.stl" into one wheel assembly until in was flush with the wheel outer surface, then repeated the process with the second "Axle.stl" and wheel assembly.
4) Slid the two axle assemblies into the chassis assembly.
5) Pressed the remaining two wheels onto the two axle assemblies.
6) Checked to make sure the wheels rotated smoothly.
7) Attached a rubber band to the car as shown in the video.
8) Wound the car as shown in the video and let it go!
And that is how I designed, printed and assembled Simple 3D Printed Rubber Band Car.
Hope you enjoy it!
Step 3: Oh, and Did I Forget to Mention...
https://www.youtube.com/edit?o=U&video_id=EN3VZ3YZDXM
The car can use twin rubber bands for all wheel drive!
Mount the rubber bands on both the top and bottom of the car as shown in the photograph (you may wish to tie or glue the rubber bands to the chassis to hold them in place). Hook the free ends of the rubber bands onto the axle rubber band hooks as shown, then draw the car backward and release for all wheel drive!