Marblevator, magnetic tracks. 3D for print
4608 Views 2 Likes 0 Downloads Download the piece here from 3dforprint
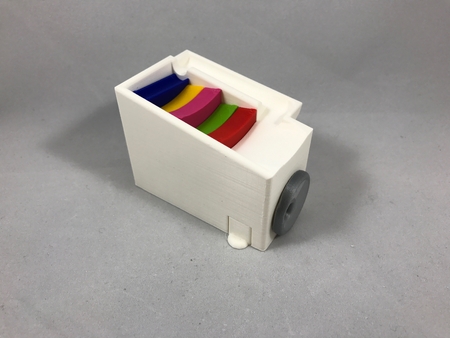
I must admit my original reason for purchasing ...a 3D printer was to create marble machines. My first marble machine, the Marblevator, was published over six years ago. Since then, I've designed, 3D printed and assembled a number of marble machines using Autodesk Fusion360 and determined it was about time to update the original Marblevator using Fusion360 to feature a wider staircase, base and tracks to allow the use of actual glass marbles (12mm), and neodymium magnets at each track section end for easier, snap together track assembly.
To allow for differing track lengths, I created (and included) the Autodesk Fusion360 File "Marblevator Tracks.f3d" which is a parametric track section generator. By simple alteration of two parameters, radius for curved track sections (right and left) and length for straight track sections, the track sections are immediately updated by Fusion360 and ready for 3D printing.
In this tutorial, I will detail how I assembled the Marblevator and a simple track. However by using the "Marblevator Tracks.f3d" model, the track design options are countless.
As usual, I probably forgot a file or two or who knows what else, so if you have any questions, please do not hesitate to ask as I do make plenty of mistakes.
Designed using Autodesk Fusion 360, sliced using Cura 4.2.0, and printed in Ultimaker Tough PLA on an Ultimaker 2+ Extended, an Ultimaker 3 Extended and an Ultimaker S5.
I purchased the following parts:
• One N20 6VDC 100RPM gear motor.
• One Hundred 6.4mm (1/4") diamet...er by 1.6mm (1/16") thick neodymium magnets (this model uses twelve).
• One Hundred 12mm (15/32") glass marbles (comes in a convenient jar).
I 3D printed the following parts at .15mm layer height, 20% infill and no supports:
• One "Base.stl".
• One "Cam.stl".
• One "Stairs.stl".
• One "Track, End.stl".
• Four "Track, Right, 78mm.stl".
• One "Track, Start.stl".
• One "Track, Straight, 58mm.stl".
• Four "Tressel, Arm, 36 Teeth.stl".
• Four "Tressel, Base.stl".
• Four "Tressel, Tower, 36 Teeth.stl".
Prior to assembly, I test fitted and trimmed, filed, sanded, etc. all parts as necessary for smooth movement of moving surfaces, and tight fit for non moving surfaces. Depending on you printer, your printer settings and the colors you chose, more or less trimming, filing and/or sanding may be required. Carefully file all edges that contacted the build plate to make absolutely certain that all build plate "ooze" is removed and that all edges are smooth. I used small jewelers files and plenty of patience to perform this step.
Assemble the Staircase.
To assemble the staircase, I performed the following steps:
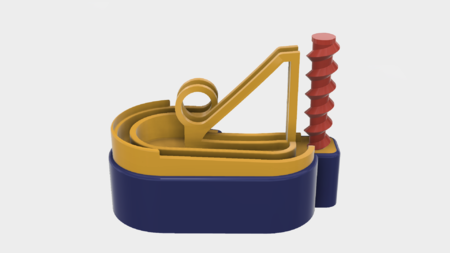
• Slid "Staircase.stl" up through the bottom of "Base.stl", pressing it upward until the staircase guides in the base are fully inserted in the the slot in the staircase, then making sure the staircase slid freely up and down in the base.
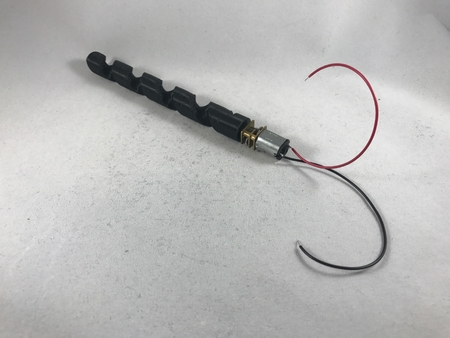
• Pressed the gear motor into the base assembly motor mount.
• Slid "Cam.stl" into the elliptical hole opposite the motor mount in the base assembly, then pressed it on the motor shaft making sure the cam was centered in the base assembly.
At this point, I applied 3VDC to the motor and made sure the cam rotated clockwise as viewed from the motor shaft end of the motor and that the mechanism operated smoothly (using an ammeter, I read the motor current at between 12MA and 20MA).
Prepare for Track Assembly.
The first preparation for track assembly was magnet installation, which I performed as follows:
• Pressed one neodymium magnet into magnet mount hole in "Track, Start.stl" using needle nose pliers.
• Placed "Track, End.stl" onto the track start assembly, positioned one neodymium magnet near the magnet mount hole in the track end piece and released it allowing the magnet to snap to the proper orientation, then pressed the magnet in place with needle nose pliers.
• Repeated this process with each track section using the track start and end assemblies to orient the magnets.
The second preparation for track assembly was tressel assembly, which I performed as follows:
• Pressed one "Tressel, Base.stl" into the open teeth end of one "Tressel, Tower, 36 Teeth.stl".
• Repeated this step for the remaining tressels.
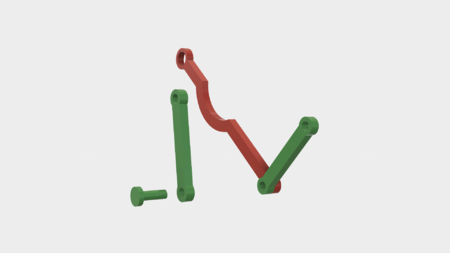
• Pressed the first "Tressel, Arm, 36 Teeth.stl" into the first tressel assembly tower leaving seven teeth outside of the tower.
• Pressed the second "Tressel, Arm, 36 Teeth.stl" into the second tressel assembly tower leaving six teeth outside of the tower.
• Pressed the third "Tressel, Arm, 36 Teeth.stl" into the third tressel assembly tower leaving five teeth outside of the tower.
• Pressed the final "Tressel, Arm, 36 Teeth.stl" into the final tressel assembly tower leaving four teeth outside of the tower.
The final preparation for track assembly was to install the track start and end assemblies onto the staircase assembly, which I performed as follows:
• Positioned the track start assembly at the top of the staircase assembly and pressed into place.
• Positioned the track end assembly at the step immediately below the the track start assembly and pressed into place.
Assemble the Track.
To assemble a track, I perform the following steps:
• Placed the base assembly on a flat, level surface.
• Attached the first track section to the track start on the base assembly, then support the free end with a tressel assembly.
• Repeated the previous step with each track section and tressel assembly.
• Connected the free end of the last track section to the track end on the base assembly.
• Connected the motor to a variable DC power supply.
• Added four marbles to the track end.
• Applied power and took a video!
With careful alignment this Marblevator has run for days without dropping a marble. For more reliable operation, consider using double sided tape to hold the base and tressel assemblies to a smooth, hard surface.
And that is how I printed and assembled Marblevator, Magnetic Tracks.
I hope you enjoy it!
Designer
Greg Zumwalt3d model description
An update to my original Marblevator design using 12mm glass marbles and magnetic track assembly.I must admit my original reason for purchasing ...a 3D printer was to create marble machines. My first marble machine, the Marblevator, was published over six years ago. Since then, I've designed, 3D printed and assembled a number of marble machines using Autodesk Fusion360 and determined it was about time to update the original Marblevator using Fusion360 to feature a wider staircase, base and tracks to allow the use of actual glass marbles (12mm), and neodymium magnets at each track section end for easier, snap together track assembly.
To allow for differing track lengths, I created (and included) the Autodesk Fusion360 File "Marblevator Tracks.f3d" which is a parametric track section generator. By simple alteration of two parameters, radius for curved track sections (right and left) and length for straight track sections, the track sections are immediately updated by Fusion360 and ready for 3D printing.
In this tutorial, I will detail how I assembled the Marblevator and a simple track. However by using the "Marblevator Tracks.f3d" model, the track design options are countless.
As usual, I probably forgot a file or two or who knows what else, so if you have any questions, please do not hesitate to ask as I do make plenty of mistakes.
Designed using Autodesk Fusion 360, sliced using Cura 4.2.0, and printed in Ultimaker Tough PLA on an Ultimaker 2+ Extended, an Ultimaker 3 Extended and an Ultimaker S5.
3d model print parameters
Purchase, Print and Prepare the Parts.I purchased the following parts:
• One N20 6VDC 100RPM gear motor.
• One Hundred 6.4mm (1/4") diamet...er by 1.6mm (1/16") thick neodymium magnets (this model uses twelve).
• One Hundred 12mm (15/32") glass marbles (comes in a convenient jar).
I 3D printed the following parts at .15mm layer height, 20% infill and no supports:
• One "Base.stl".
• One "Cam.stl".
• One "Stairs.stl".
• One "Track, End.stl".
• Four "Track, Right, 78mm.stl".
• One "Track, Start.stl".
• One "Track, Straight, 58mm.stl".
• Four "Tressel, Arm, 36 Teeth.stl".
• Four "Tressel, Base.stl".
• Four "Tressel, Tower, 36 Teeth.stl".
Prior to assembly, I test fitted and trimmed, filed, sanded, etc. all parts as necessary for smooth movement of moving surfaces, and tight fit for non moving surfaces. Depending on you printer, your printer settings and the colors you chose, more or less trimming, filing and/or sanding may be required. Carefully file all edges that contacted the build plate to make absolutely certain that all build plate "ooze" is removed and that all edges are smooth. I used small jewelers files and plenty of patience to perform this step.
Assemble the Staircase.
To assemble the staircase, I performed the following steps:
• Slid "Staircase.stl" up through the bottom of "Base.stl", pressing it upward until the staircase guides in the base are fully inserted in the the slot in the staircase, then making sure the staircase slid freely up and down in the base.
• Pressed the gear motor into the base assembly motor mount.
• Slid "Cam.stl" into the elliptical hole opposite the motor mount in the base assembly, then pressed it on the motor shaft making sure the cam was centered in the base assembly.
At this point, I applied 3VDC to the motor and made sure the cam rotated clockwise as viewed from the motor shaft end of the motor and that the mechanism operated smoothly (using an ammeter, I read the motor current at between 12MA and 20MA).
Prepare for Track Assembly.
The first preparation for track assembly was magnet installation, which I performed as follows:
• Pressed one neodymium magnet into magnet mount hole in "Track, Start.stl" using needle nose pliers.
• Placed "Track, End.stl" onto the track start assembly, positioned one neodymium magnet near the magnet mount hole in the track end piece and released it allowing the magnet to snap to the proper orientation, then pressed the magnet in place with needle nose pliers.
• Repeated this process with each track section using the track start and end assemblies to orient the magnets.
The second preparation for track assembly was tressel assembly, which I performed as follows:
• Pressed one "Tressel, Base.stl" into the open teeth end of one "Tressel, Tower, 36 Teeth.stl".
• Repeated this step for the remaining tressels.
• Pressed the first "Tressel, Arm, 36 Teeth.stl" into the first tressel assembly tower leaving seven teeth outside of the tower.
• Pressed the second "Tressel, Arm, 36 Teeth.stl" into the second tressel assembly tower leaving six teeth outside of the tower.
• Pressed the third "Tressel, Arm, 36 Teeth.stl" into the third tressel assembly tower leaving five teeth outside of the tower.
• Pressed the final "Tressel, Arm, 36 Teeth.stl" into the final tressel assembly tower leaving four teeth outside of the tower.
The final preparation for track assembly was to install the track start and end assemblies onto the staircase assembly, which I performed as follows:
• Positioned the track start assembly at the top of the staircase assembly and pressed into place.
• Positioned the track end assembly at the step immediately below the the track start assembly and pressed into place.
Assemble the Track.
To assemble a track, I perform the following steps:
• Placed the base assembly on a flat, level surface.
• Attached the first track section to the track start on the base assembly, then support the free end with a tressel assembly.
• Repeated the previous step with each track section and tressel assembly.
• Connected the free end of the last track section to the track end on the base assembly.
• Connected the motor to a variable DC power supply.
• Added four marbles to the track end.
• Applied power and took a video!
With careful alignment this Marblevator has run for days without dropping a marble. For more reliable operation, consider using double sided tape to hold the base and tressel assemblies to a smooth, hard surface.
And that is how I printed and assembled Marblevator, Magnetic Tracks.
I hope you enjoy it!
