Tunable tolerance tetrahedron twist timewasting toy 3D for print
8910 Views 2 Likes 0 Downloads Download the piece here from 3dforprint
http://www.thingiverse.com/thing:186372
. The problem with that thing... was that it was just an STL file, with no means for adjusting the "fit" tolerance or scaling. So, one of the students in my lab, Zachary Snyder, spent valuable should-have-been-studying-for-final-exams time on deriving his own formula for it in OpenSCAD... and then I spent too much time trying to print it with various parameters and tweaking the design. Oh yeah, it also can take a shockingly long time to solve the puzzle... especially shocking given that it's just two pieces!
The 20160630 version has a few minor, but significant improvements. The original version uses a turn of 1.0, which makes the parts not fit with those from the new design unless tenth_turns is set to 10 rather than the new default value of 12.
MakerGear
Printer:
M2
Rafts:
No
Supports:
Doesn't Matter
Resolution:
not critical
Infill:
some
Notes:
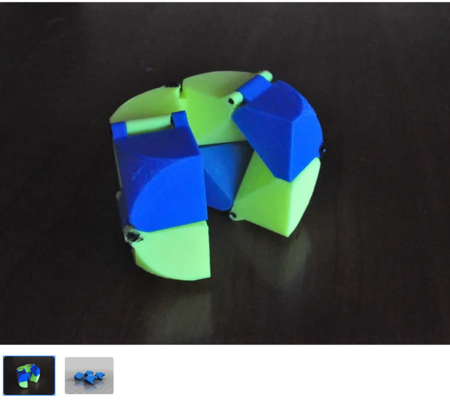
Can prin...t assembled (intertwined) without supports or as separate parts with/without supports; good to use a brim if printing parts separately. Tests ranging in size from 20 to 75mm on a side were printed on two MakerGear M2 (at up to 150mm/s) and a Wanhao I3 (at up to 60mm/s) using PLA with extrusion heights of 0.1mm to 0.25mm. The parts vary dramatically in thickness, so be warned that thin sections are much more fragile than the thicker sections, and extra shells or infill may be needed to improve durability when idiots try to solve the puzzle by forcing pieces together.... The 20160630 version defaults to having slightly thicker thin sections, which help strength. Higher dimensional accuracy prints have been made printing the two parts separately using Slic3r-produced 10% 3D hexagonal fill and supports with 2 layers of shell. You can print two copies of tttttt20160630noUK1.stl to have no UK logo or one copy each of tttttt20160630u.stl and tttttt20160630k.stl for the version with the UK logo.
Important Stuff
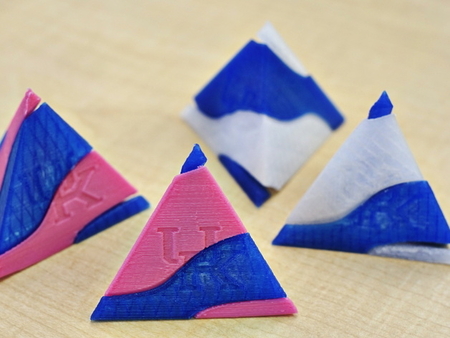
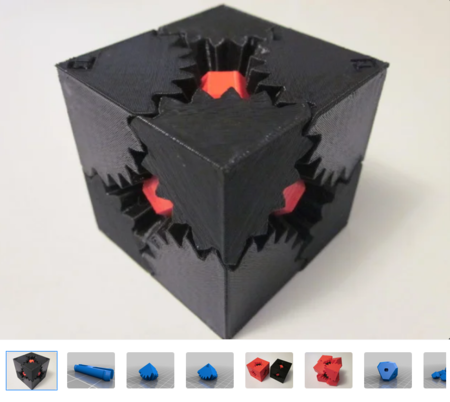
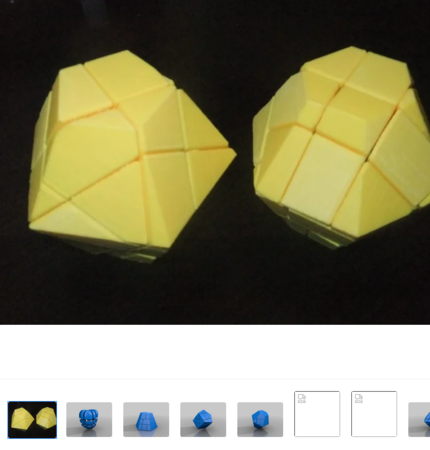
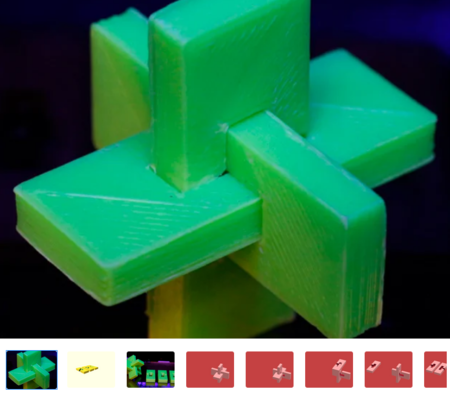
### Printing Intertwined Believe it or not, this thing can actually print assembled without supports! The 75mm/side pink and blue ones were printed on two different MakerGear M2, blue with 1mm gap and pink with 0.75mm gap, then taken apart and reassembled intermixed. Although both were successful as print assembled without supports, both did require some careful prying with a knife edge to break the minor welds caused by sag during printing. Using very thin walls, 2mm or less, actually helps when printing intertwined. ### Printing Separately Alternatively, you can get a nicer print by using a slicer to separate the two pieces and then print them with support to the bed and a brim to keep them stable. The second STL file was created using Cura for precisely that transformation (Cura's "Lay Flat" command is also helpful if you want to rotate one of the tetrahedrons, as I did), and pieces printed from that file on a MakerGear M2 (at 0.25mm) and Wanhao I3 (at 0.1mm) fit together effortlessly -- that's how the blue (M2, 0.25mm) and natural (I3, 0.1mm) examples in the photo were made. Printing the 20160630 one-part-at-a-time STLs produces remarkably clean and accurate prints. In fact, the only cleaning needed is snapping-off the support. I didn't even use a file! ### Customizer Parameters Are In Microns The Customizer still doesn't understand decimal input, so all the parameters to this design are given in integer microns -- 1/1000 mm units. For example, a good value for the gap is between about 0.25mm and 1mm, which would be obtained by setting Micron Gap between 250 and 1000 in the Customizer. ### Solving The Puzzle If you print this as separate parts, you will undoubtedly be tempted at some point to just force the pieces together. __DO NOT FORCE THEM__. With a 1mm gap, the pieces are actually a __DISTURBINGLY LOOSE FIT__ -- if you are putting them together the right way. Thing 186372 didn't leave a gap, so they talk about needing to sand the parts, but __no sanding is required if you leave a gap__ (although you'll still _want_ to file-off any remaining brim, support material, or hanging threads/stray blobs). What is the right way to put the two pieces together? Well, the version with the UK logo makes it a little easier to visualize, but the truth is that the simple spiral slicing doesn't line-up with the tetrahedron in one of the planes you expect it to. Once you find the right plane, it is a trivial matter of literally _screwing the two parts together_.
Designer
profhankd3d model description
This tunable tolerance tetrahedron twist timewasting toy thing was inspired byhttp://www.thingiverse.com/thing:186372
. The problem with that thing... was that it was just an STL file, with no means for adjusting the "fit" tolerance or scaling. So, one of the students in my lab, Zachary Snyder, spent valuable should-have-been-studying-for-final-exams time on deriving his own formula for it in OpenSCAD... and then I spent too much time trying to print it with various parameters and tweaking the design. Oh yeah, it also can take a shockingly long time to solve the puzzle... especially shocking given that it's just two pieces!
The 20160630 version has a few minor, but significant improvements. The original version uses a turn of 1.0, which makes the parts not fit with those from the new design unless tenth_turns is set to 10 rather than the new default value of 12.
3d model print parameters
Printer brand:MakerGear
Printer:
M2
Rafts:
No
Supports:
Doesn't Matter
Resolution:
not critical
Infill:
some
Notes:
Can prin...t assembled (intertwined) without supports or as separate parts with/without supports; good to use a brim if printing parts separately. Tests ranging in size from 20 to 75mm on a side were printed on two MakerGear M2 (at up to 150mm/s) and a Wanhao I3 (at up to 60mm/s) using PLA with extrusion heights of 0.1mm to 0.25mm. The parts vary dramatically in thickness, so be warned that thin sections are much more fragile than the thicker sections, and extra shells or infill may be needed to improve durability when idiots try to solve the puzzle by forcing pieces together.... The 20160630 version defaults to having slightly thicker thin sections, which help strength. Higher dimensional accuracy prints have been made printing the two parts separately using Slic3r-produced 10% 3D hexagonal fill and supports with 2 layers of shell. You can print two copies of tttttt20160630noUK1.stl to have no UK logo or one copy each of tttttt20160630u.stl and tttttt20160630k.stl for the version with the UK logo.
Important Stuff
### Printing Intertwined Believe it or not, this thing can actually print assembled without supports! The 75mm/side pink and blue ones were printed on two different MakerGear M2, blue with 1mm gap and pink with 0.75mm gap, then taken apart and reassembled intermixed. Although both were successful as print assembled without supports, both did require some careful prying with a knife edge to break the minor welds caused by sag during printing. Using very thin walls, 2mm or less, actually helps when printing intertwined. ### Printing Separately Alternatively, you can get a nicer print by using a slicer to separate the two pieces and then print them with support to the bed and a brim to keep them stable. The second STL file was created using Cura for precisely that transformation (Cura's "Lay Flat" command is also helpful if you want to rotate one of the tetrahedrons, as I did), and pieces printed from that file on a MakerGear M2 (at 0.25mm) and Wanhao I3 (at 0.1mm) fit together effortlessly -- that's how the blue (M2, 0.25mm) and natural (I3, 0.1mm) examples in the photo were made. Printing the 20160630 one-part-at-a-time STLs produces remarkably clean and accurate prints. In fact, the only cleaning needed is snapping-off the support. I didn't even use a file! ### Customizer Parameters Are In Microns The Customizer still doesn't understand decimal input, so all the parameters to this design are given in integer microns -- 1/1000 mm units. For example, a good value for the gap is between about 0.25mm and 1mm, which would be obtained by setting Micron Gap between 250 and 1000 in the Customizer. ### Solving The Puzzle If you print this as separate parts, you will undoubtedly be tempted at some point to just force the pieces together. __DO NOT FORCE THEM__. With a 1mm gap, the pieces are actually a __DISTURBINGLY LOOSE FIT__ -- if you are putting them together the right way. Thing 186372 didn't leave a gap, so they talk about needing to sand the parts, but __no sanding is required if you leave a gap__ (although you'll still _want_ to file-off any remaining brim, support material, or hanging threads/stray blobs). What is the right way to put the two pieces together? Well, the version with the UK logo makes it a little easier to visualize, but the truth is that the simple spiral slicing doesn't line-up with the tetrahedron in one of the planes you expect it to. Once you find the right plane, it is a trivial matter of literally _screwing the two parts together_.
