Cycloidal disk electro mechanical timer. 3D for print
2656 Views 4 Likes 0 Downloads Download the piece here from 3dforprint
https://youtu.be/D3N7bA7T2Gw
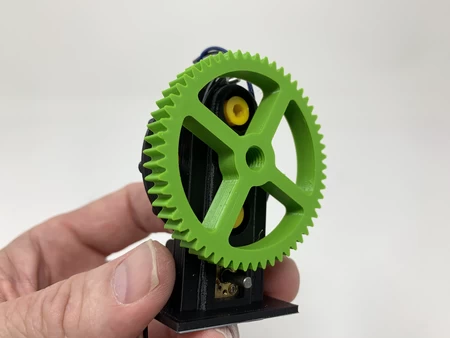
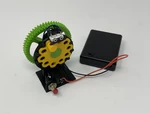
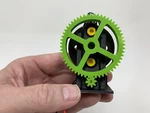
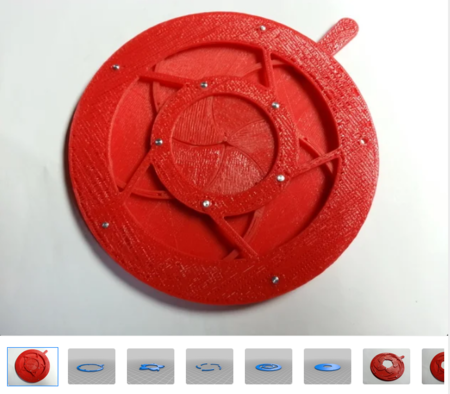
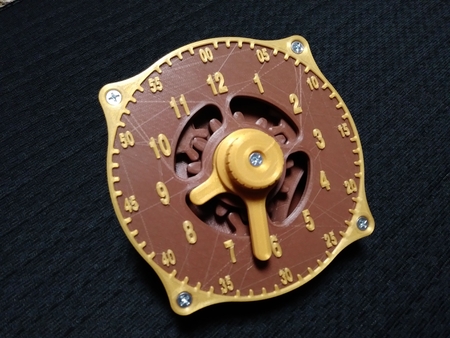
Cycloidal Disk Electro Mechanical Timer is a mechanism I designed... to control the start and stop of some of my automaton designs. When the user presses the start button, the automaton will start, cycle through the presentation, then stop automatically using this mechanism.
I wrote a Python script for the Autodesk Fusion 360 "Add-Ins" menu in order to generate a hypocycloidal "sketch" curve based on pin count and pin diameter. From this curve I can easily create a cycloidal disk and plate. Thus the Python script allows me to easily adjust the input to output ratio and size of the cycloidal mechanism in order to synchronize the running time of an automaton with its presentation, all within a much smaller space than before. For this mechanism, I designed the cycloidal disk and plate for a ten to one input to output ratio, meaning the large gear will turn ten times before the cycloidal disk turns one time, then the mechanism stops. Note there is aliasing in the video such that the gears do not appear to be rotating as designed.
As usual I probably forgot a file or two or who knows what else, so if you have any questions, please do not hesitate to ask as I do make plenty of mistakes.
Designed using Autodesk Fusion 360, sliced using Cura 4.7.0, and 3D printed in PLA on an Ultimaker 3 Extended and Ultimaker S5s.
I acquired the following parts:
• One micro lever switch (search for "CYT1073").
• One normal open mini momentary push button switch....
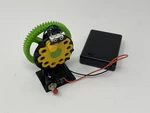
• One 4 AA battery holder with switch.
• Four AA batteries.
• One N20 6VDC 75RPM gear motor.
• Two M2.5 by 16mm cap screws.
• Two M2.5 nuts.
I 3D printed the following parts at .15mm layer height with 20% infill:
• One "Base.stl".
• Two "Bolt.stl".
• One "Disk.stl".
• One "Gear (1m 56t) and Axle.stl".
• One "Gear, Motor.stl".
• One "Pin, Disk.stl".
• One "Plate.stl".
• One "Retainer.stl".
Prior to assembly, I test fit and trimmed, filed, drilled, sanded, etc. all parts as necessary for smooth movement of moving surfaces, and tight fit for non moving surfaces. Depending on you printer, your printer settings and the colors you chose, more or less trimming, filing, drilling and/or sanding may be required. Carefully file all edges that contacted the build plate to make absolutely certain that all build plate "ooze" is removed and that all edges are smooth. I used small jewelers files and plenty of patience to perform this step.
The mechanism also uses threaded assembly, so I used a tap and die set (6mm by 1) for thread cleaning.
Assembly.
To assemble the mechanism, I performed the following steps:
• Bent the momentary micro switch terminals as shown, then soldered two 100mm lengths of blue wire to the switch terminals.
• Inserted the wires up through the right wiring trough in "Base.stl", then secured the switch to the base using the included nut.
• Attached the micro lever switch to "Plate.stl" using the two 2.5mm cap screws and nuts.
• Attached the plate assembly to the base assembly using two "Bolt.stl".
• Soldered the battery back red wire to the motor "+" terminal.
• Soldered a 100mm length of black wire to the motor "-" terminal.
• Pressed the motor into the base assembly, then routed the motor black wire up the left wiring trough in the base assembly.
• Routed the battery pack black wire up the left wiring trough, then soldered the battery pack black wire and one of the blue momentary micro switch wires to the micro lever switch normally open (NO) terminal.
• Soldered the motor black wire and the remaining blue momentary micro switch wires to the micro lever switch common (C) terminal.
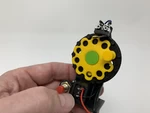
• Pressed "Pin, Disk.stl" into one of the holes in "Disk.stl" and secured in place with a small dot of cyanoacrylate glue.
• Placed "Retainer.stl" in the hole in the disk assembly and positioned the assembly into the tower center hole in the base assembly.
• Secured the disk assembly to the base assembly using "Gear (1m 56t) and Axle.stl" making sure the gear and disk rotated with ease.
• Pressed "Gear, Motor.stl" onto the gear motor shaft.
To operate, I turned on the battery switch and, if not already moving, pressed the momentary switch. Once rotating, with the disk pin comes in contact with the lever on the micro lever switch, the mechanism should stop, if not, adjust the micro lever switch until it does.
And that is how I assembled Cycloidal Disk Electro Mechanical Timer.
I hope you enjoyed it!
Designer
Greg Zumwalt3d model description
An electro mechanical timer for my automaton designs.https://youtu.be/D3N7bA7T2Gw
Cycloidal Disk Electro Mechanical Timer is a mechanism I designed... to control the start and stop of some of my automaton designs. When the user presses the start button, the automaton will start, cycle through the presentation, then stop automatically using this mechanism.
I wrote a Python script for the Autodesk Fusion 360 "Add-Ins" menu in order to generate a hypocycloidal "sketch" curve based on pin count and pin diameter. From this curve I can easily create a cycloidal disk and plate. Thus the Python script allows me to easily adjust the input to output ratio and size of the cycloidal mechanism in order to synchronize the running time of an automaton with its presentation, all within a much smaller space than before. For this mechanism, I designed the cycloidal disk and plate for a ten to one input to output ratio, meaning the large gear will turn ten times before the cycloidal disk turns one time, then the mechanism stops. Note there is aliasing in the video such that the gears do not appear to be rotating as designed.
As usual I probably forgot a file or two or who knows what else, so if you have any questions, please do not hesitate to ask as I do make plenty of mistakes.
Designed using Autodesk Fusion 360, sliced using Cura 4.7.0, and 3D printed in PLA on an Ultimaker 3 Extended and Ultimaker S5s.
3d model print parameters
Parts.I acquired the following parts:
• One micro lever switch (search for "CYT1073").
• One normal open mini momentary push button switch....
• One 4 AA battery holder with switch.
• Four AA batteries.
• One N20 6VDC 75RPM gear motor.
• Two M2.5 by 16mm cap screws.
• Two M2.5 nuts.
I 3D printed the following parts at .15mm layer height with 20% infill:
• One "Base.stl".
• Two "Bolt.stl".
• One "Disk.stl".
• One "Gear (1m 56t) and Axle.stl".
• One "Gear, Motor.stl".
• One "Pin, Disk.stl".
• One "Plate.stl".
• One "Retainer.stl".
Prior to assembly, I test fit and trimmed, filed, drilled, sanded, etc. all parts as necessary for smooth movement of moving surfaces, and tight fit for non moving surfaces. Depending on you printer, your printer settings and the colors you chose, more or less trimming, filing, drilling and/or sanding may be required. Carefully file all edges that contacted the build plate to make absolutely certain that all build plate "ooze" is removed and that all edges are smooth. I used small jewelers files and plenty of patience to perform this step.
The mechanism also uses threaded assembly, so I used a tap and die set (6mm by 1) for thread cleaning.
Assembly.
To assemble the mechanism, I performed the following steps:
• Bent the momentary micro switch terminals as shown, then soldered two 100mm lengths of blue wire to the switch terminals.
• Inserted the wires up through the right wiring trough in "Base.stl", then secured the switch to the base using the included nut.
• Attached the micro lever switch to "Plate.stl" using the two 2.5mm cap screws and nuts.
• Attached the plate assembly to the base assembly using two "Bolt.stl".
• Soldered the battery back red wire to the motor "+" terminal.
• Soldered a 100mm length of black wire to the motor "-" terminal.
• Pressed the motor into the base assembly, then routed the motor black wire up the left wiring trough in the base assembly.
• Routed the battery pack black wire up the left wiring trough, then soldered the battery pack black wire and one of the blue momentary micro switch wires to the micro lever switch normally open (NO) terminal.
• Soldered the motor black wire and the remaining blue momentary micro switch wires to the micro lever switch common (C) terminal.
• Pressed "Pin, Disk.stl" into one of the holes in "Disk.stl" and secured in place with a small dot of cyanoacrylate glue.
• Placed "Retainer.stl" in the hole in the disk assembly and positioned the assembly into the tower center hole in the base assembly.
• Secured the disk assembly to the base assembly using "Gear (1m 56t) and Axle.stl" making sure the gear and disk rotated with ease.
• Pressed "Gear, Motor.stl" onto the gear motor shaft.
To operate, I turned on the battery switch and, if not already moving, pressed the momentary switch. Once rotating, with the disk pin comes in contact with the lever on the micro lever switch, the mechanism should stop, if not, adjust the micro lever switch until it does.
And that is how I assembled Cycloidal Disk Electro Mechanical Timer.
I hope you enjoyed it!
