Umo+ heated chamber 3D for print

6719 Views 1 Likes 0 Downloads Download the piece here from 3dforprint
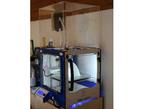
A heated chamber reduces tension caused by temperature differences within the part during printing. This greatly reduces warping and cracks in large parts. For printing in PLA, a heated chamber is not needed. For ABS it is very helpful. Combined with the ABS-acetone-slurry preparation of the heated bed this pretty much eliminates failed prints caused by warping and sticking to bed issues.
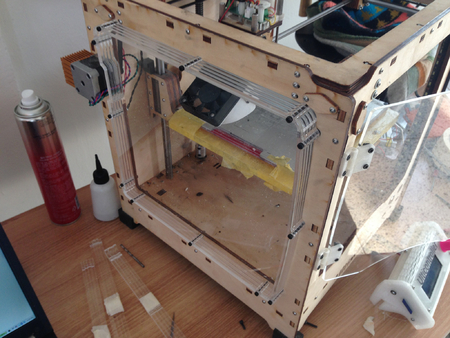
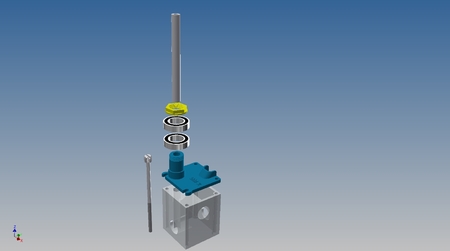
Only the hinges of the door and the cooling fan shroud need to be screwed on the Ultimaker. The other parts are mountable without any tools. Also they are easy to remove. The increased temperature makes it necessary to add some additional changes.
Parts of this Ultimaker Original+ Heated Chamber Mod:
- Acrylic top cover
made of 2mm Acrylic sheet:
2 Pcs Front and Back: 316mm x 300mm
2 Pcs Sides: 330mm x 300mm
1 Pcs Top: 320mm x 330mm
I used CA glue but you might use some special glue that works better.
The “guide” and “lid” parts are pushed into the slot of the back acrylic sheet. Do not glue the lid on the top cover. It is removable, so you can easily mount the cover on the Ultimaker, then seal the gap with the lid.
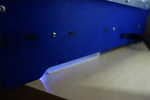
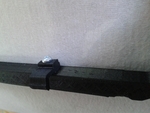
As a gasket I took a brush and cut it in two halves (see picture). This reduces the amount of hot air escaping the chamber.
- Snap-in side covers
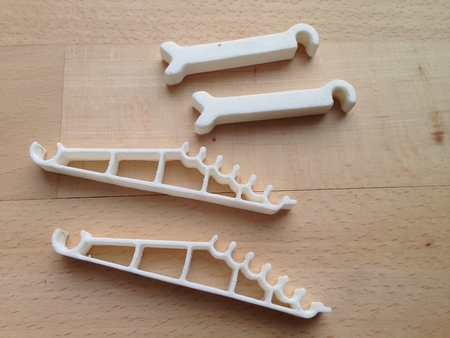
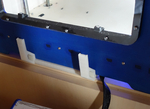
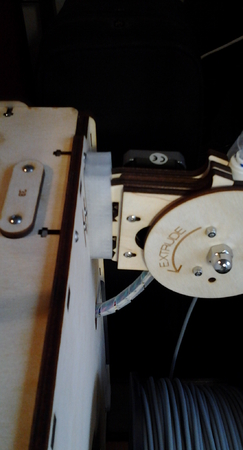
Print the “Frame” parts in ABS. PLA will not last at 50°C. Print the ABS parts 1% larger to compensate shrinking. If you forgot to do so (like me), use 4x the “latch_long” parts on the bottom and 4x the “latch”. Else just 8 times the “latch”. Puzzle the Frame parts into two complete frames. Note, the left frame has a cutout for the stepper motor.
print the pdf with the shape of the acrylic glass on a A3 sized printer scaled 1:1. Glue the print on the acrylic sheet with glue stick, then cut and drill. For mounting the acrylic on the frame, I used self-cutting screws (wood screws) with a diameter of 3mm and a length of 10mm (actually they were longer and I cut the tip of)
- Removable acrylic front door with hinges.
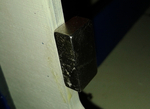
The door is removable and locks with magnets. I used some strong magnets which are a little overkill but that’s what I had around. Glue the magnets on the Ultimaker so the screws of the door handle are attracted to them. Use two 4mm diameter rods that you glue into “hinge2”. I like how the handle turned out.
- UltiControl Bracket
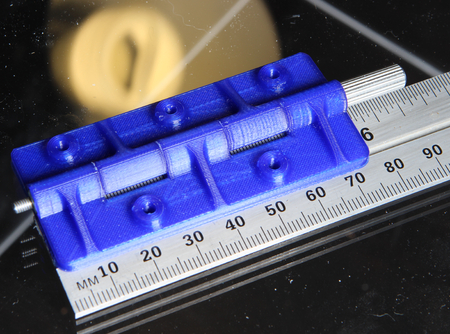
I have placed the Ultimaker on a shelf facing with its front to the right. This way I have better access to the feeder and the filament. With the front door in place, I cannot mount the Ulticontroller on its usual place. So I made this bracket with which you can mount it on the side of the Ultimaker. Print the bracket twice and once the distance holder. Use countersunk wooden screws to mount the three - pieces together.
-Edit: made a shorter version of the bracket so the door can be opened when the Ulticontrol is mounted on the front side.
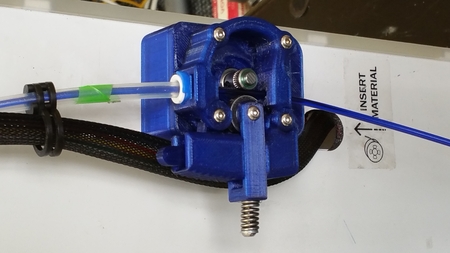
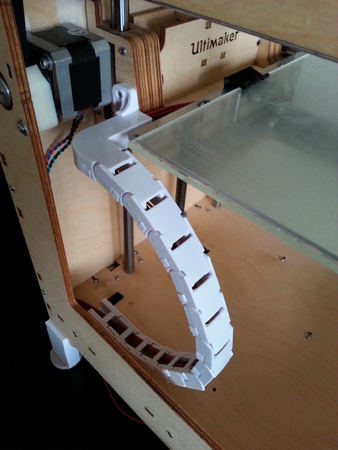
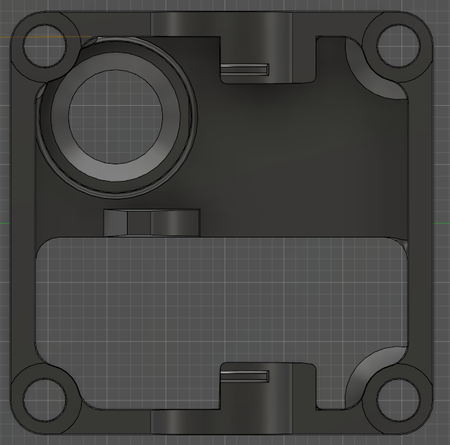
- Mounting the X and Y Motors outside of the chamber
The increased temperature makes it necessary to move the X and Y motor to the outside of the chamber. This can be done very easily. Make sure to reverse the turning direction of the X and Y motor, else you will get a crash when auto home. You just need to switch two wires in the connector of the motors:
https://ultimaker.com/en/modifications-and-hacks/view/2499-heated-build-chamber-flip-stepper-motor-direction?page=1#reply-11883
I had to add a 3mm distance holder between the Y-Motor and the side wall for getting the correct alignment with the belt. (no drawing included). Also I had to increase the size of the hole for the Y motor so I could tighten the belt enough.
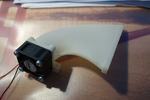
- Cooling fan for mainboard (recommended)
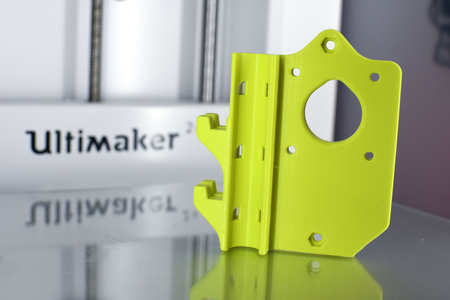
Though the electronics is not inside of the chamber, it is mounted at the bottom of the Ultimaker, where it has little cooling airflow. In the original setup, the board gets already quite hot and heats the bottom plate. When we raise the temperature of the bottom plate with our heated chamber, the cooling gets even worse. Time to add some airflow! I used a 40mm, 24VDC Fan and attached it directly to the 24V Pin on the board. If you have M4 thread-cutter, cut the thread after printing and use M4 screws to mount the fan on the shroud. The fan is quite loud, put some rubber between the fan shroud and the bottom plate to improve this. The bottom plate is acting like a resonance body. (Same issue with the Stepper Motors btw)
- 2 Pcs (Top Front and Back): 316mm x 300mm
- 2 Pcs Top Sides: 330mm x 300mm
- 1 Pcs Top: 320mm x 330m...m
- 2 Pcs Side: 295mm x 275mm
- 1 Pcs Front Door: 270mm x 285mm
- Household Brush for sealing the Gap in the top cover
- Glue for Acryllic glas
- ABS Filament
- Screws:
- 40 Pcs wood screws diameter 3mm x 10mm
- 12 Pcs wood screws with countersunk head 3mm x 10
- 2 Pcs. wood screws with countersunk head 3.5mm x 45
- 4 Pcs M4 x 25 if M4 thread-cutter available, else use wood screws
- 2 Pcs. bar for hinges: 4mm diameter, 30mm long
- 40mm, 24VDC Fan, compatible to SUNON MB40202V1-000U-A99
- some cables and 2.54mm pitch female connector.
Designer
wololooo3d model description
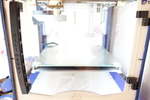
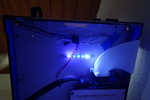
Heated Chamber Mod with all follow-up changes included. This setup reaches 50°C air temperature, measured at 12cm distance to the heated bed, at leve...l height of the print head above the back corner of the heated bed (set to 100°C). No additional heating is required.A heated chamber reduces tension caused by temperature differences within the part during printing. This greatly reduces warping and cracks in large parts. For printing in PLA, a heated chamber is not needed. For ABS it is very helpful. Combined with the ABS-acetone-slurry preparation of the heated bed this pretty much eliminates failed prints caused by warping and sticking to bed issues.
Only the hinges of the door and the cooling fan shroud need to be screwed on the Ultimaker. The other parts are mountable without any tools. Also they are easy to remove. The increased temperature makes it necessary to add some additional changes.
Parts of this Ultimaker Original+ Heated Chamber Mod:
- Acrylic top cover
made of 2mm Acrylic sheet:
2 Pcs Front and Back: 316mm x 300mm
2 Pcs Sides: 330mm x 300mm
1 Pcs Top: 320mm x 330mm
I used CA glue but you might use some special glue that works better.
The “guide” and “lid” parts are pushed into the slot of the back acrylic sheet. Do not glue the lid on the top cover. It is removable, so you can easily mount the cover on the Ultimaker, then seal the gap with the lid.
As a gasket I took a brush and cut it in two halves (see picture). This reduces the amount of hot air escaping the chamber.
- Snap-in side covers
Print the “Frame” parts in ABS. PLA will not last at 50°C. Print the ABS parts 1% larger to compensate shrinking. If you forgot to do so (like me), use 4x the “latch_long” parts on the bottom and 4x the “latch”. Else just 8 times the “latch”. Puzzle the Frame parts into two complete frames. Note, the left frame has a cutout for the stepper motor.
print the pdf with the shape of the acrylic glass on a A3 sized printer scaled 1:1. Glue the print on the acrylic sheet with glue stick, then cut and drill. For mounting the acrylic on the frame, I used self-cutting screws (wood screws) with a diameter of 3mm and a length of 10mm (actually they were longer and I cut the tip of)
- Removable acrylic front door with hinges.
The door is removable and locks with magnets. I used some strong magnets which are a little overkill but that’s what I had around. Glue the magnets on the Ultimaker so the screws of the door handle are attracted to them. Use two 4mm diameter rods that you glue into “hinge2”. I like how the handle turned out.
- UltiControl Bracket
I have placed the Ultimaker on a shelf facing with its front to the right. This way I have better access to the feeder and the filament. With the front door in place, I cannot mount the Ulticontroller on its usual place. So I made this bracket with which you can mount it on the side of the Ultimaker. Print the bracket twice and once the distance holder. Use countersunk wooden screws to mount the three - pieces together.
-Edit: made a shorter version of the bracket so the door can be opened when the Ulticontrol is mounted on the front side.
- Mounting the X and Y Motors outside of the chamber
The increased temperature makes it necessary to move the X and Y motor to the outside of the chamber. This can be done very easily. Make sure to reverse the turning direction of the X and Y motor, else you will get a crash when auto home. You just need to switch two wires in the connector of the motors:
https://ultimaker.com/en/modifications-and-hacks/view/2499-heated-build-chamber-flip-stepper-motor-direction?page=1#reply-11883
I had to add a 3mm distance holder between the Y-Motor and the side wall for getting the correct alignment with the belt. (no drawing included). Also I had to increase the size of the hole for the Y motor so I could tighten the belt enough.
- Cooling fan for mainboard (recommended)
Though the electronics is not inside of the chamber, it is mounted at the bottom of the Ultimaker, where it has little cooling airflow. In the original setup, the board gets already quite hot and heats the bottom plate. When we raise the temperature of the bottom plate with our heated chamber, the cooling gets even worse. Time to add some airflow! I used a 40mm, 24VDC Fan and attached it directly to the 24V Pin on the board. If you have M4 thread-cutter, cut the thread after printing and use M4 screws to mount the fan on the shroud. The fan is quite loud, put some rubber between the fan shroud and the bottom plate to improve this. The bottom plate is acting like a resonance body. (Same issue with the Stepper Motors btw)
3d model print parameters
- Acryllic glas (PMMA, Plexiglas) 2mm thick:- 2 Pcs (Top Front and Back): 316mm x 300mm
- 2 Pcs Top Sides: 330mm x 300mm
- 1 Pcs Top: 320mm x 330m...m
- 2 Pcs Side: 295mm x 275mm
- 1 Pcs Front Door: 270mm x 285mm
- Household Brush for sealing the Gap in the top cover
- Glue for Acryllic glas
- ABS Filament
- Screws:
- 40 Pcs wood screws diameter 3mm x 10mm
- 12 Pcs wood screws with countersunk head 3mm x 10
- 2 Pcs. wood screws with countersunk head 3.5mm x 45
- 4 Pcs M4 x 25 if M4 thread-cutter available, else use wood screws
- 2 Pcs. bar for hinges: 4mm diameter, 30mm long
- 40mm, 24VDC Fan, compatible to SUNON MB40202V1-000U-A99
- some cables and 2.54mm pitch female connector.
![[Old Version] Lars' Ultralight Ultimaker XY Blocks](https://www.3dforprint.com/modelos/4649/old-version-lars-ultralight-ultimaker-xy-blocks1_medium.jpg)